Armatures
Parts of an armature
Base – Attach your armature to a base if the sculpting medium is too soft to hold in your hands
Skeleton – The underlying structure that supports your sculpture and establishes your proportions of your final form
Filler – Fillers can be used to quickly fill out large volumes of the sculpture and minimize the amount of clay used
Articulation – For articulated sculptures, articulation can be integrated into the armature or added to the sculpt in progress
Armature Bases
Anchored – Armatures can be anchored to a base by threading the armature wire through the base. Detaching requires unthreading the wire from the base. Alternatively, the armature wire be anchored by inserted in a soft base, like cork.
When to use one: Anchored bases are useful most kinds of sculpts. Depending on the size of the sculpt, you may want a base that you can hold in your hand so you don’t disturb the clay by mistake. Larger sculpts may be anchored from the side, attached to a fixed post that extends from the base.

Clamps – Clamp bases typically clamp armature wire that extends below the sculpt. The top of the clamp serves as the base for the sculpt.
When to use one: Mini-Small sculpts – Clamp bases can be used for armatures that have descending wires that are inline with each other (eg. two leg wires) The clamp block is also easy to hold.
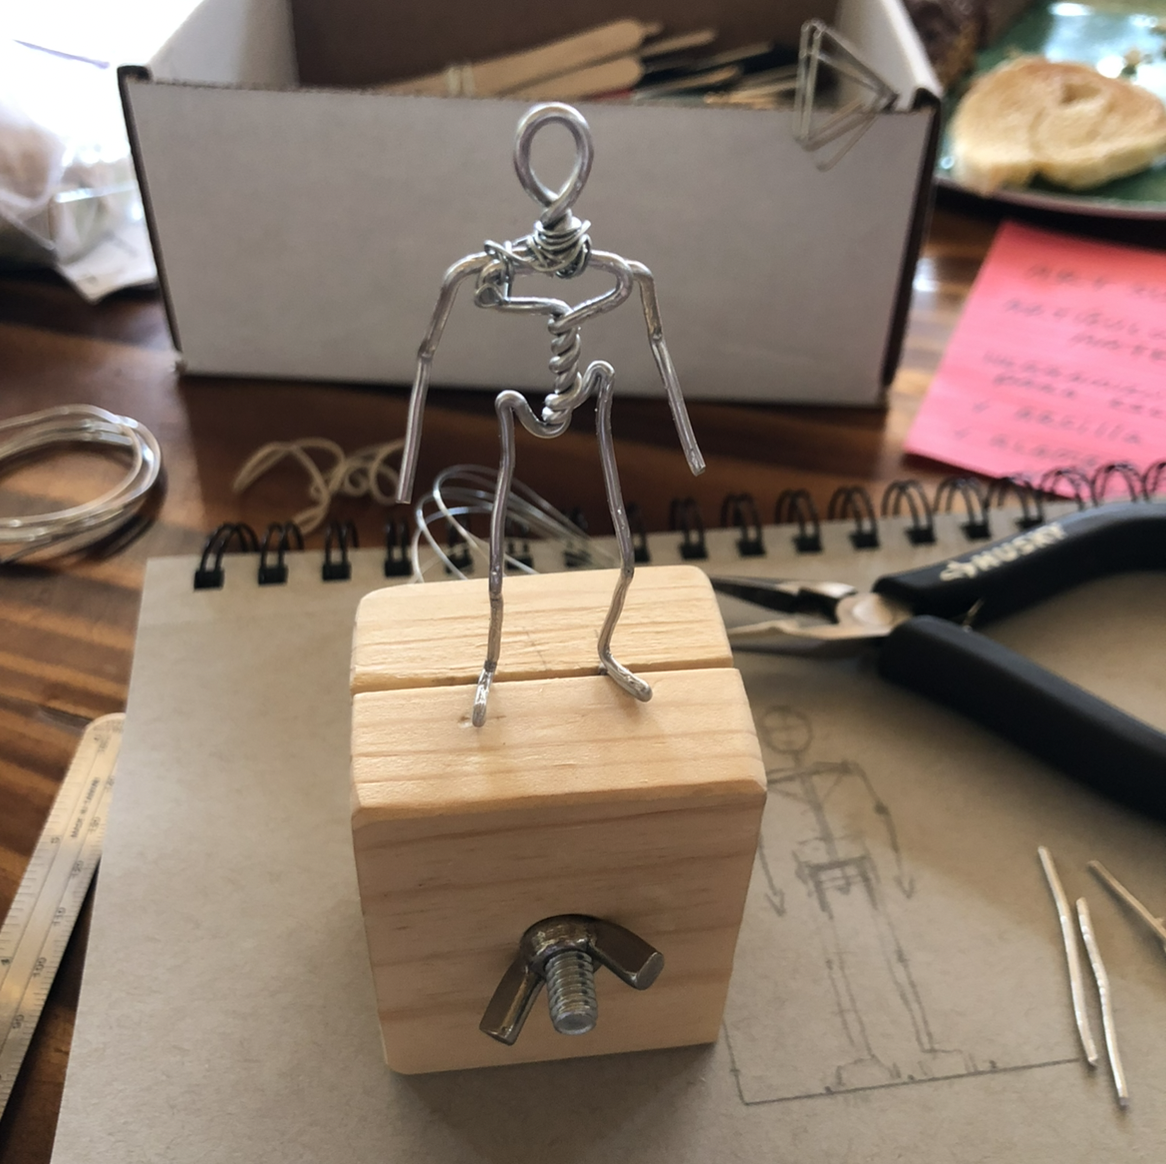
Notice how the wire extends below the feet in order to be secured in the clamp.
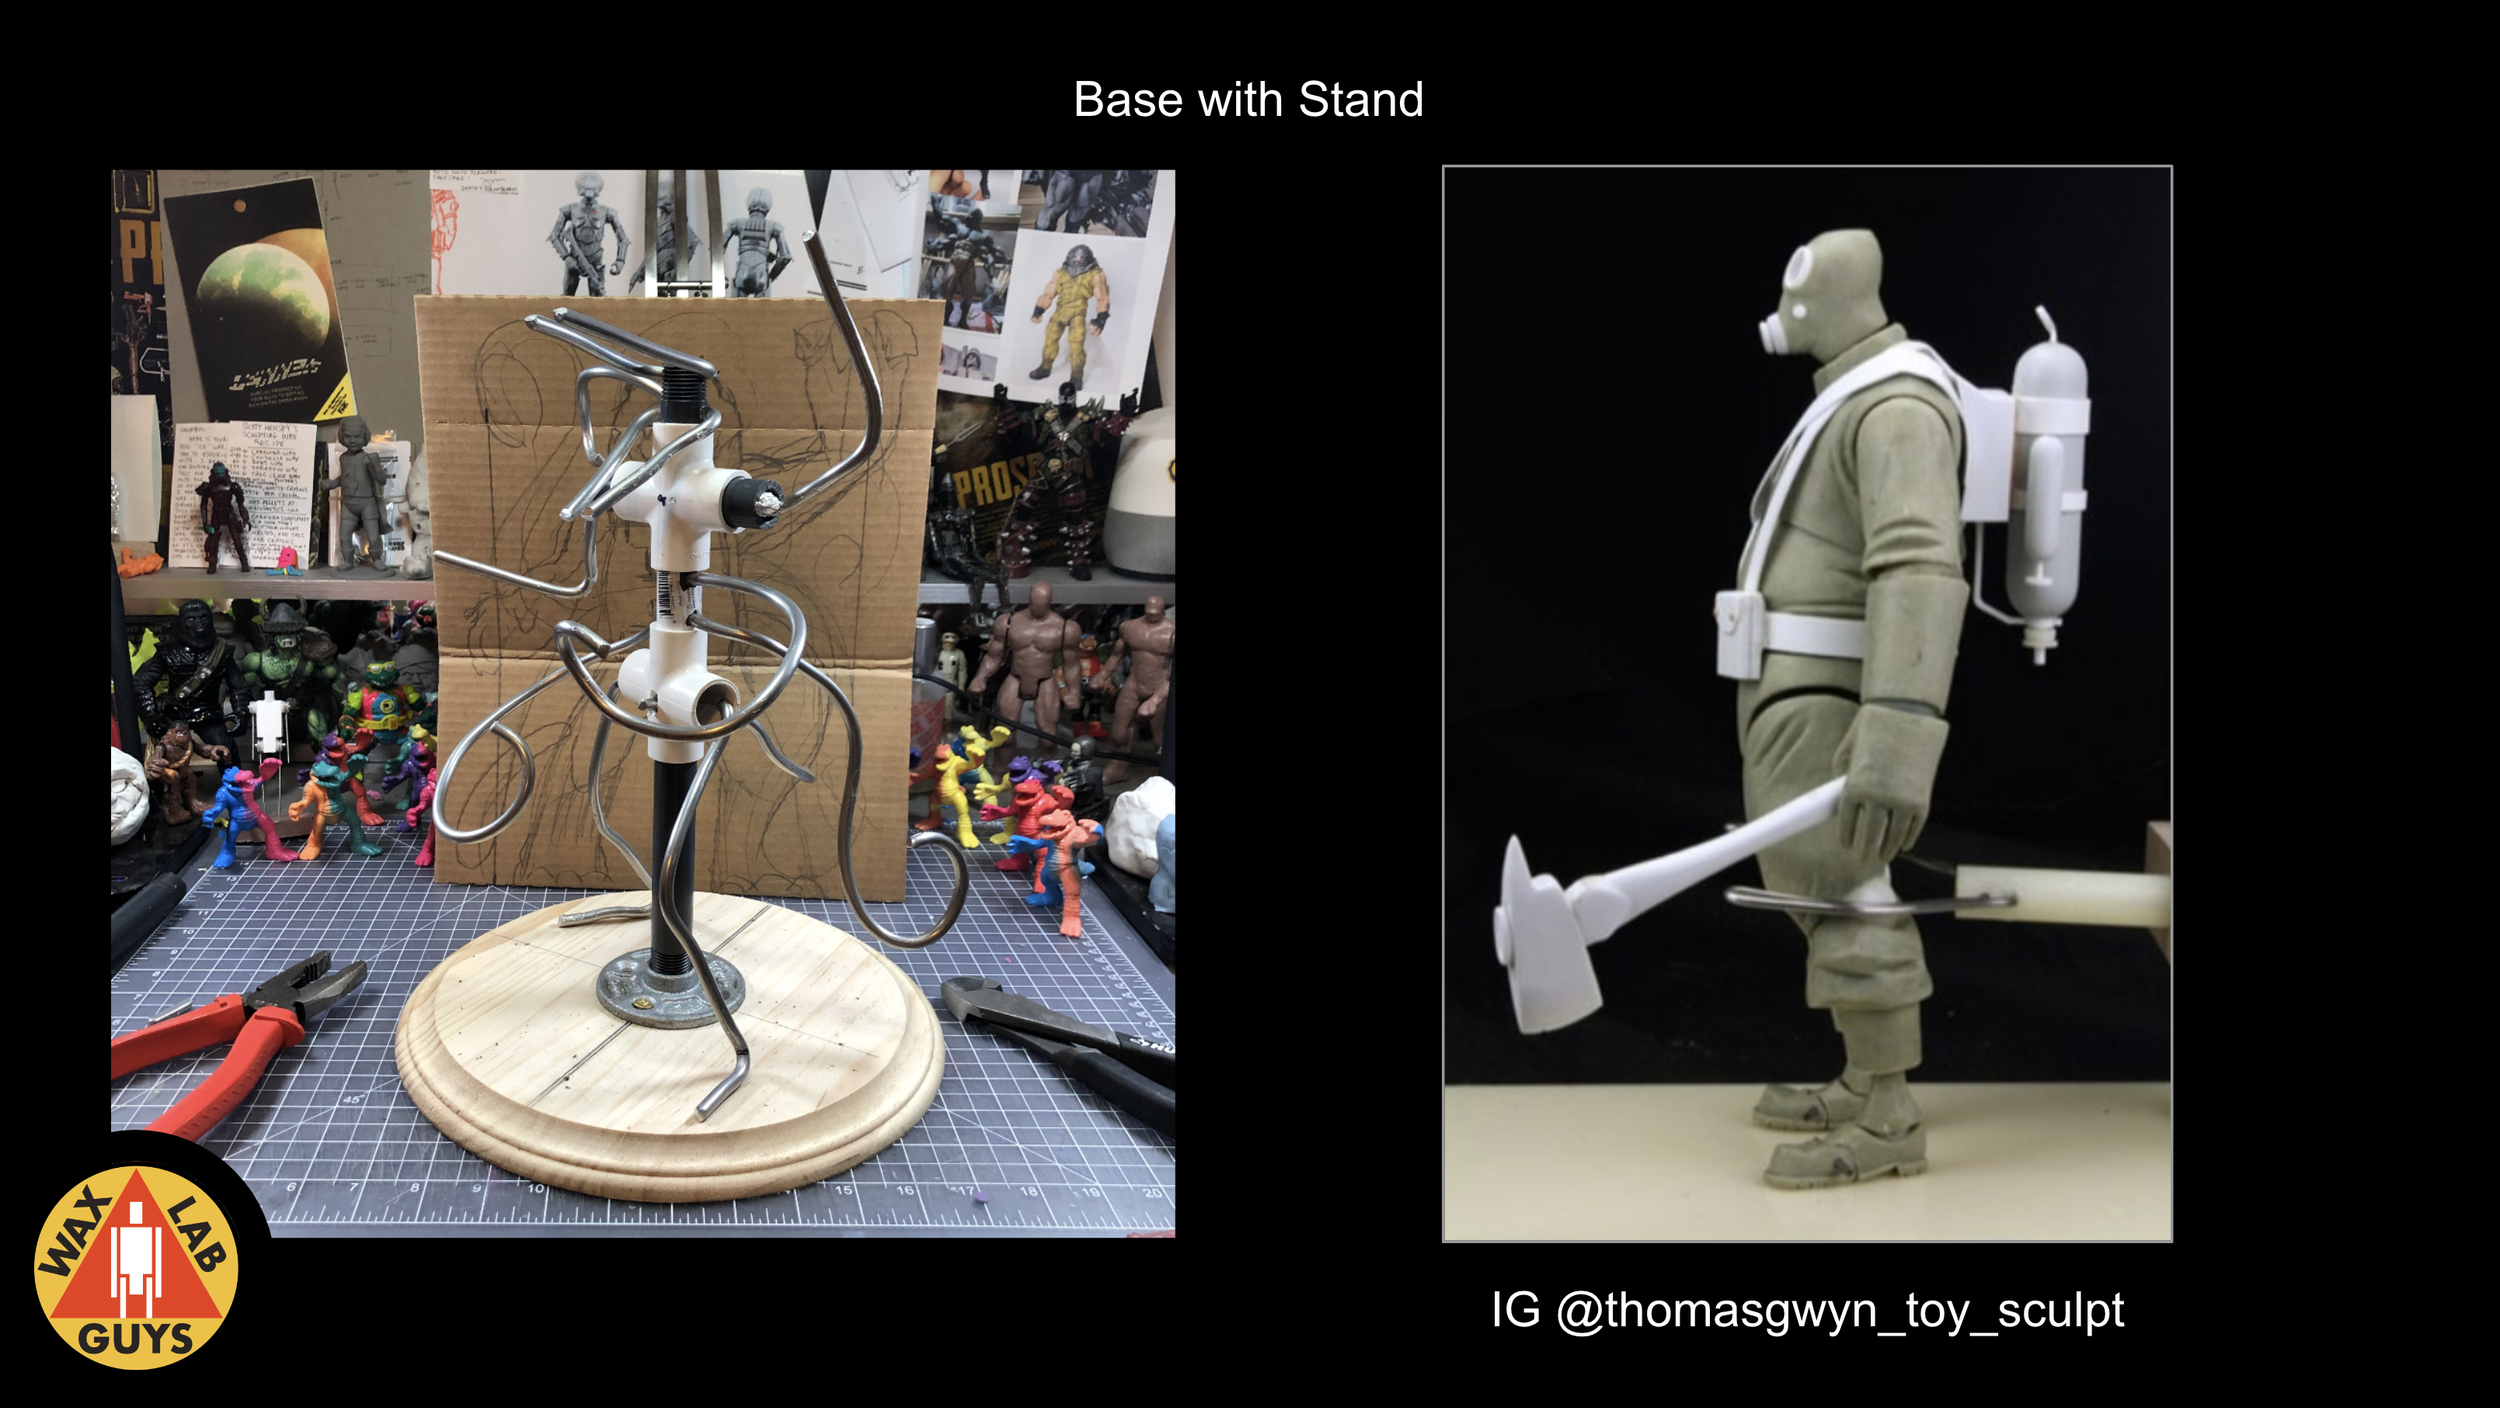
Stands – A stand can be used to hold a sculpt in place without being attached to it. This could be a ‘grip’ a ‘post’ that the sculpt is placed over. The sculpt is easily removed by lifting it from the stand
When to use one: Any size (typically large) – Stands are useful if laying your sculpt down isn’t an option and it can’t safely stand on it own. Stands are great if you need to hold the sculpt in your hand while working.
Armature Skeletons
The underlying structure that supports your sculpture and establishes your proportions of your final form. The following are different types of armature skeletons.

Bendable
Bendable skeletons are often made of wire and allow the sculpt to be repositioned while working.

Rigid
Rigid skeletons are designed to stay put. Whether it’s fused joints or simply a single mass to be sculpted over, the rigid skeleton is expected not to warp while sculpting.

Articulated
Articulated skeletons are designed to mimic production articulation points allowing sculptors to see how articulated parts interact with one another

Castings
Not all sculpts start from a formless skeleton. Some begin by using a copy of an existing figure. Depending on the casting medium, these castings may be produced with or without an internal skeleton.
Armature Fillers
Fillers can be used to quickly fill out large volumes of the sculpture and minimize the amount of clay used
Tin Foil
Pro – Quick and cheap; easy to adjust
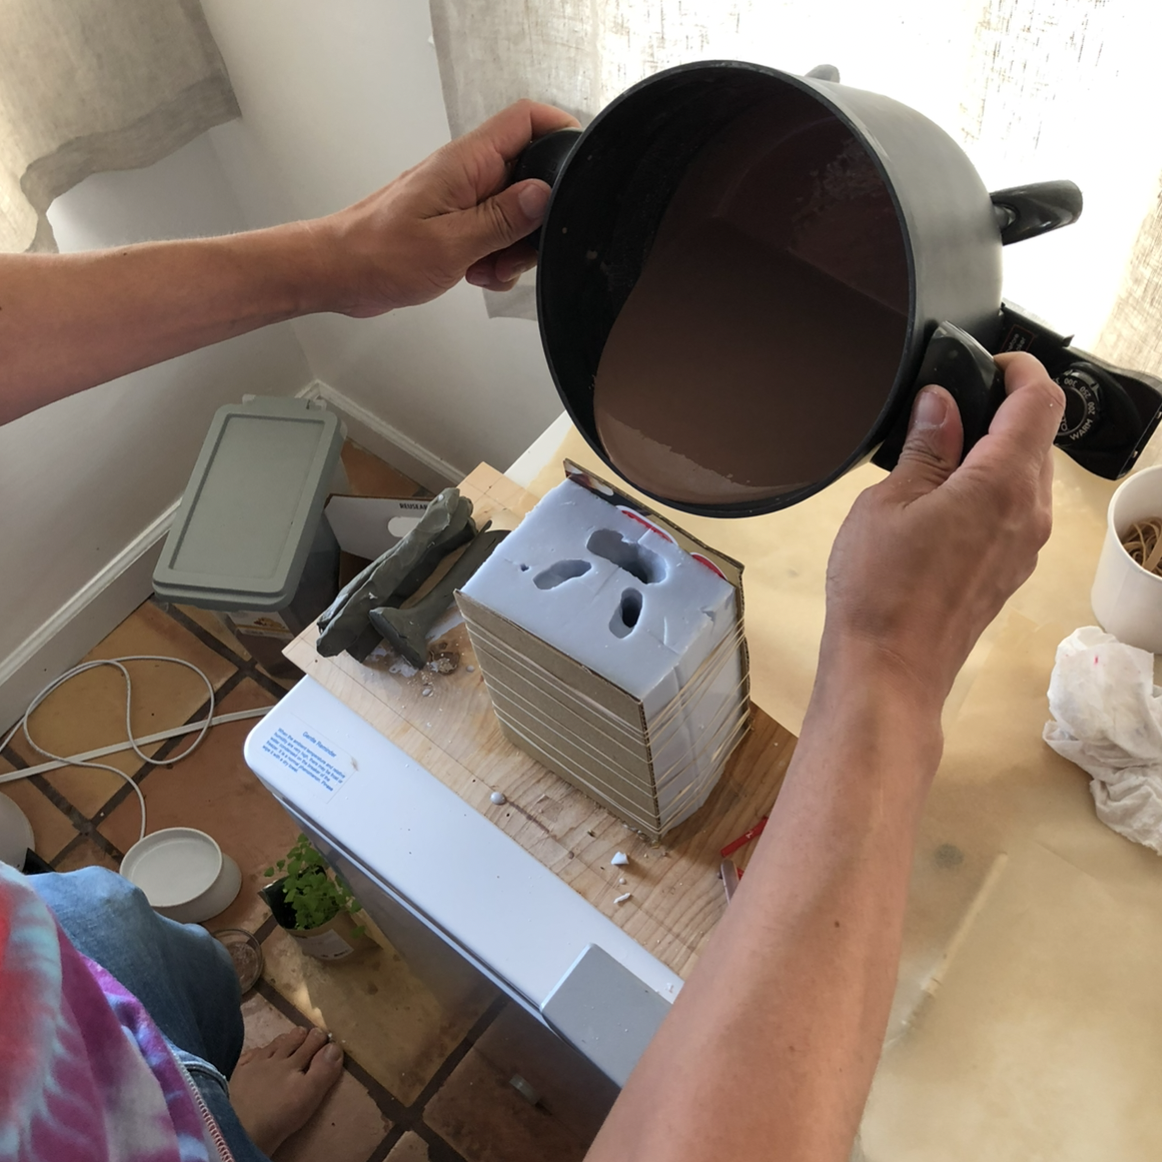
Con – Air pockets can collapse when curing silicone molds in a pressure pot
Apoxie Clay
Pro – Soft, easy to build up; permanent once cured; won’t collapse under pressure
Con – Curing time; added cost
Sculpey
Pro – Soft, easy to build up; permanent once cured; won’t collapse under pressure
Con – Curing time; requires baking to harden; heat tolerance of other armature elements
Salt Dough
Pro – Cheaper than sculpey, you can make it at home
Con – Curing time; requires baking to harden; heat tolerance of other armature elements

Articulation
Anatomy of articulation
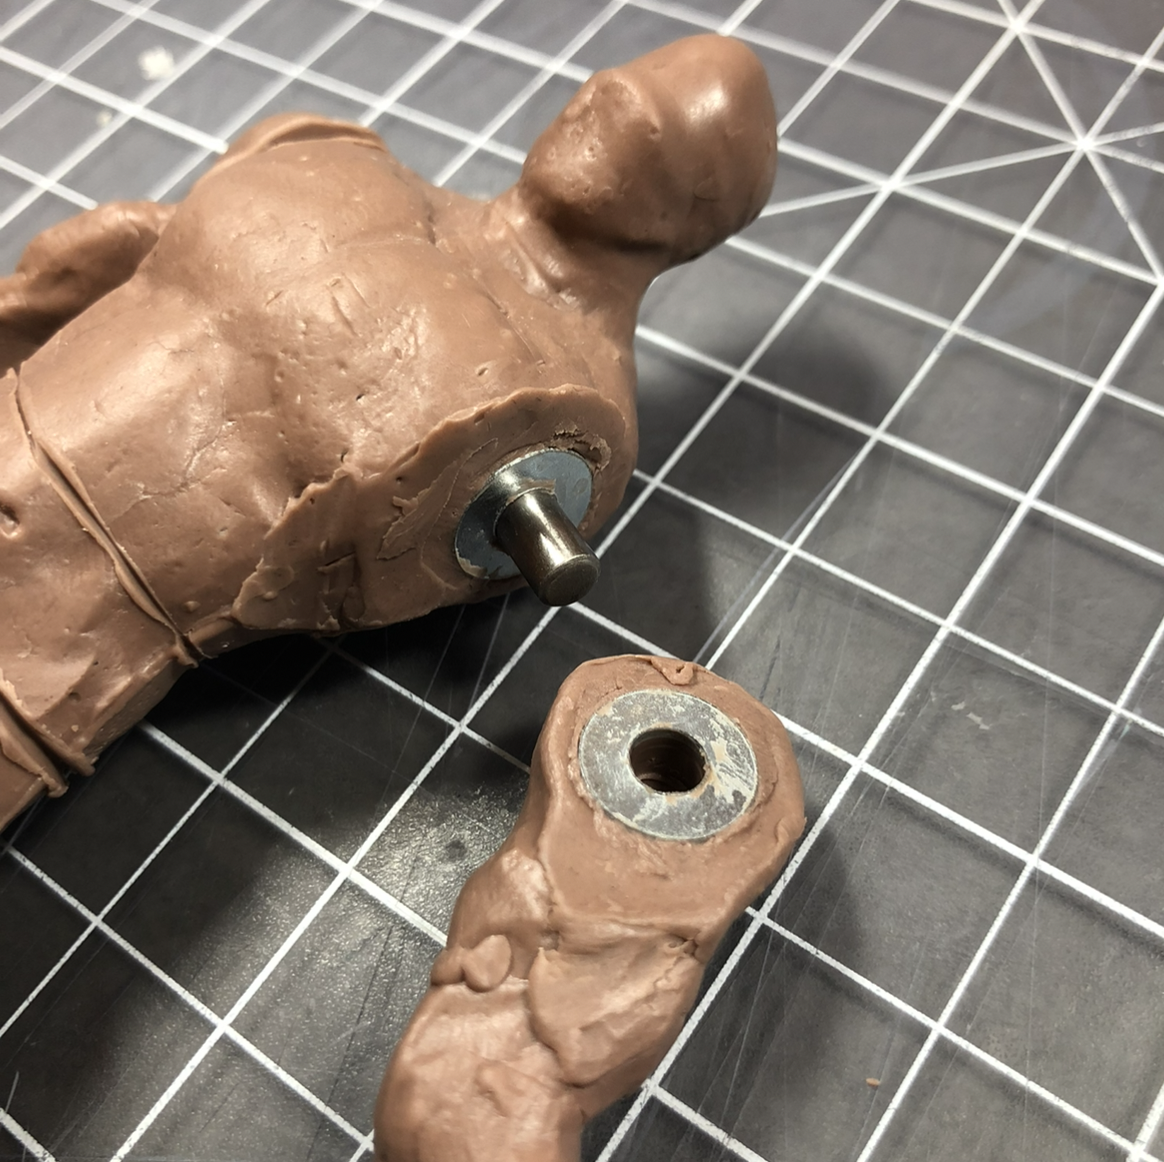
Dowel – The dowel (or pin) serves as the pivot for any rotational articulation
Disc – Discs are used to create a flat interface between articulating parts of the figure. This is a critical aspect of the articulation, form sculpt to production.
Ball & Socket – Ball joints allow for more dynamic movement and require some degree of pressure to fit together.
Anchor – While not always necessary, an anchor allows you to secure articulation discs to your sculpt. Alternatively, a disc can be pressed in or adhered to your sculpting medium
Types of articulation
Pivot – Pivots are typically used for articulation like heads, waists, and wrists, but they can also be found in traditional 5POA figures at the shoulders and hips.
Hinge – Hinges are typically used for elbows & knee joints. The hinge is made of 3 discs and dowel to pivot on. The discs are visible in the final product, so consider how the thickness of the discs affects the aesthetic of your design
T-Crotch – The t-crotch is the common used format for many action figures. The crotch is effectively the disc, while the dowel serves as a pivot for the legs.
Ball Joints – Ball joints can be found in necks, shoulders, and hip articulation
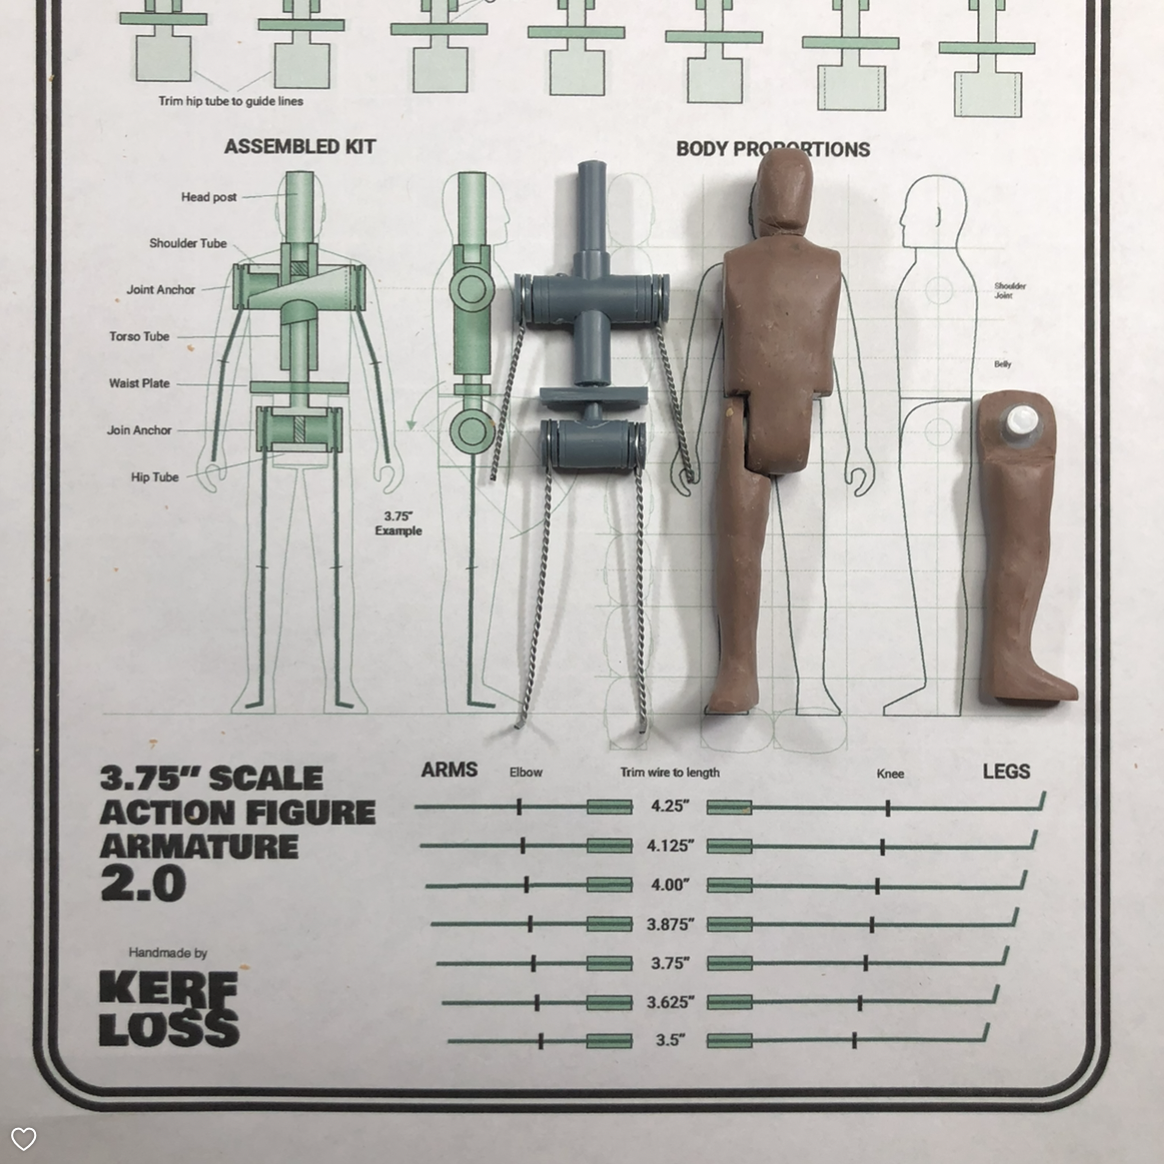
5POA Kits – A 5POA kit is designed recreate the classic action figure proportions. Using a kit is an easy way to create multiple figures that share common proportions.
Just Joints Kit – The Just Joints kit is a set of pre-made pivots with sleeves that make it easy to integrate with your armature
We highly recommended reading Pop Sculpture by Tim Bruckner, Zach Oat, and Rubén Procopio (2010)

Examples of 5POA armature kits.

Example of various types of articulation used in a salt dough armature.
Armature Examples
Miniature Sculptures
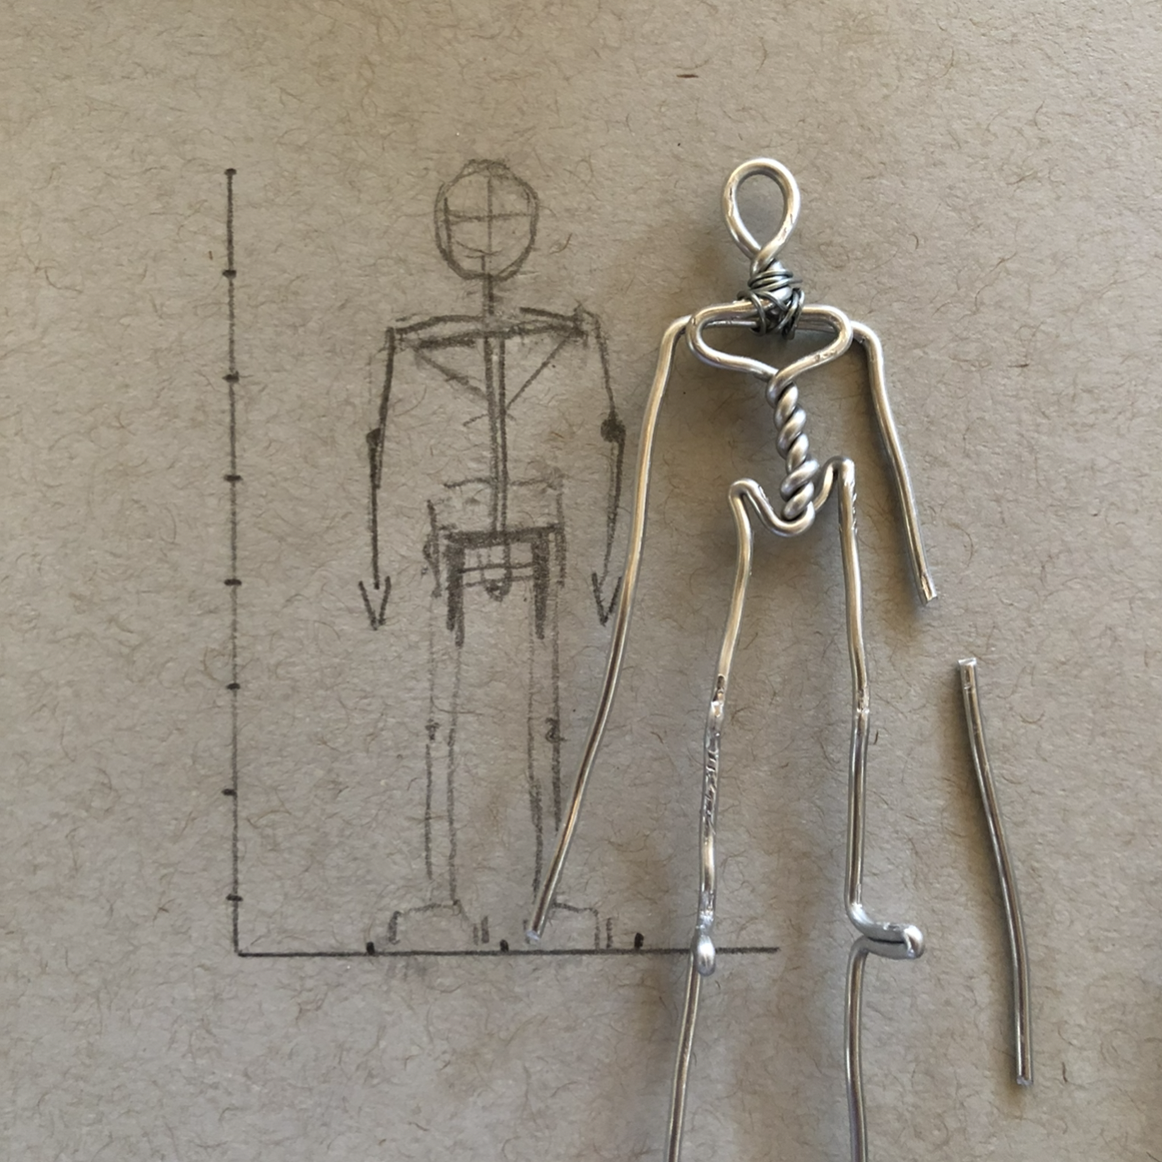
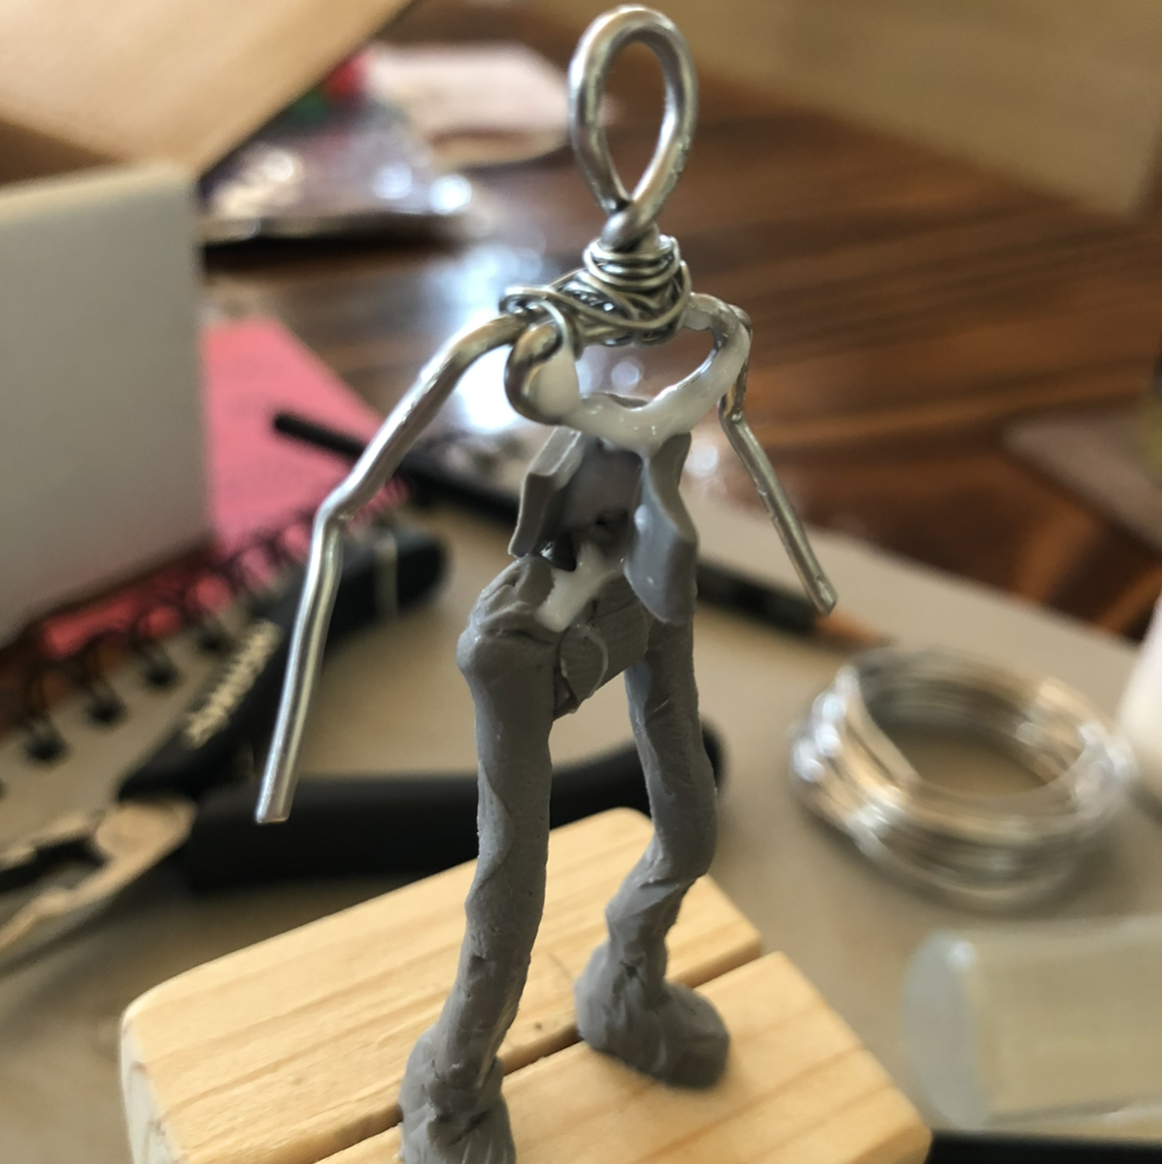
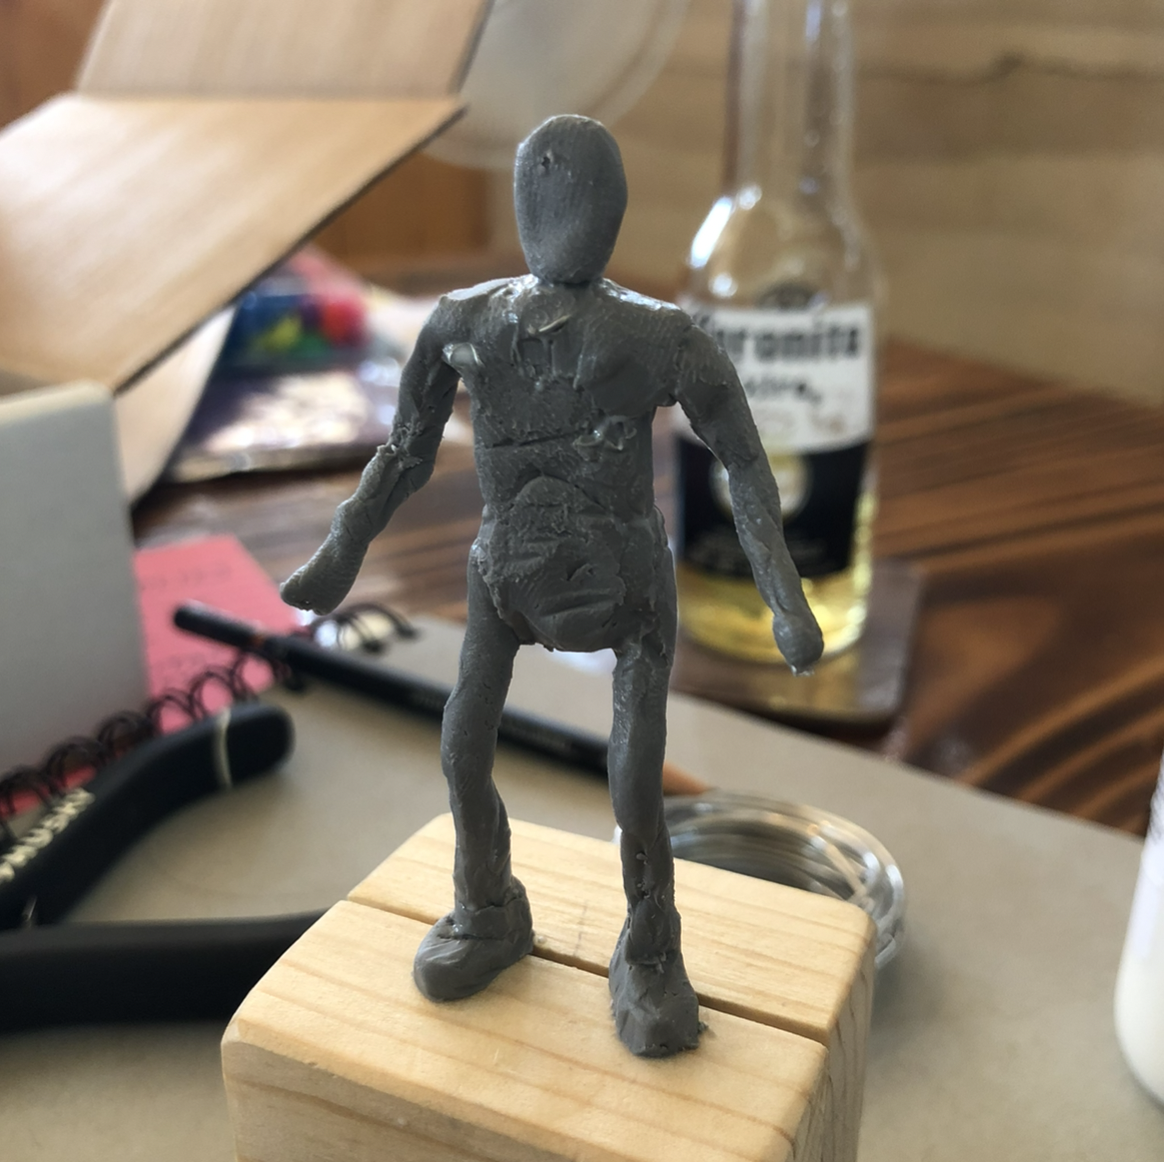
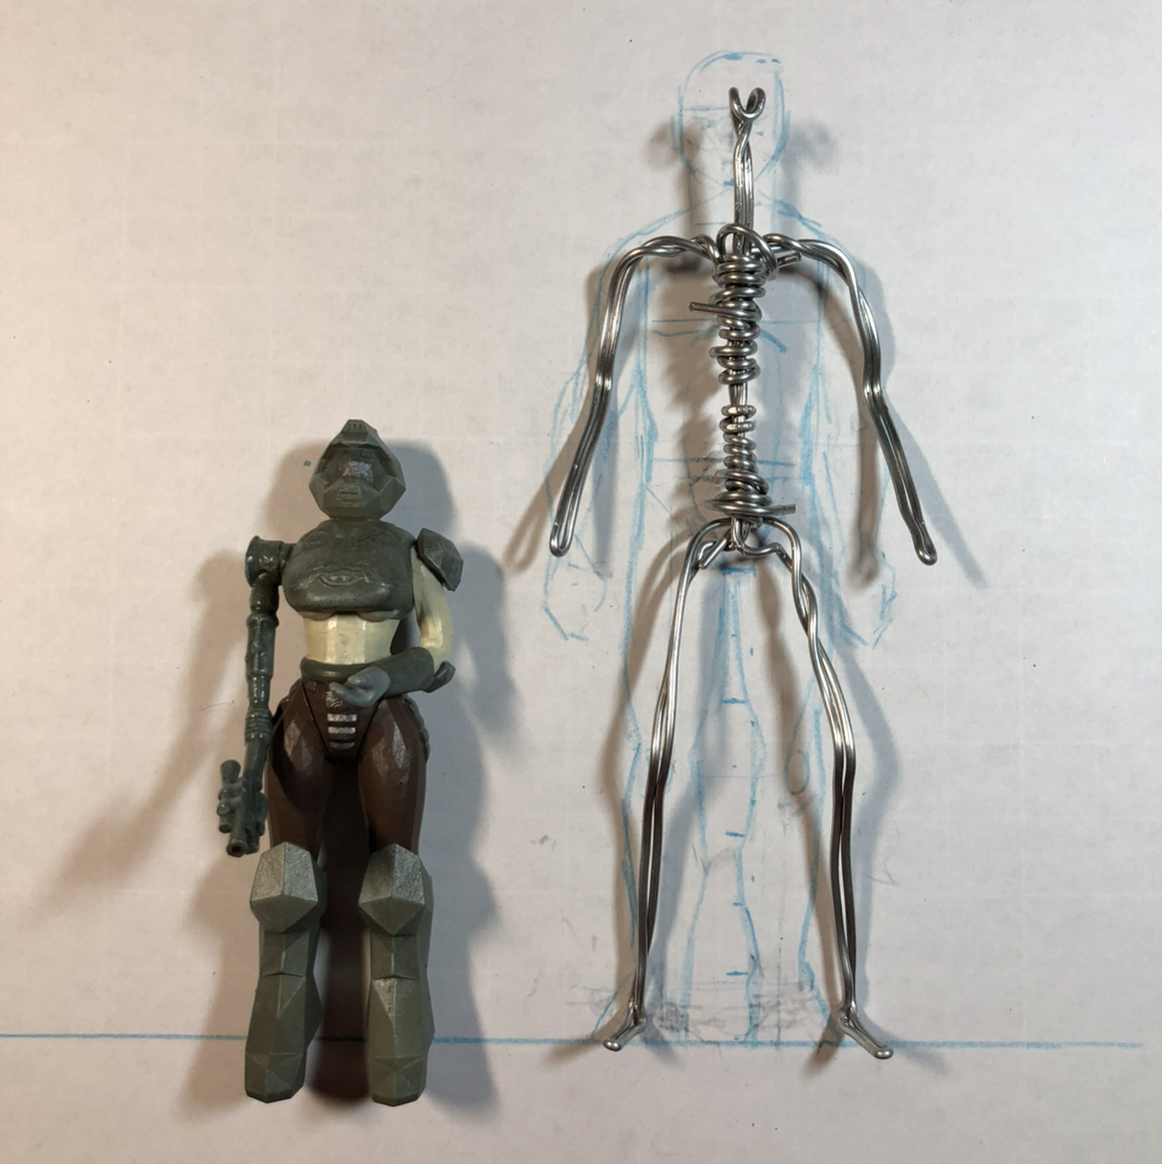
Using a wire armature in a wood clamp.
Shape the wire according to the design specification.
Secure in clamp.
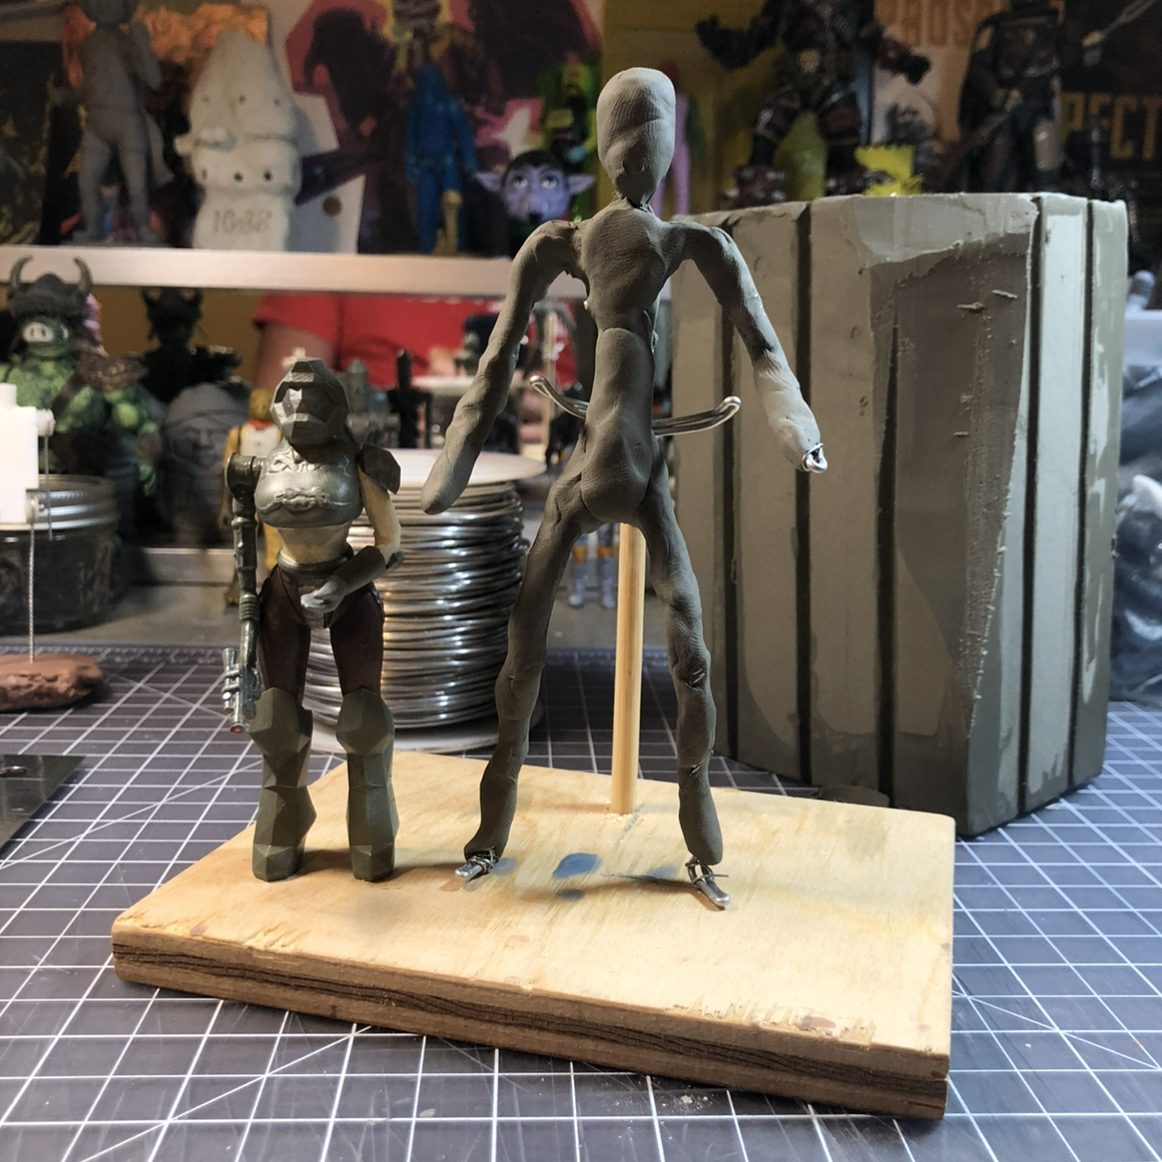
With Super Sculpey clay, apply a polymer clay adhesive to secure the clay to the wire.


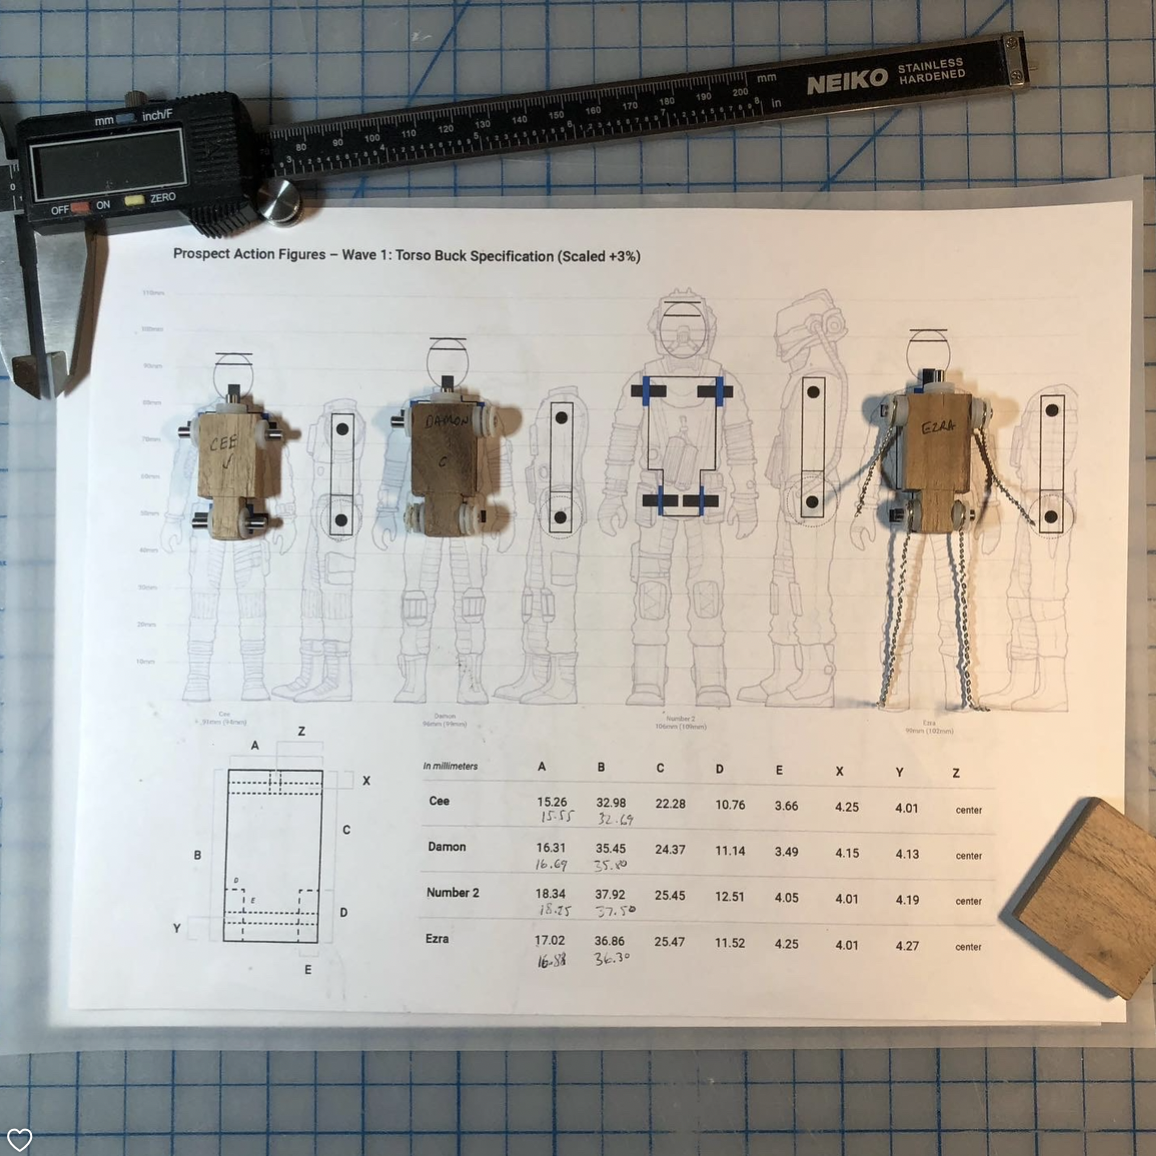
5 Points of Articulation - Fixed Size
Size the armature to the design specification. This allows you to match the clay rough to your design as well.
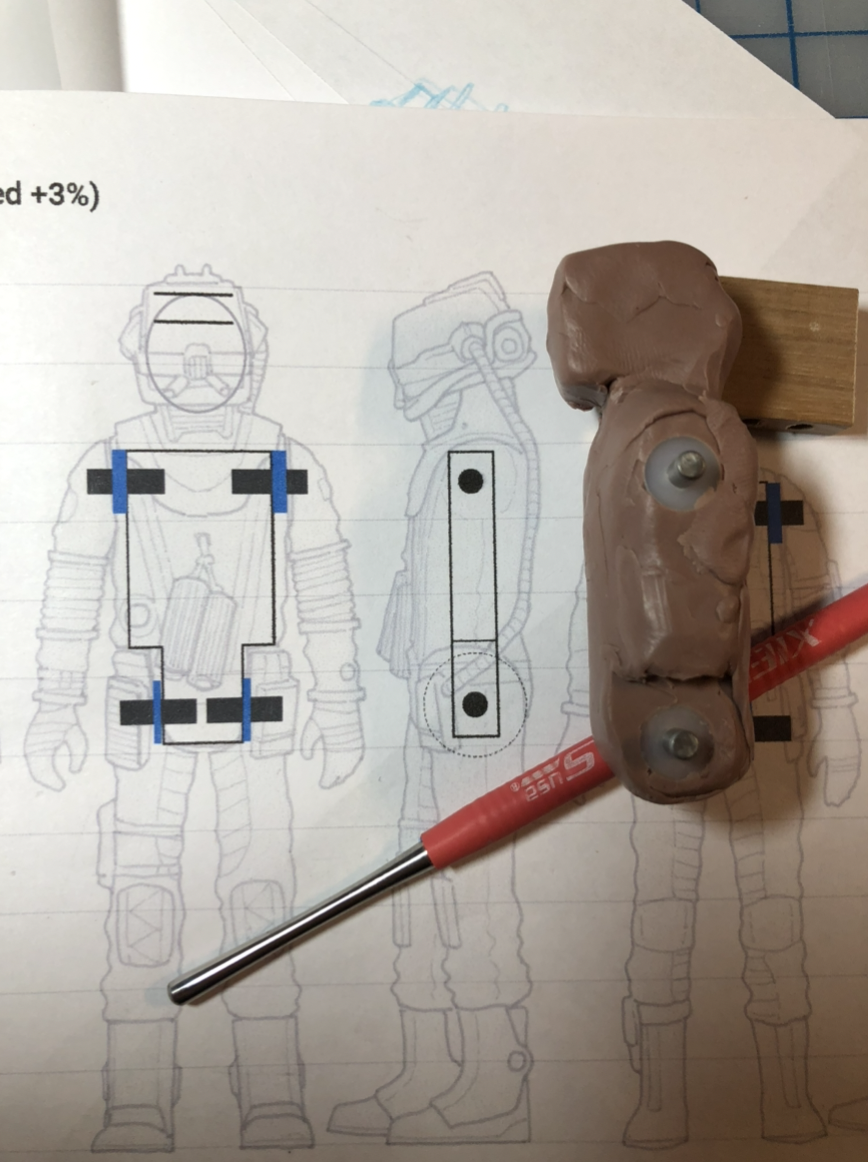
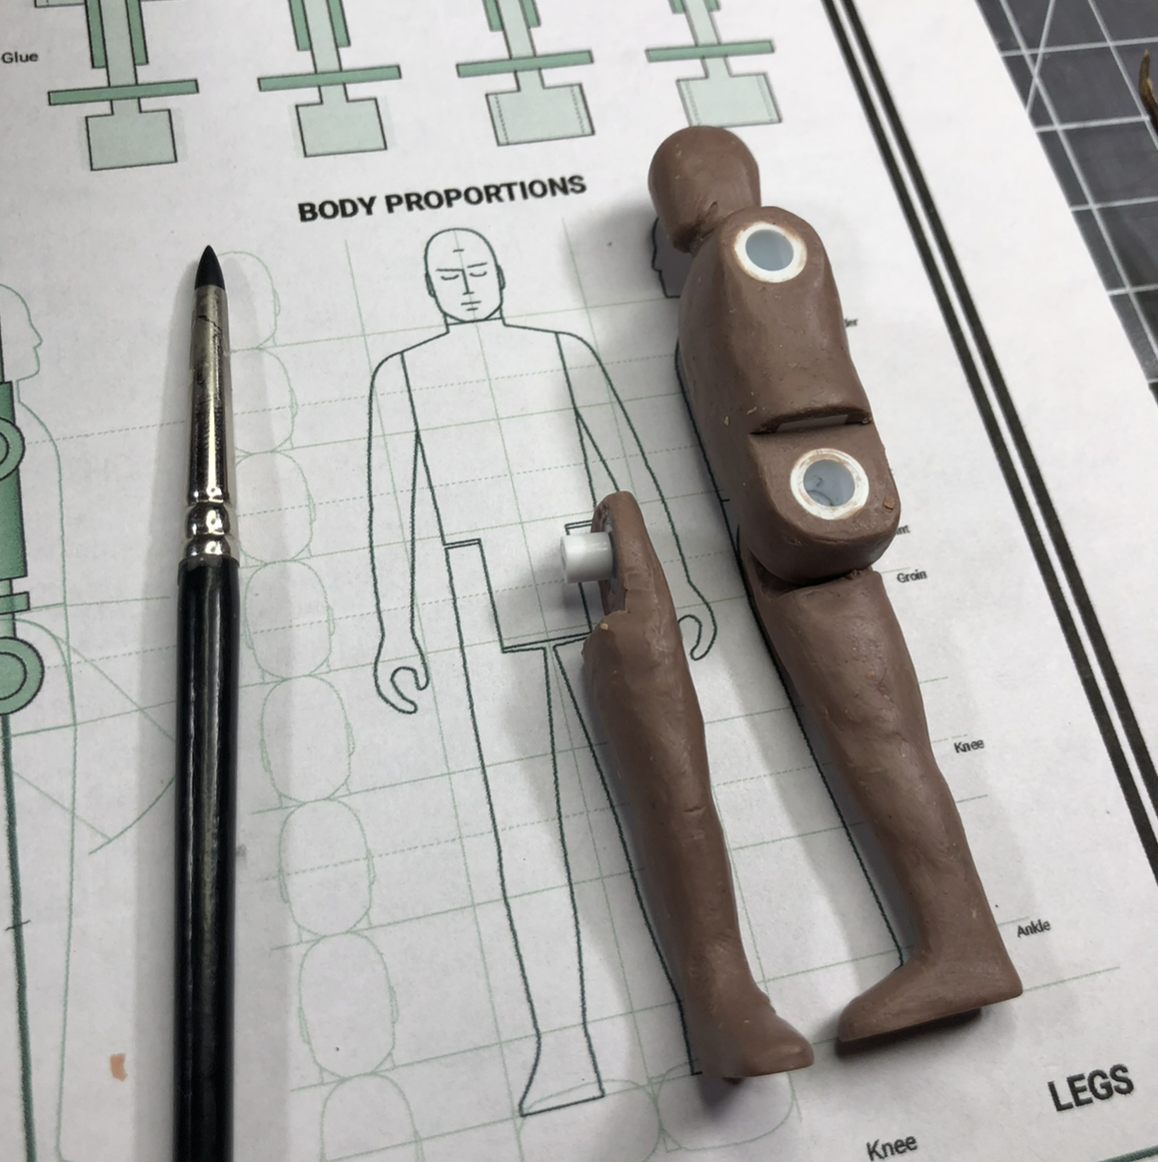
Build up clay around armature. Remove the limbs to sculpt around each part and understand how the parts move relative to each other.
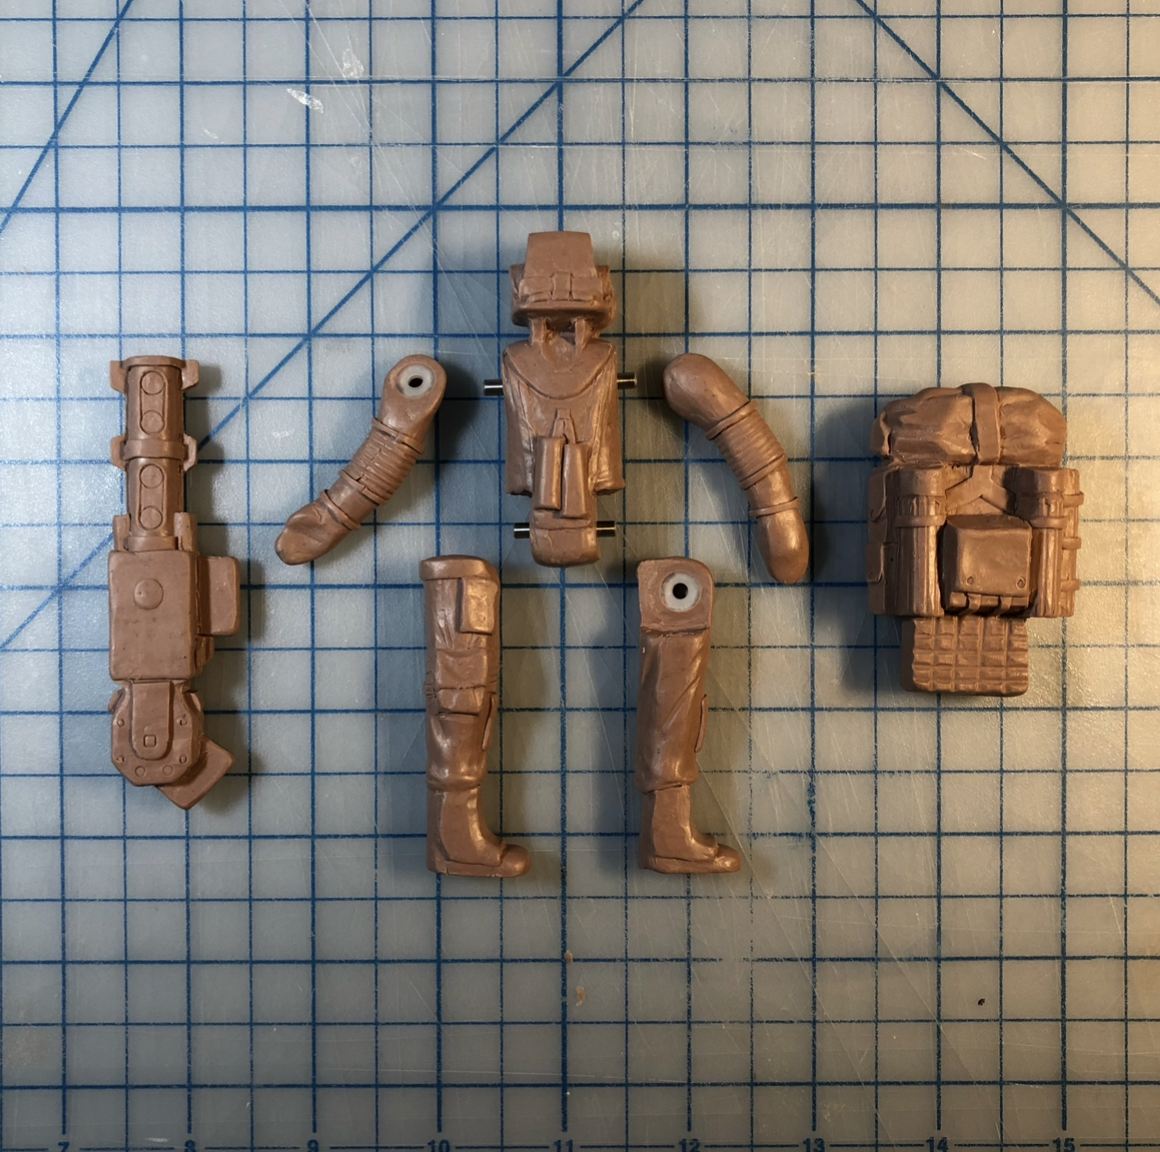
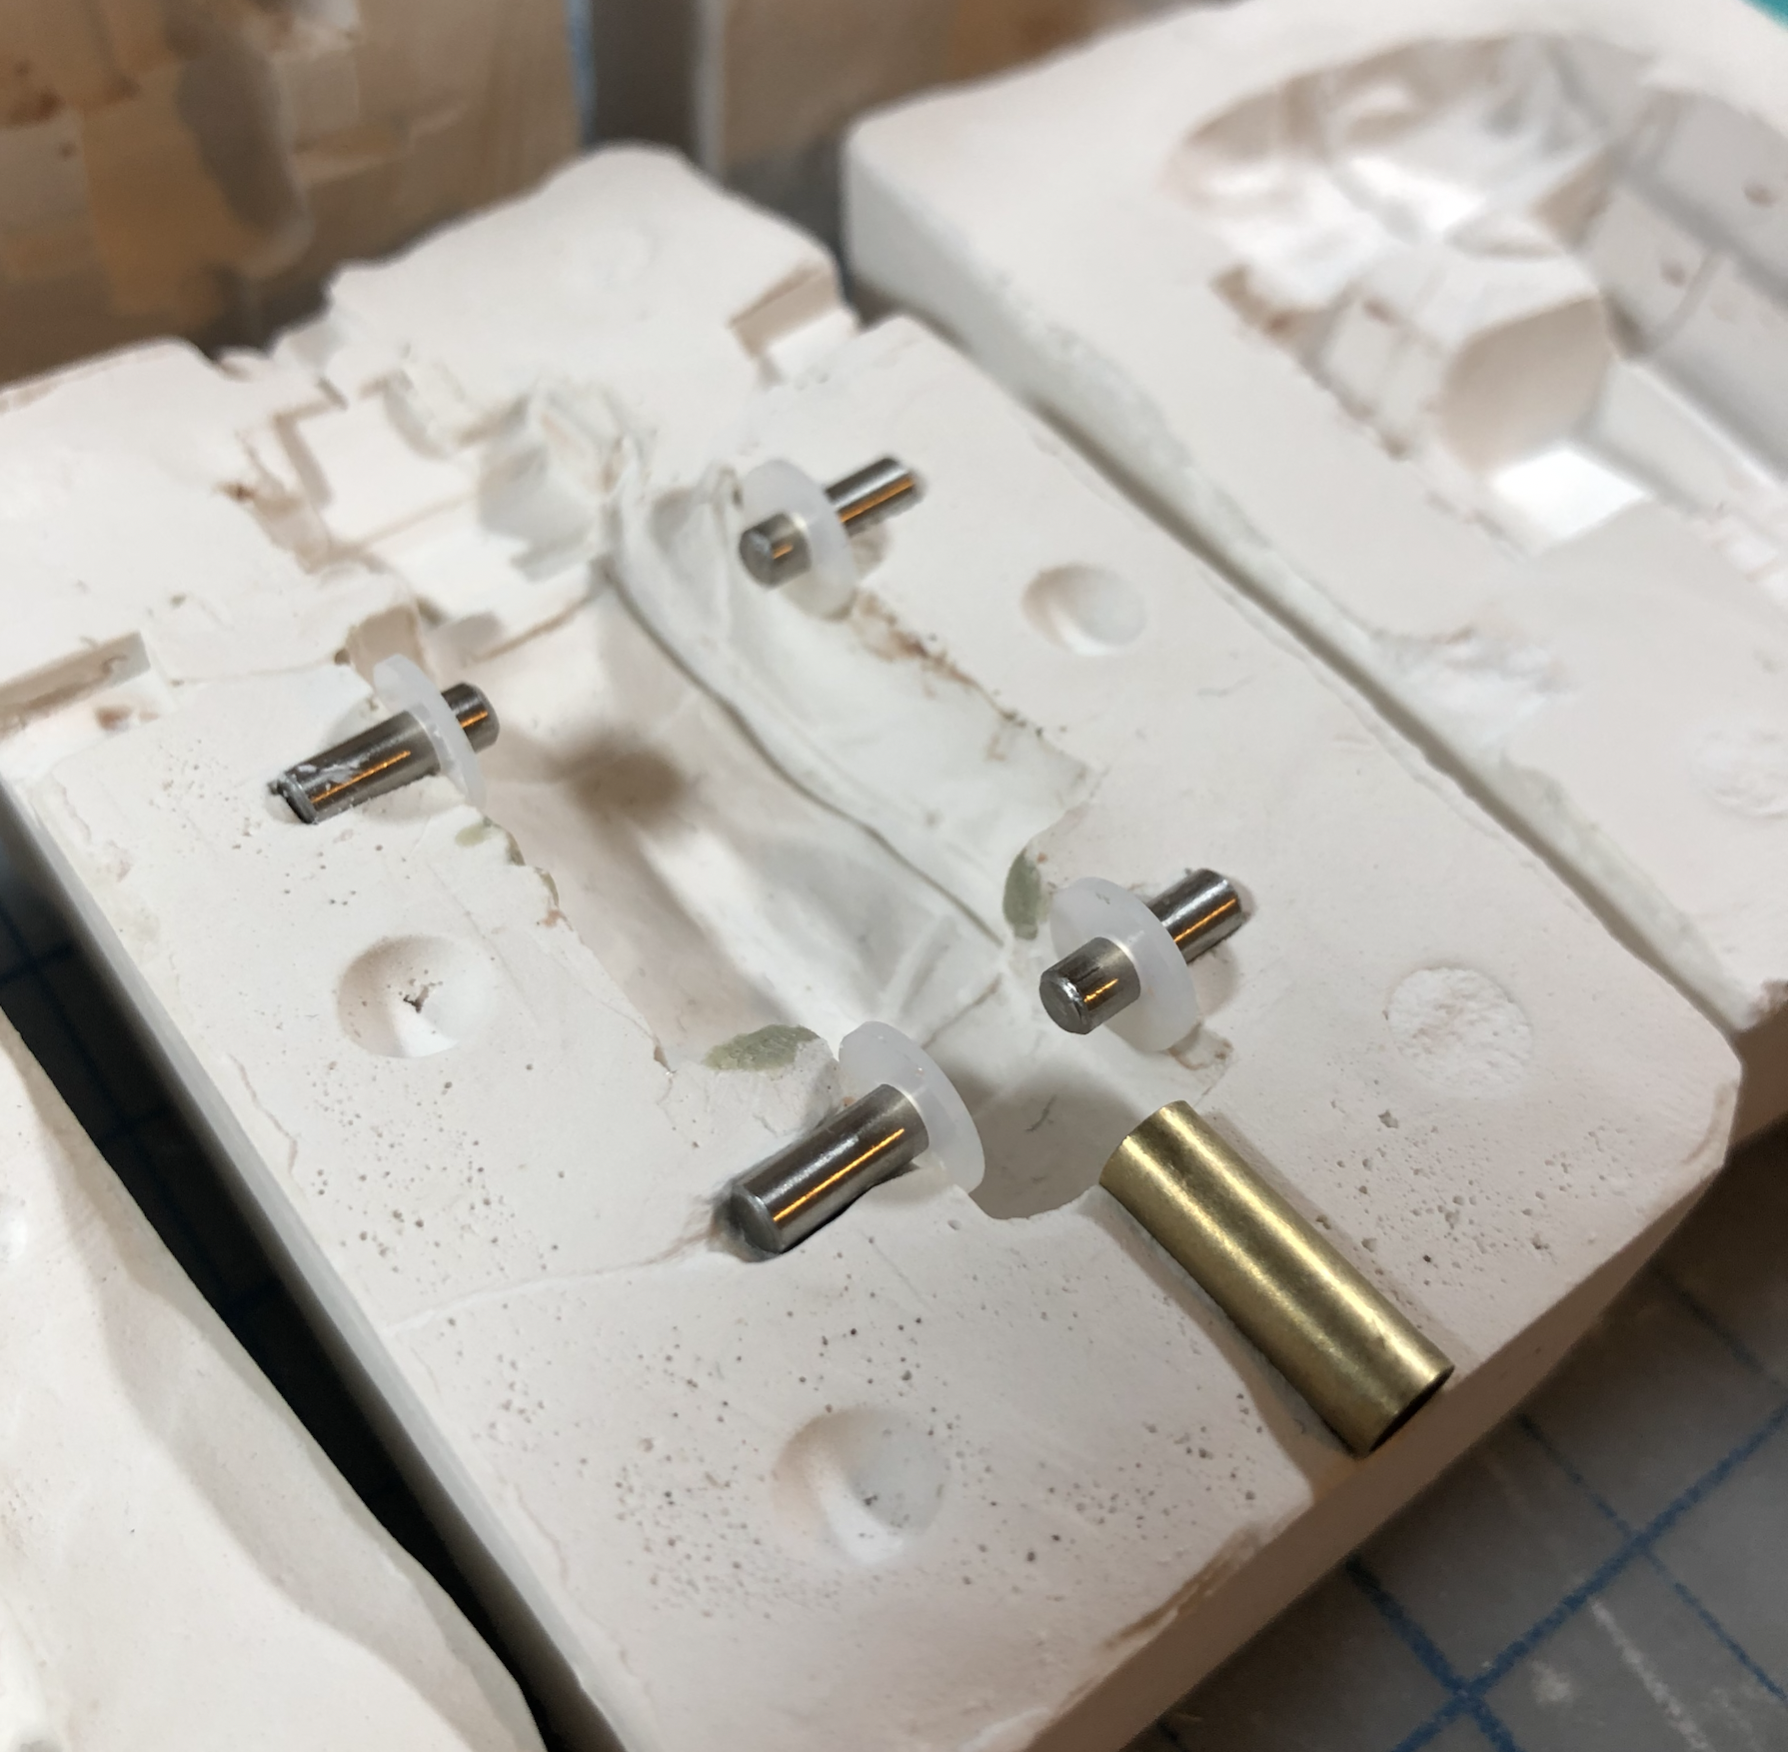
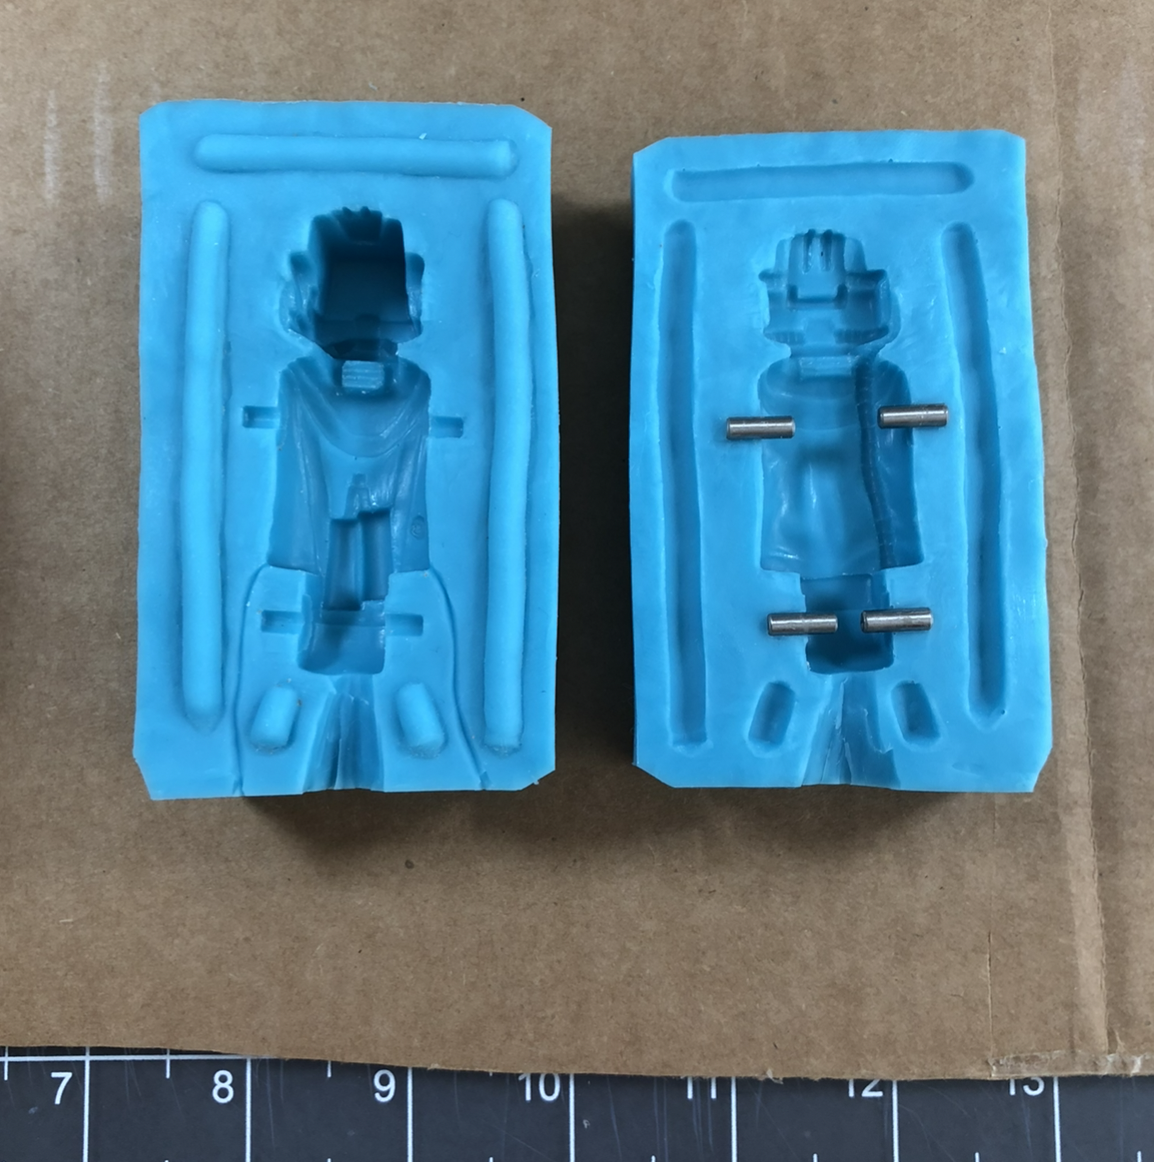
Set the articulation fixtures into the mold and casting wax or resin around them.
5 POA - Adjustable Size
This adjustable armature was developed by Kerf Loss. Further development is needed to make production feasible.
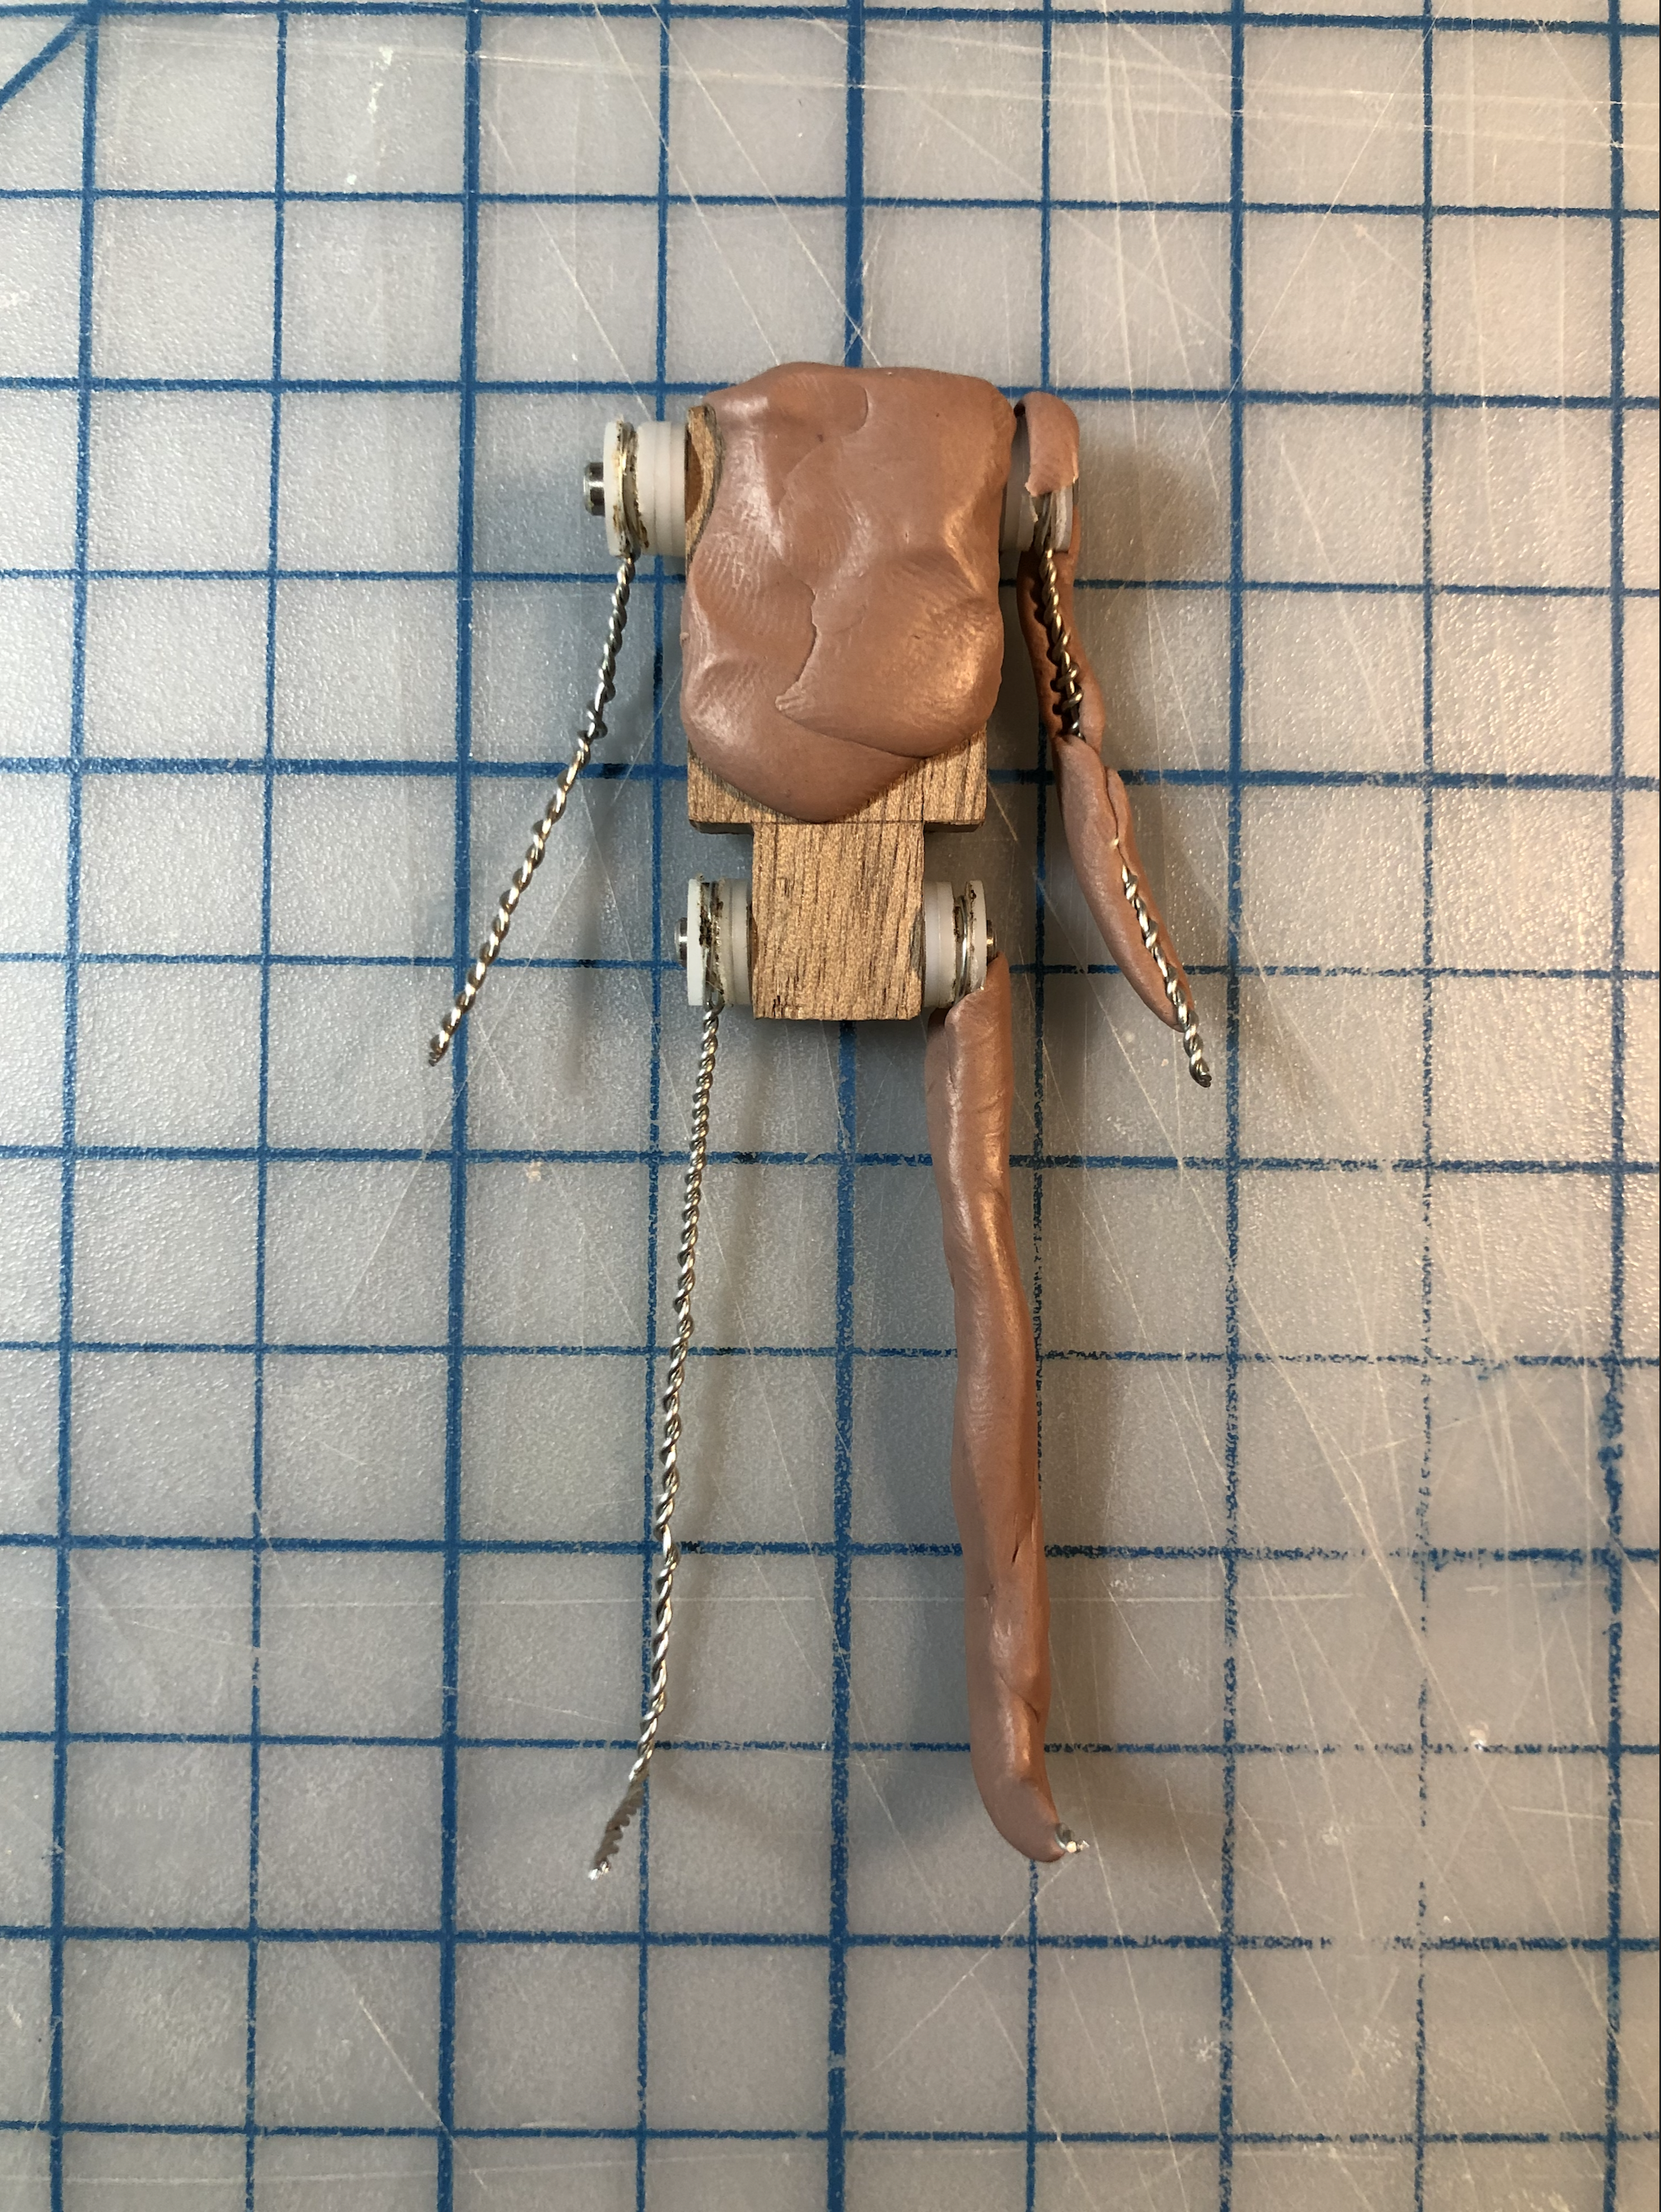
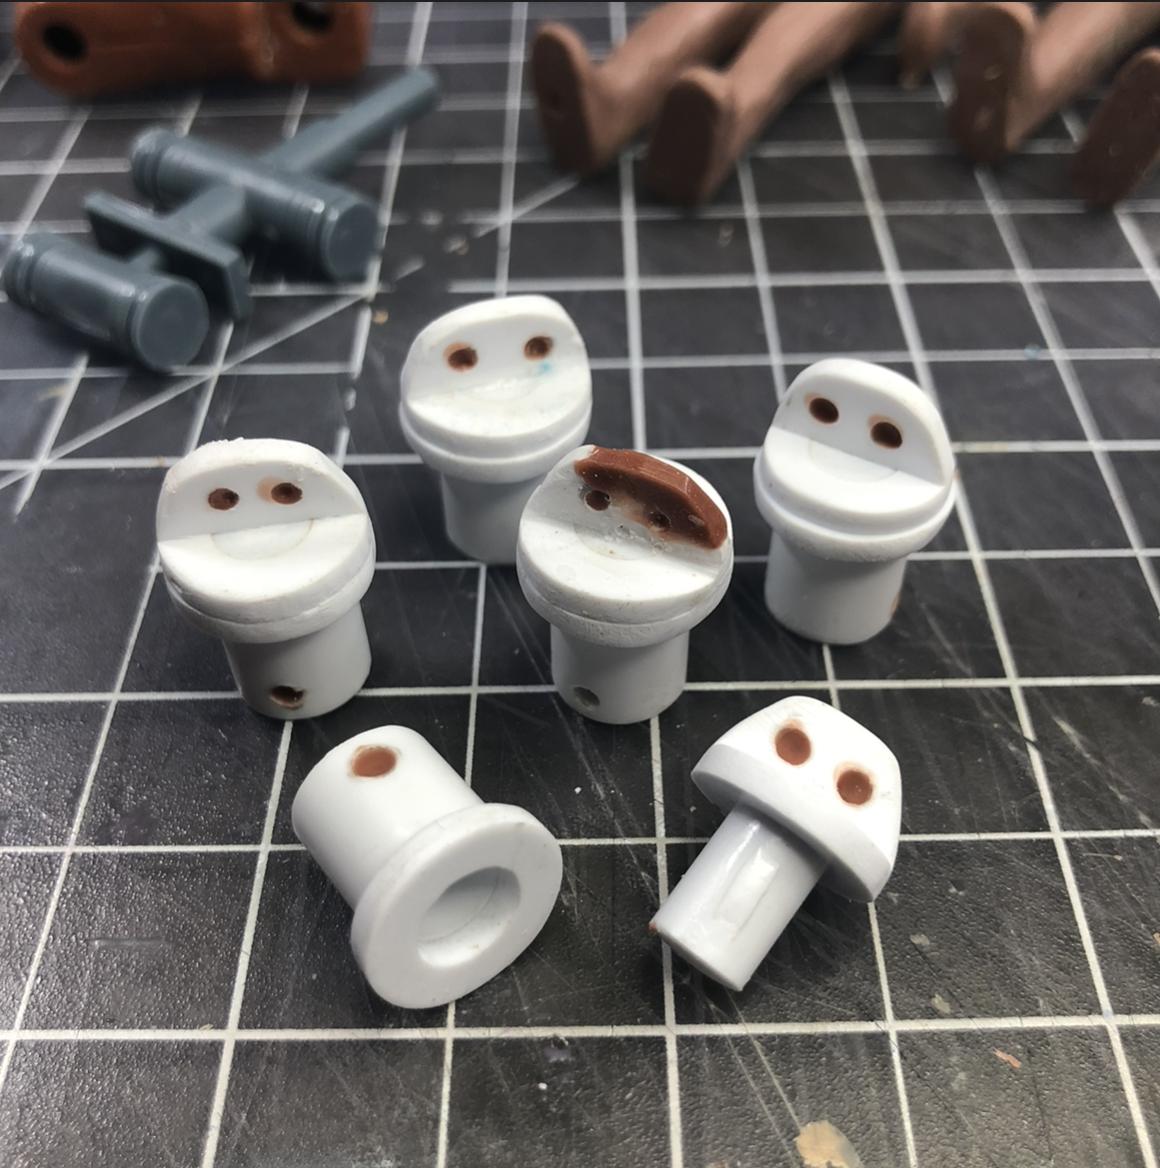
Just Joints
Construct joint fixtures from polystyrene plastic.
Thread wire through fixtures and join to the armature skeleton.
Build up armature filer and block out the form of your figure.

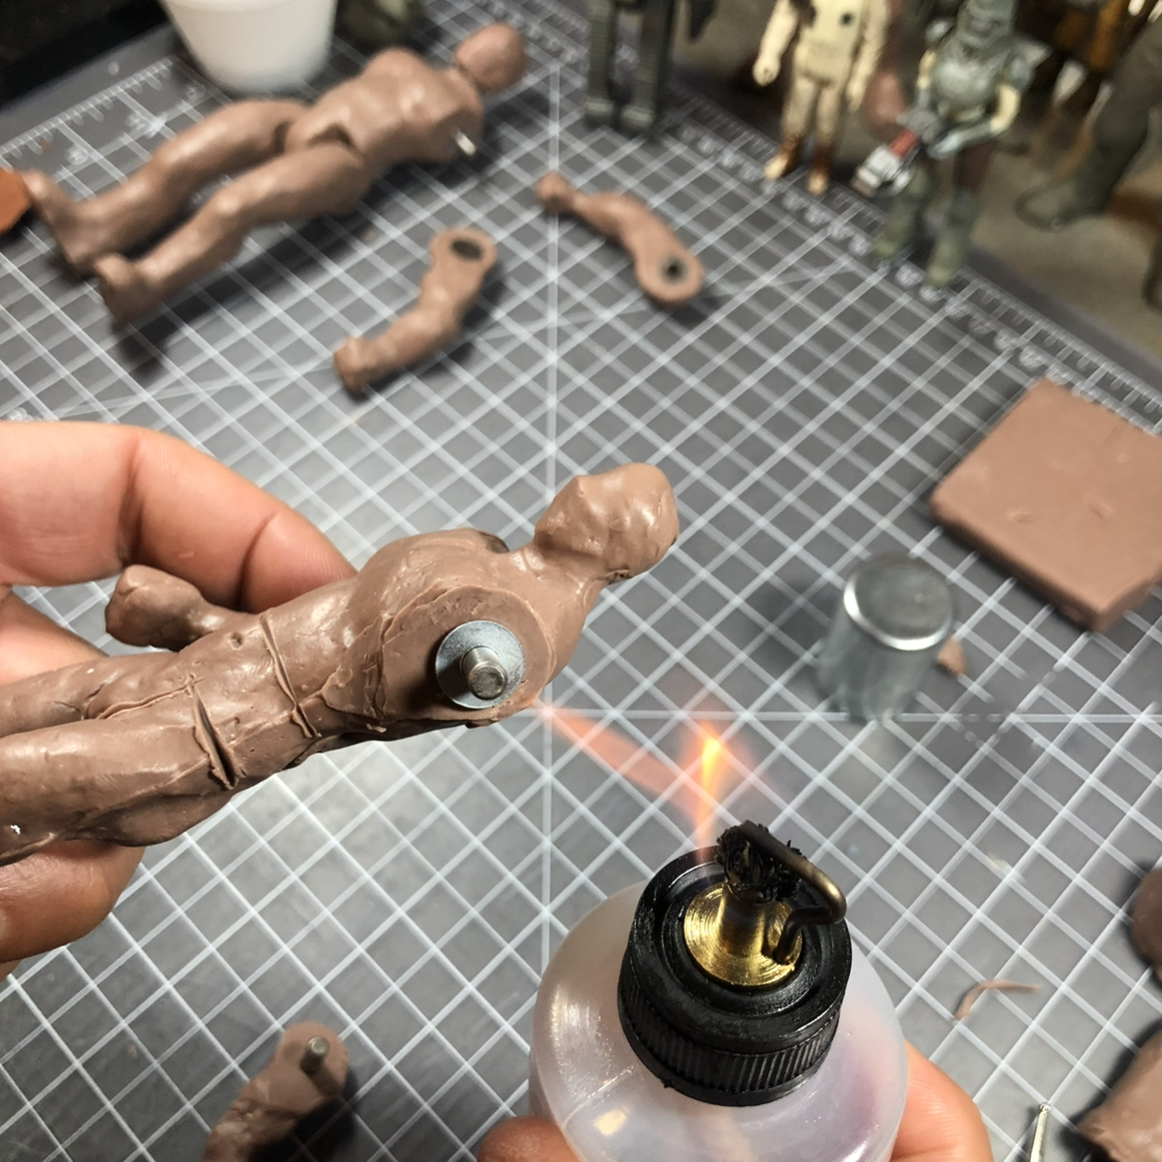
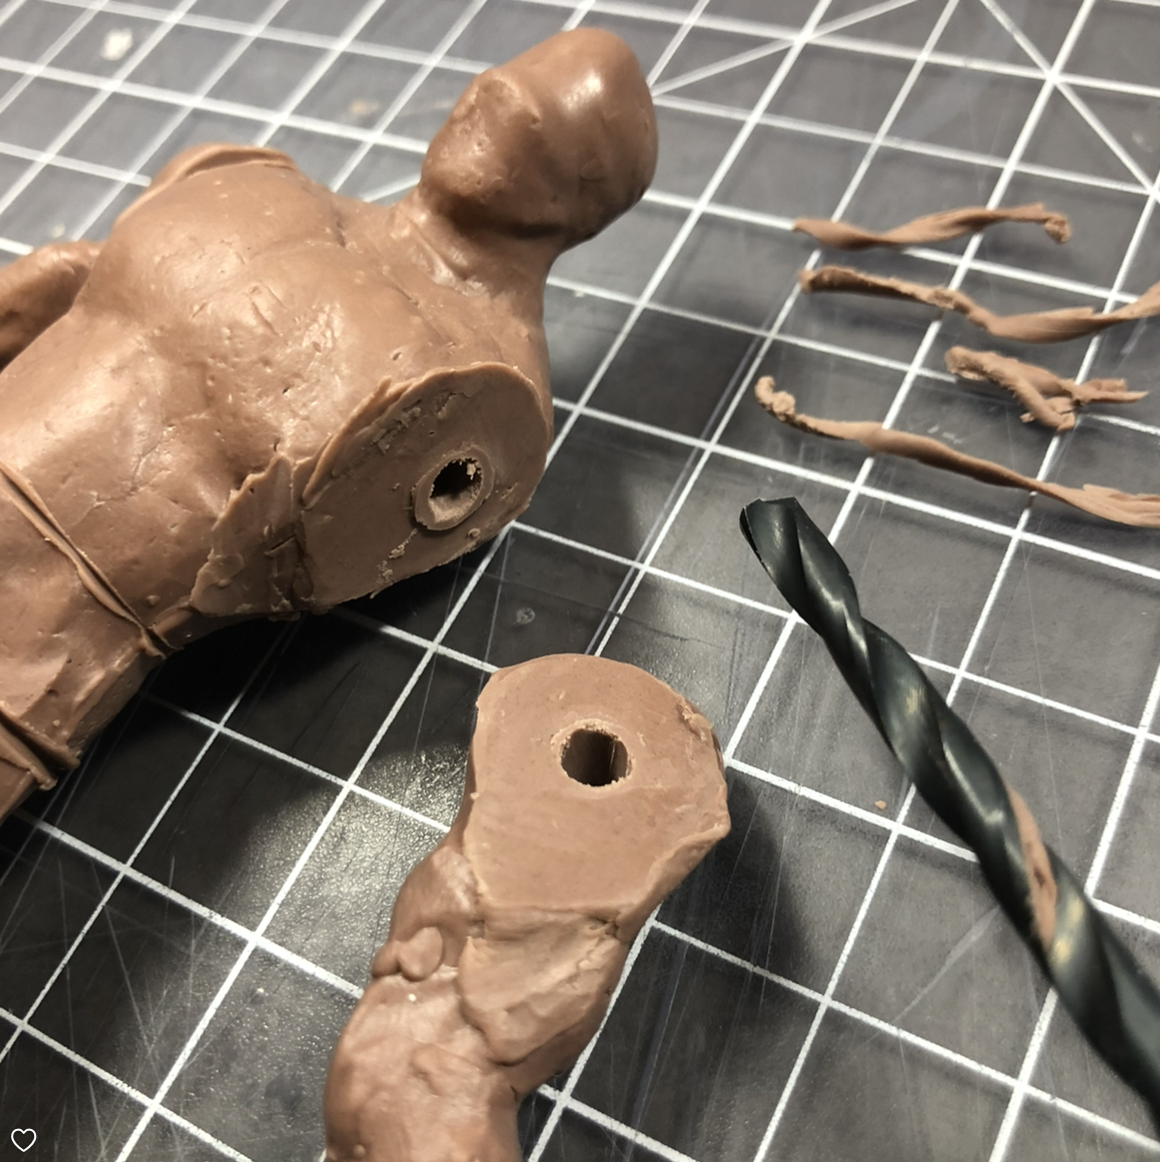
Adding articulation after sculpting
Sculpt a generic form onto the wire armature.
Make a mold and cast clay or wax.
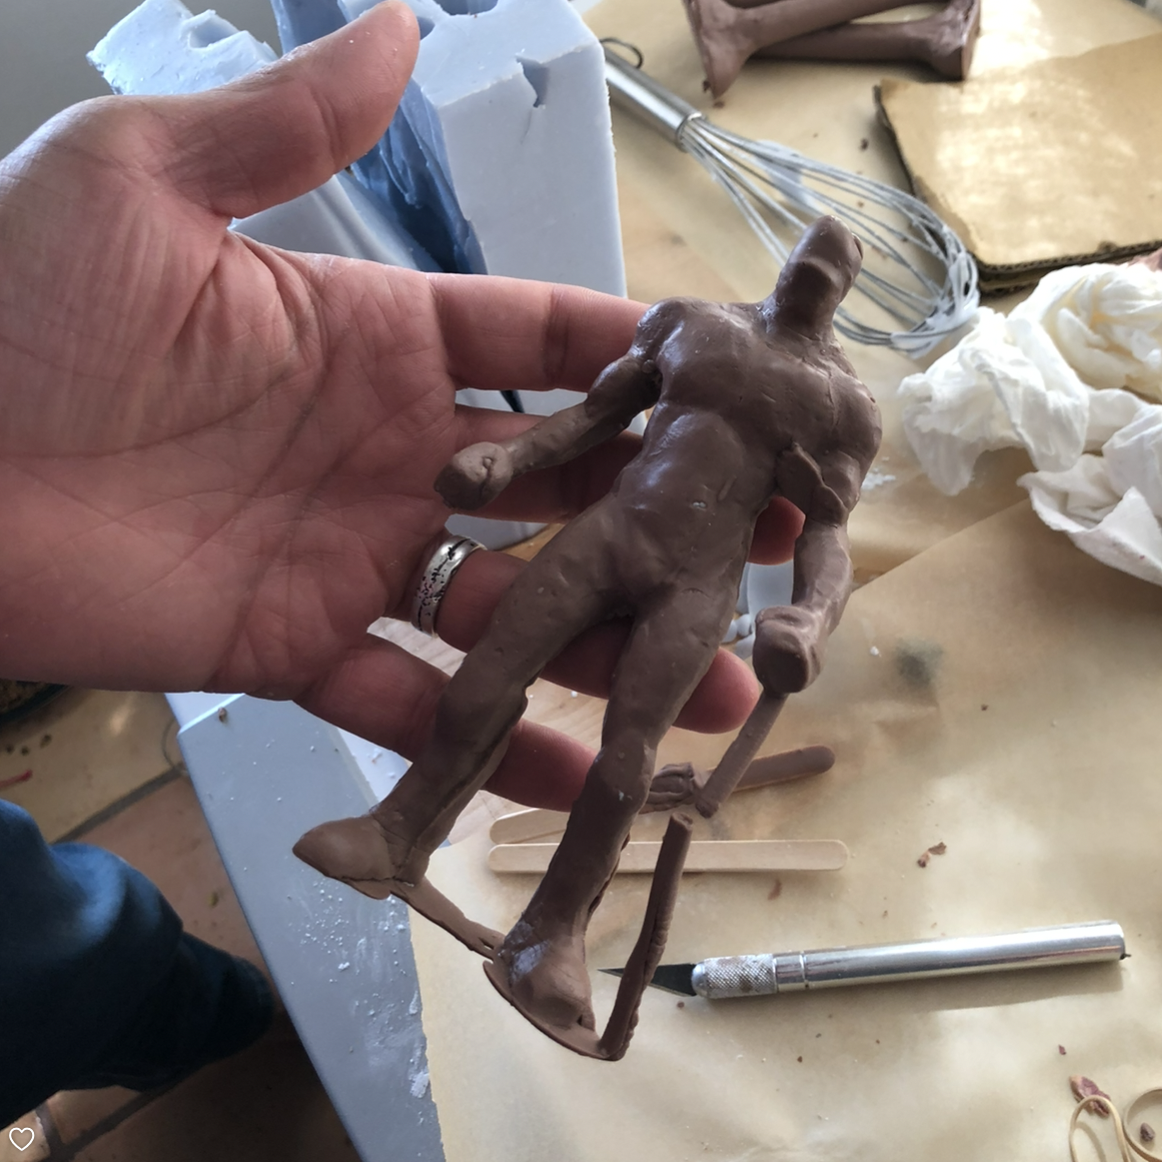
Drill out holes for the articular dowels. They can metal or wood.
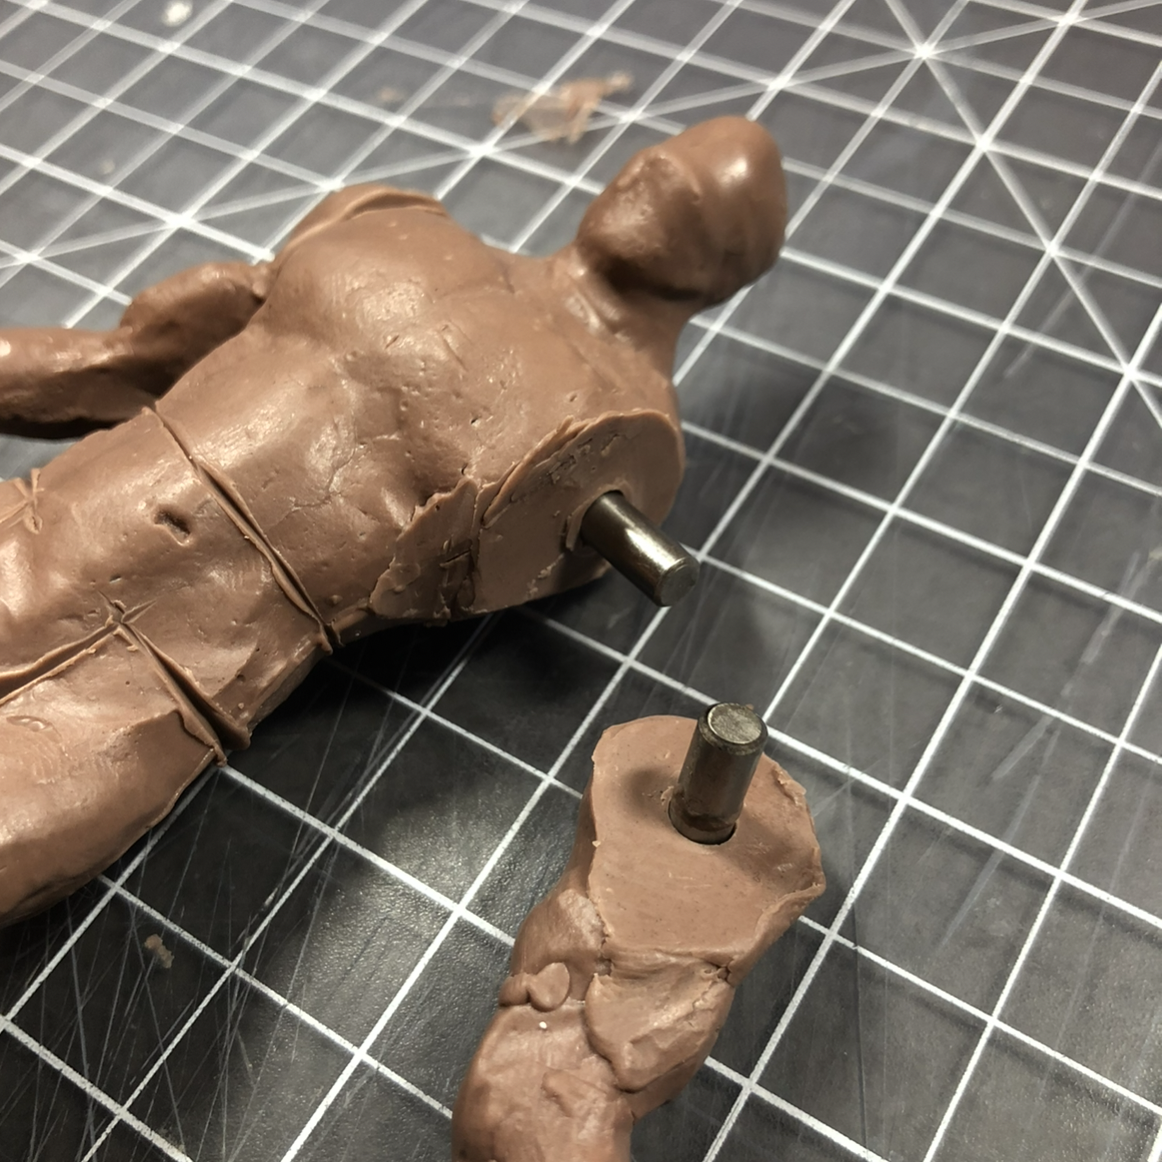
Heat the surface around the dowel to insert a metal or plastic disc. This will ensure the interface between joints is smooth and strong.