The DIY Action Figure Making Process
Overview
The following do-it-yourself process is modeled after the traditional prototyping methods typically followed at sculpture departments in major toy companies prior to 3D sculpting and printing. Specifically, these steps describe the design and production of 5-point articulation action figures, like those from the original Star Wars toy line. However these steps generally apply to any sculpture you want to produce copies of.
The high level steps of the DIY action figure making process are:
Design
Armature
Rough sculpt
Master sculpt
Production tooling
Painting
Packaging
Of course, this is just one of many variations on the process and by no means the ‘right’ or ‘best’ way. Experience level, time, money, and your imagination are all factors in the right process for you.
About the images on this page – These images are from a project by Johnathan Andersen, a.k.a. Kerf Loss, of a character from the 2018 sci-fi film, Prospect.
“In the fall of 2020, I had just begun researching Kenner’s prototyping process when I discovered the 2018 sci-fi film, Prospect. The character “Number 2” captured my imagination the moment I saw his helmet. The costume design was imbued with that early Star Wars era production design making him perfect for my first action figure.”
Design


If you’re reading this, you likely already have an idea for your action figure. Maybe it’s based on a character in a film or your favorite toy growing up. Or you’re a comic book artist and want to turn your drawings into toys.
No matter where you’re starting from, a good first step in the action figure making process is to understand what your toy will look like from all sides.
A turnaround drawing, like the one shown above, is a great tool for thinking about how your figure will look and how you want to produce it. This can reduce costly reworking in the sculpting phase if you realize later that you want to change some significant aspect of the design.
If you’re translating a well-known character to a toy form, the design step is a good opportunity to think about the aspects of the design that are essential to recognize the character.
In the end, a simpler design will save time in production.
Download a Turnaround Drawing Template (PDF)
Armature
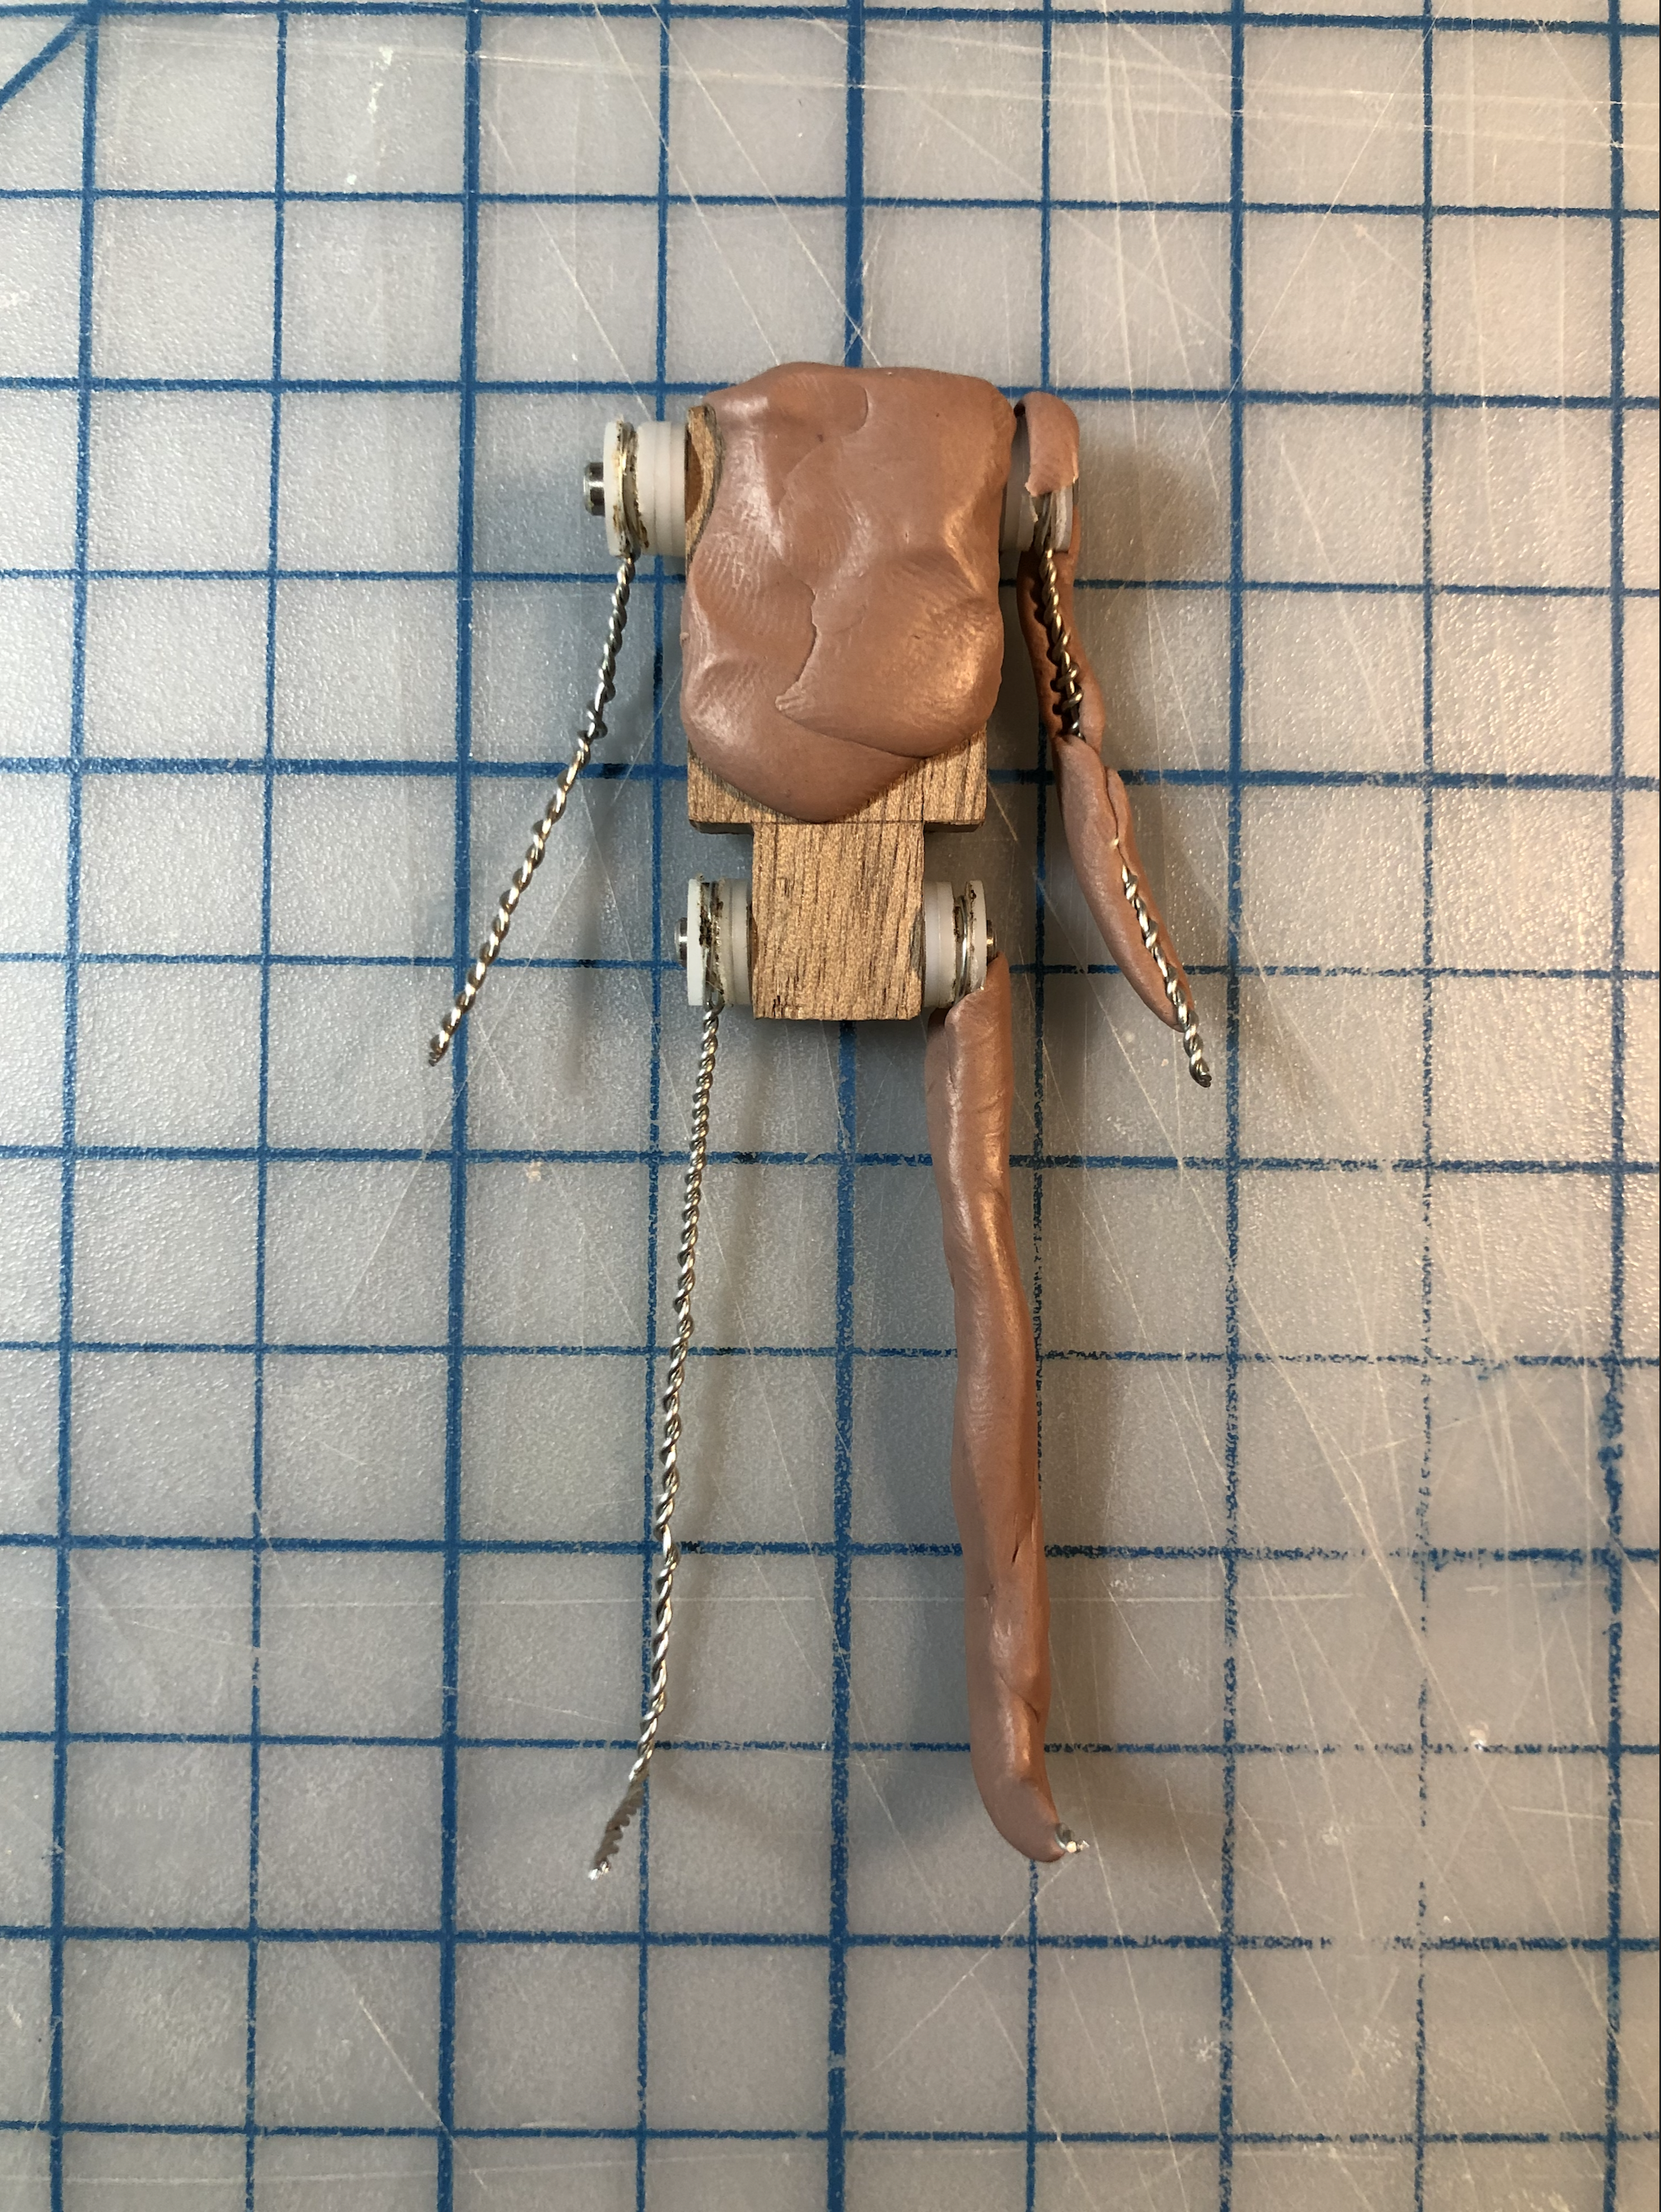

The armature is the foundation of your rough sculpt. When working with soft clays, the armature provides support throughout the figure. If your toy is articulated, adding articulation to your armature allows you to build your sculpt with the understanding of how the individual parts move together.
Articulated armatures have the added benefit of being able to remove the appendages, allowing them to be sculpted in-the-round and ultimately facilitates the production process.
At Kenner Toys, they used an armature similar the design shown above. It features a torso ‘buck’ and removable articulated wire appendages.
*Stay tuned for future articles on different types of armatures and how to make your own.
Rough Sculpt


The clay rough is used to establish the base form of the figure and major details. Clay is a much faster medium to work in than wax, allowing sculptors to efficiently adjust proportions and model more expressive aspects of the design, such as clothing.
Master Sculpt


The master sculpt is where all the details are honed in and the parts are optimized for production.
Depending on the clay you used in the rough sculpt, you may choose to make a wax casting, allowing you to refine the details in a more rigid medium.
Learn more: About Wax Sculpting
However, if the clay you use in the rough sculpt can be refined to a quality you’re satisfied with, your rough sculpt becomes your master sculpt the more you refine it.
The master sculpt is also the last opportunity to ensure each part of your figure is ready for production. Consider the production molding and casting materials and methods to ensure you don’t run into any issues in later steps. For example, in a factory production setting, the parting line for the steel production mold would be refined using a nest mold and a piece of graphite to mark the mid-line of each piece.
Wax Sculpting
If you’re not satisfied with the level of detail you can achieve with your rough sculpt clay, then consider creating a mold of your clay figure and casting a copy in wax. Sculpting wax can only be carved with hard tools and requires melting to add wax to an existing piece. It can take the finest of details and be polished to a shiny finish. It also won’t take finger prints, giving you a level of control that surpasses soft clays.
Learn more: Mold Making for Wax Casting
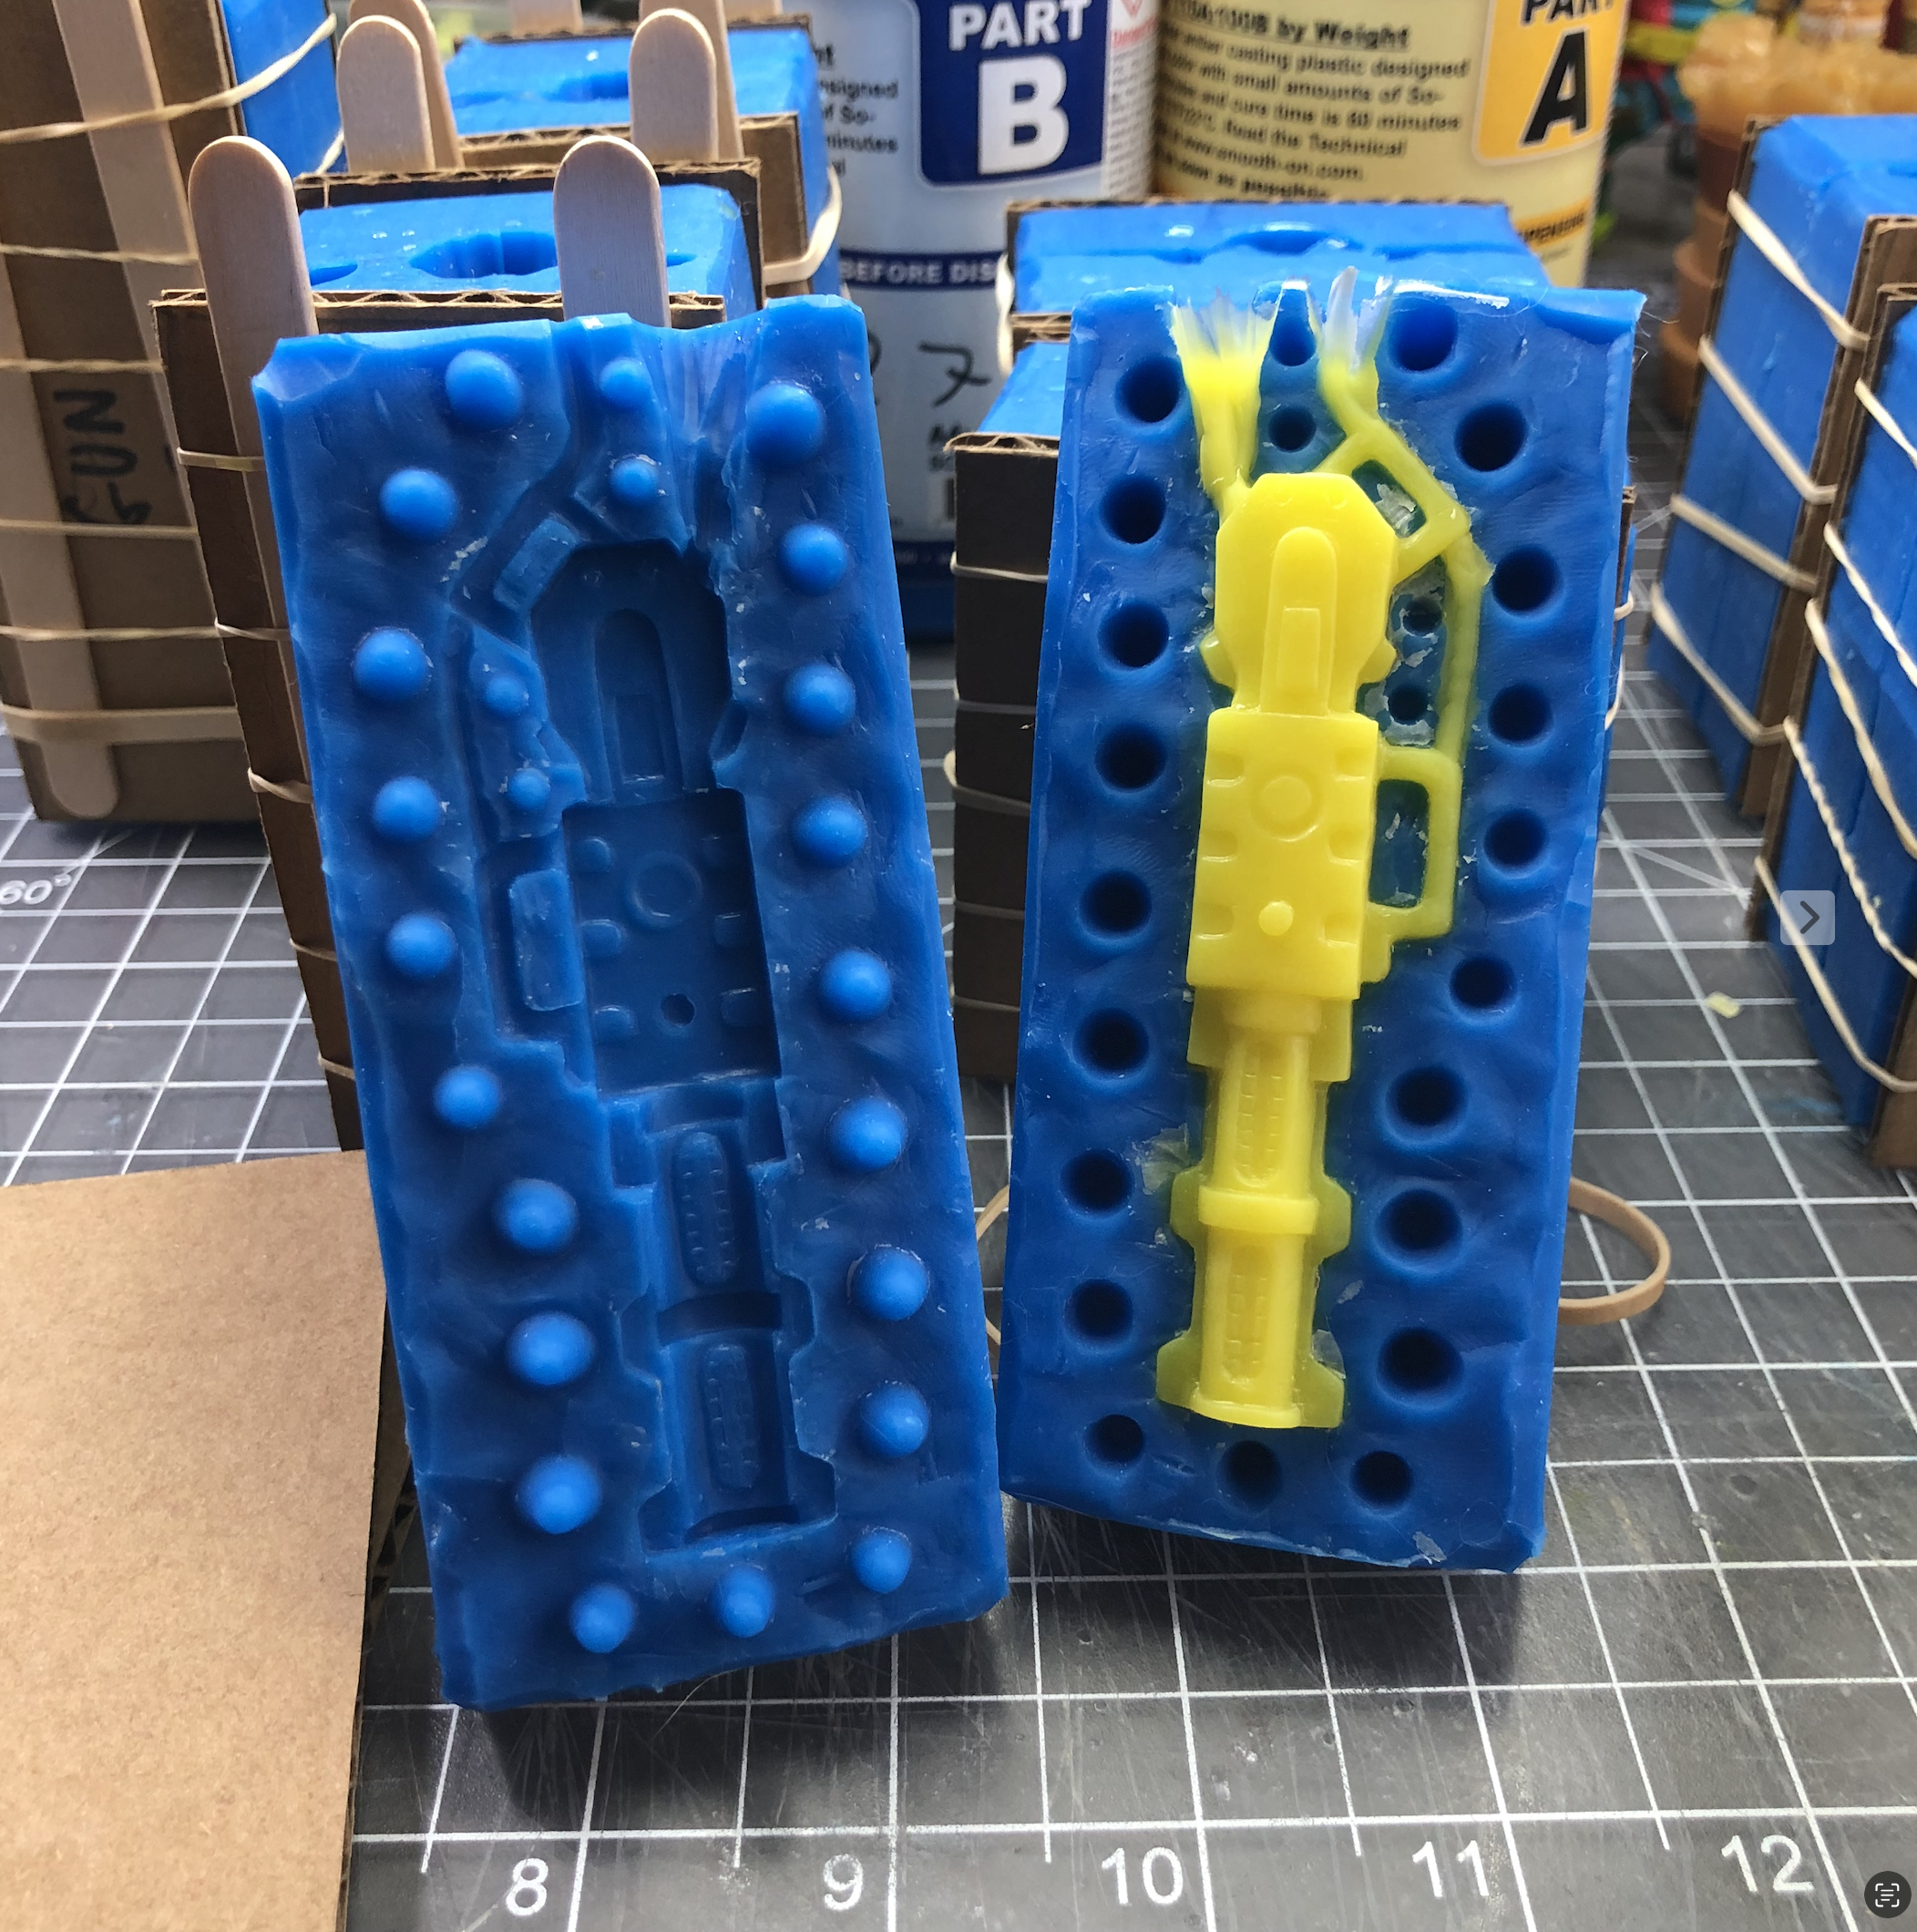
Production Tooling


If you want to produce multiple copies of your action figure, you’ll need to make molds. Silicone used for mold-making comes in many varieties that differ in pot life, cure time, and hardness among other properties. The design of your parts, the method of mold-making, and the number of copies you produce all factor into the silicone you choose and how your molds are designed.
*Stay tuned for future articles on silicone mold-making that will discuss these factors in more depth.
Resin Hardcopy

In a real-world production setting, the resin hardcopy serves as a durable master for the production of factory-made steel molds as well as a paint master for factory paint applications.
For the DIY maker however, the resin hardcopies are the final form of the action figure. At this point, the production articulation method can be applied and tested and any last adjustments made before painting.
*Stay tuned for future articles on articulation methods.
Painting


Painting your action figures is a chance to create an iconic look with your choice of colors, painting techniques, and finishes. It’s the final touch that makes them feel real in your hands, calling back to those childhood memories.
Before you start painting, it’s a good idea to experiment with colors and techniques. Painting multiple figures is a time consuming process, so this can be a valuable step in understanding the time and material investment needed.
When painting multiple figures, think about the process like a production line: paint each spot with a single color for each piece before moving on to the next. This reduces cleaning time between colors and adjusting handling for each part.
In the pictures above, each figure + accessories took over an hour and a half total, using 6 different colors. Needless to say, it would have taken much longer if each figures were painting completely before moving on to the next.
Packaging


Packaging comes in all shapes and sizes. It can vary from simply plastic zip-lock pouches with card inserts to window boxes with elaborate 360° artwork. If you’re looking for the classic 6x9 cardback with plastic blisters, there are a number of suppliers that offer standard and custom blister sizes. And don’t forget the sombrero hole punch!