Wax Casting
Preparing molds for casting
Preheat your molds
Preheating your molds can improve the flow of wax and minimize chill lines (see more on these below).
You can do this by leaving them out in the sun for a few hours or by opening them up and using a heat gun or a hair dryer.
Secure your molds
Make sure your molds are supported well with rubber bands, straps, or whatever you’re using to hold the different mold parts together. If you’re injecting wax, it’s especially important that you secure your mold as unexpected pressure of wax filling the mold can separate the mold parts.
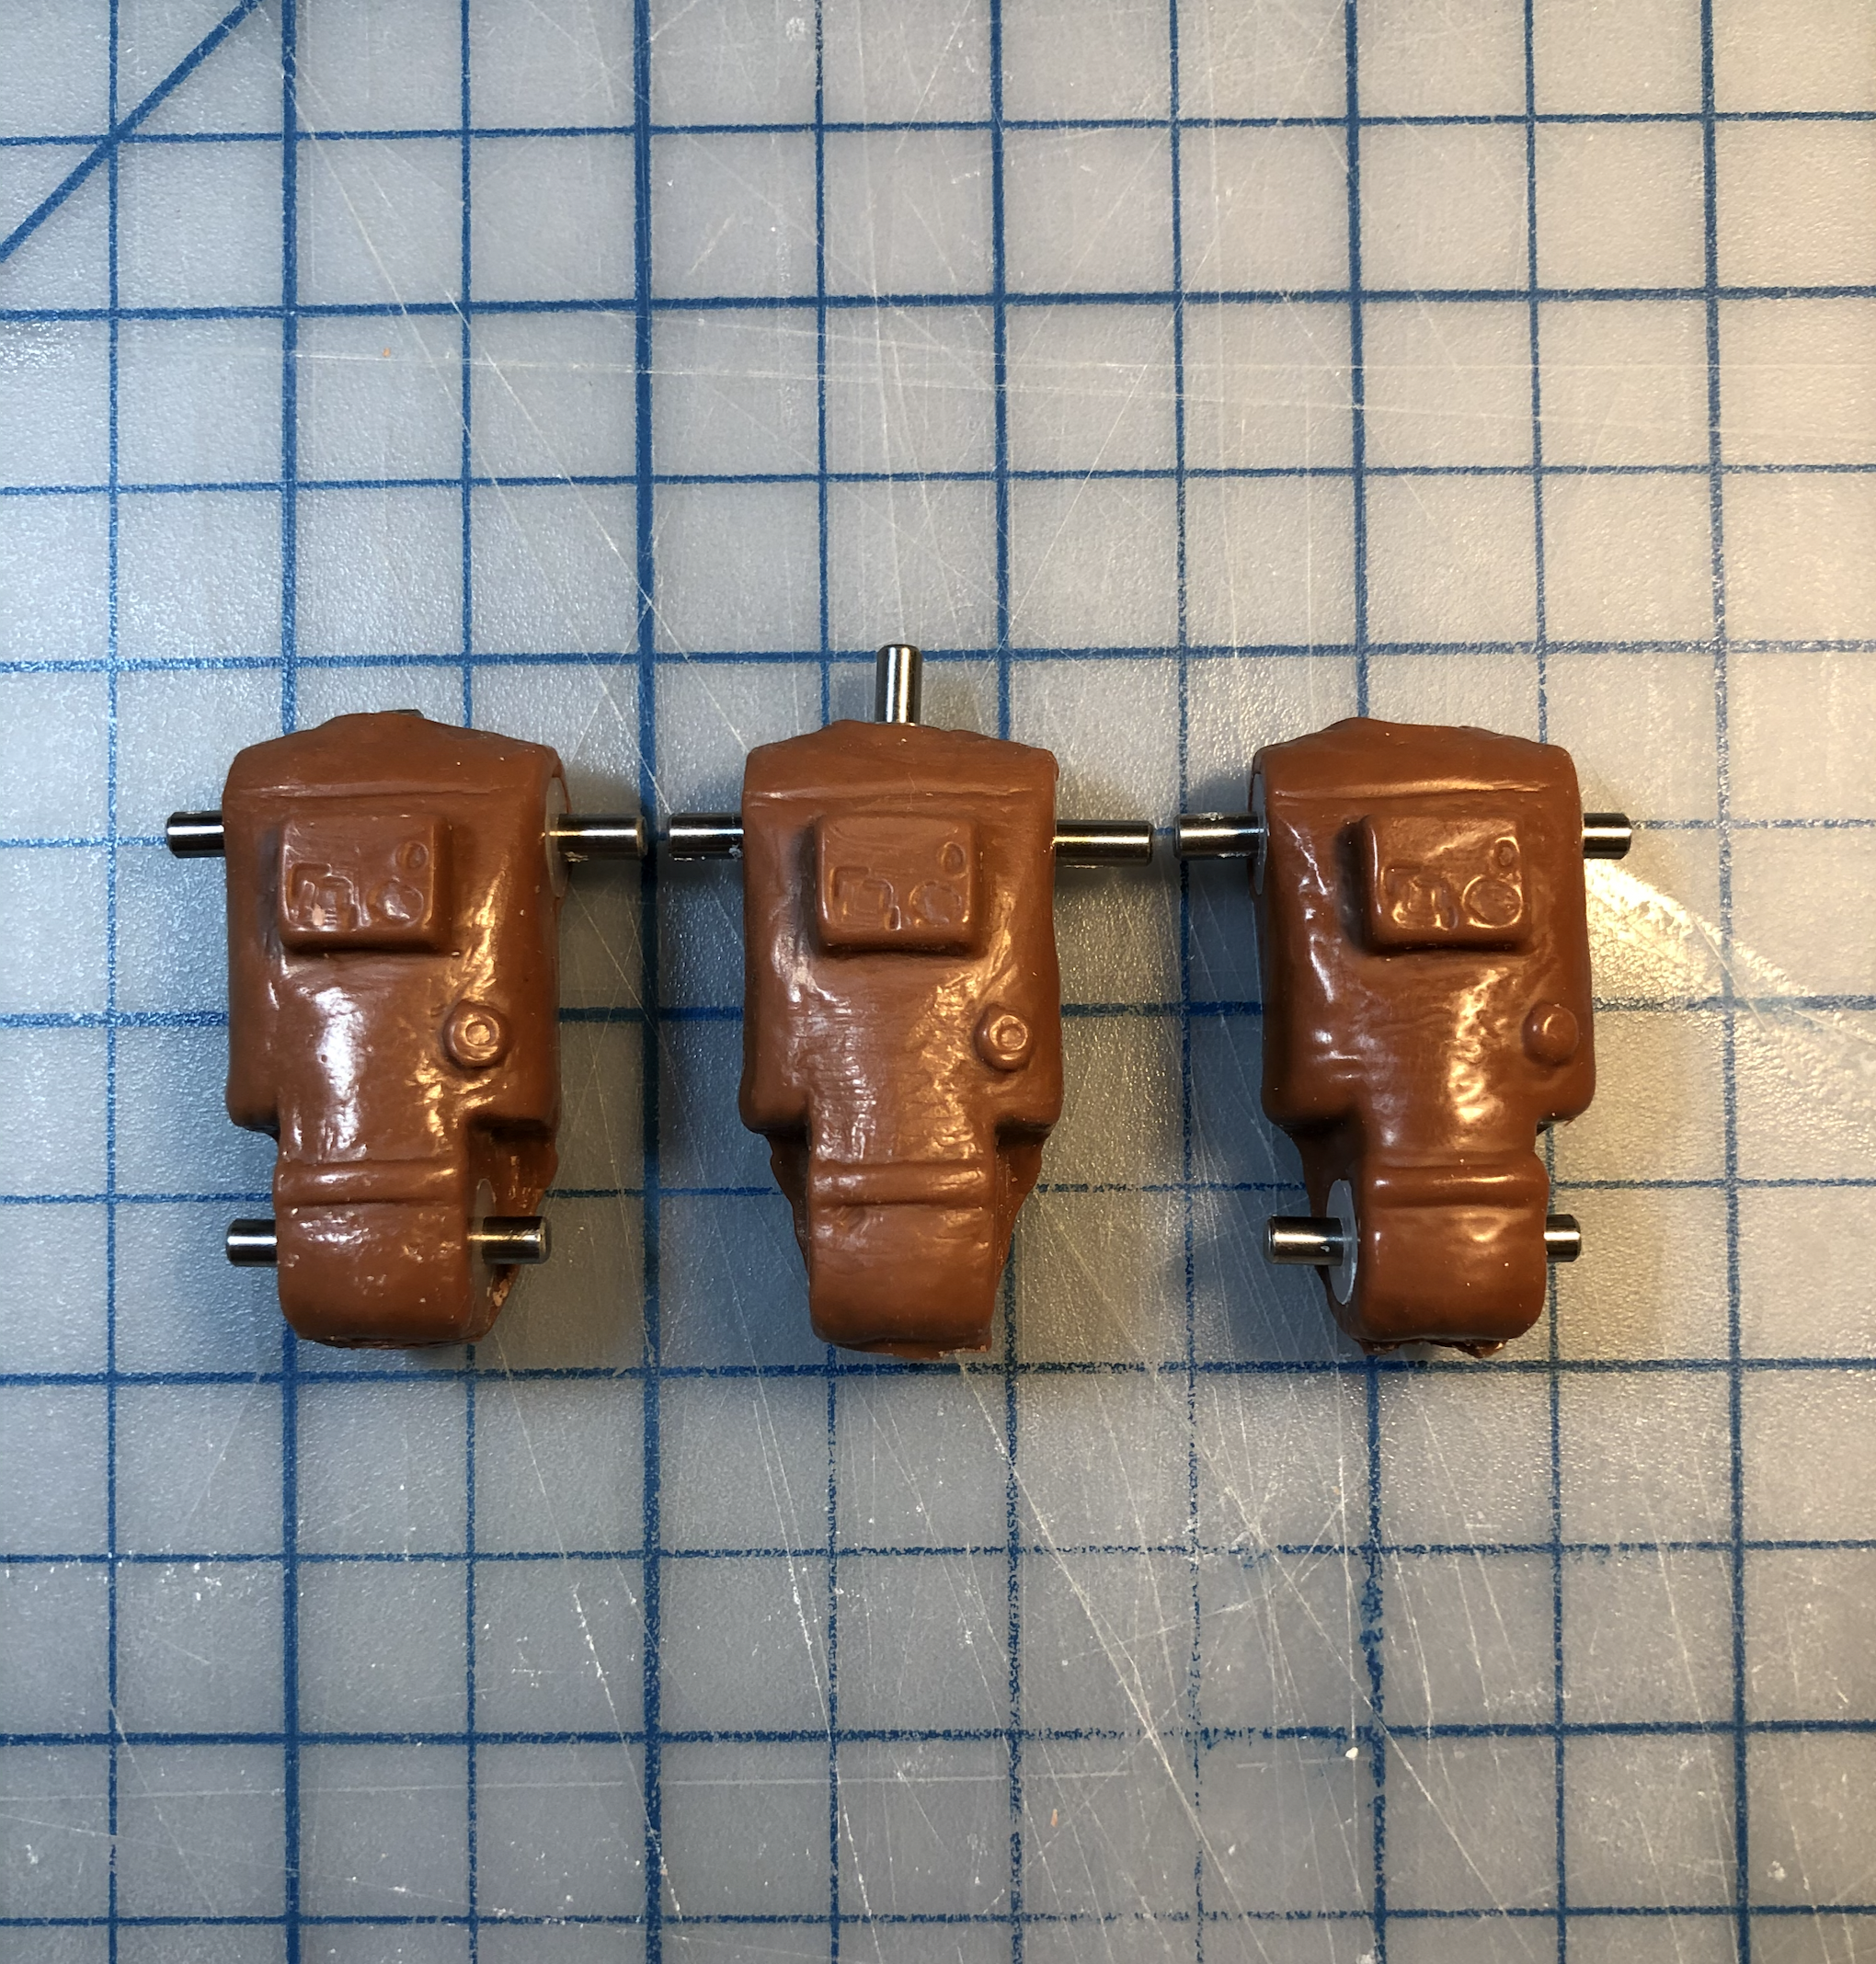
You’ll also want them to be fairly level, and ganged up with other molds you plan to pour so you can quickly move from one mold to the next
Have backups
Take the time now to set it all out and get things perfect. Throw in a few extra dump molds for your excess just like you would with resin. I have a few molds of generic action figure parts in different scales I like to use for the basis of future custom sculpts.
Or pour out the remaining wax into a container and throw it back into your melting pot.
Casting Techniques
CAUTION – Melted wax can burn your skin. Wear protective clothing. Also, wear protective eye wear. Syringes can become blocked due to cooling wax. Do not force a syringe of hot wax.
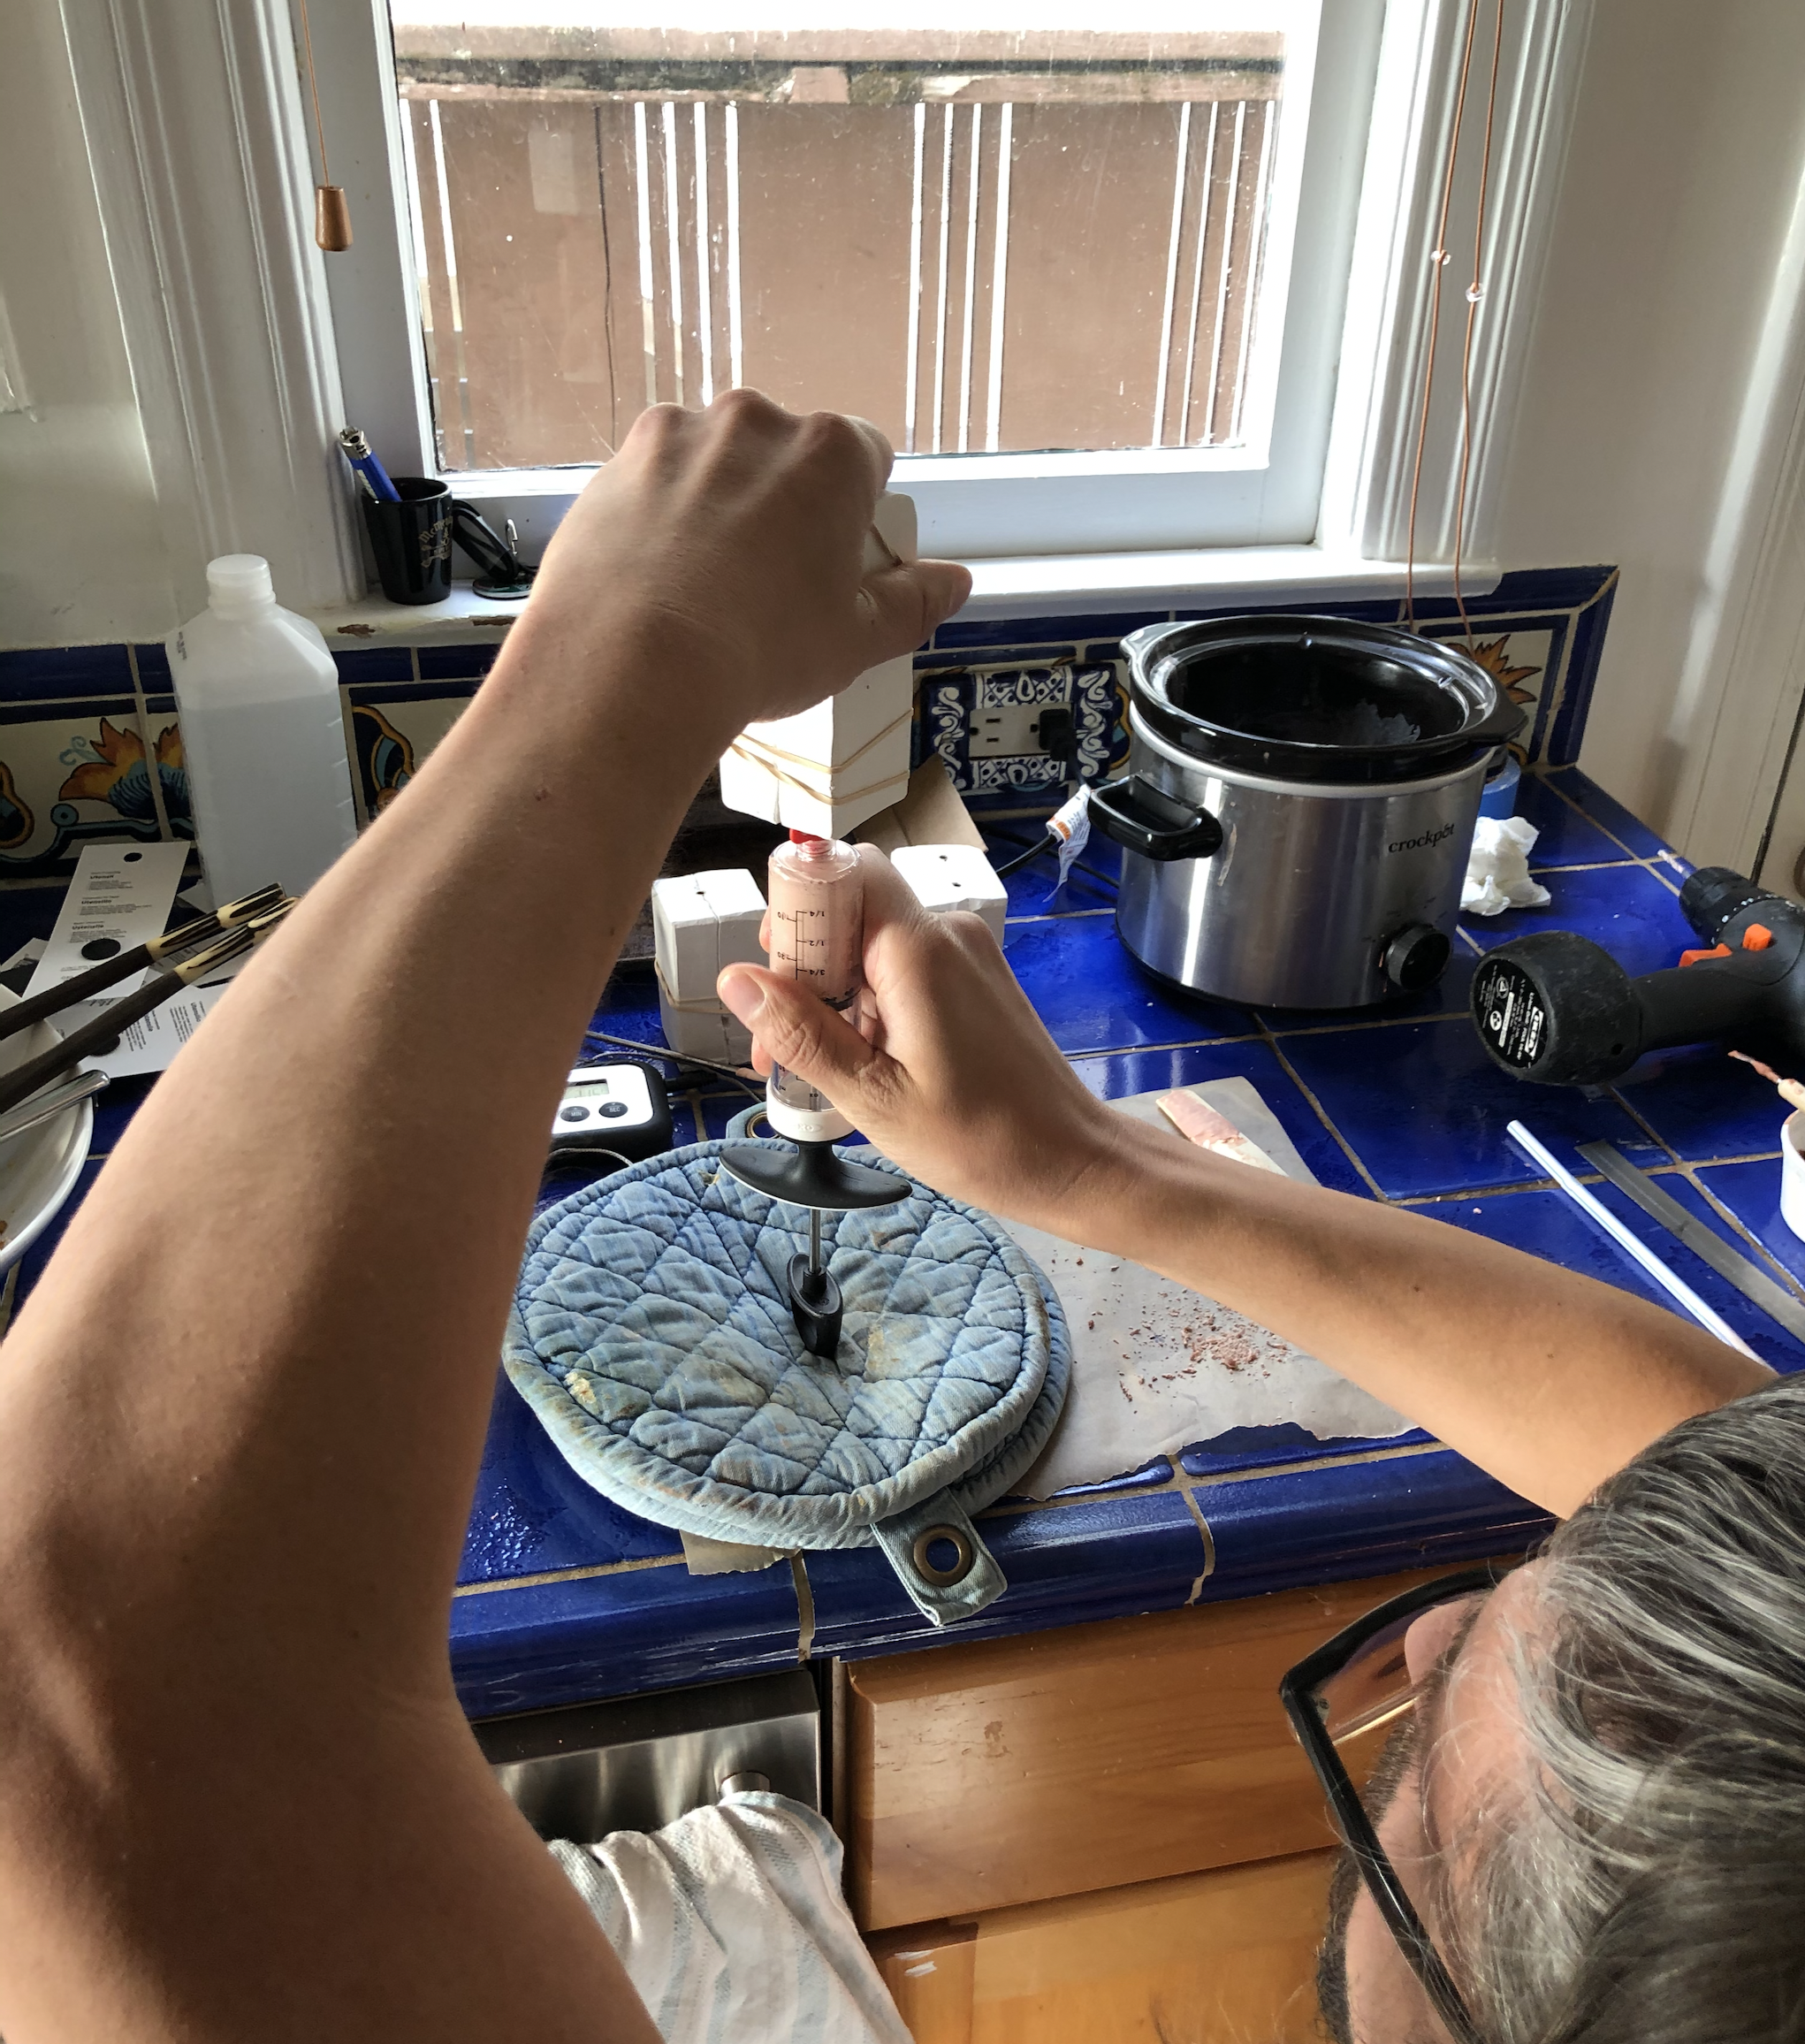
Casting small parts with syringe injection
The following video demonstrates the wax casting process with injection into plaster molds.
The diameter of your syringe affects how easily your wax will flow, so find large gauge syringe tips or trim them down at an angle to increase the diameter.

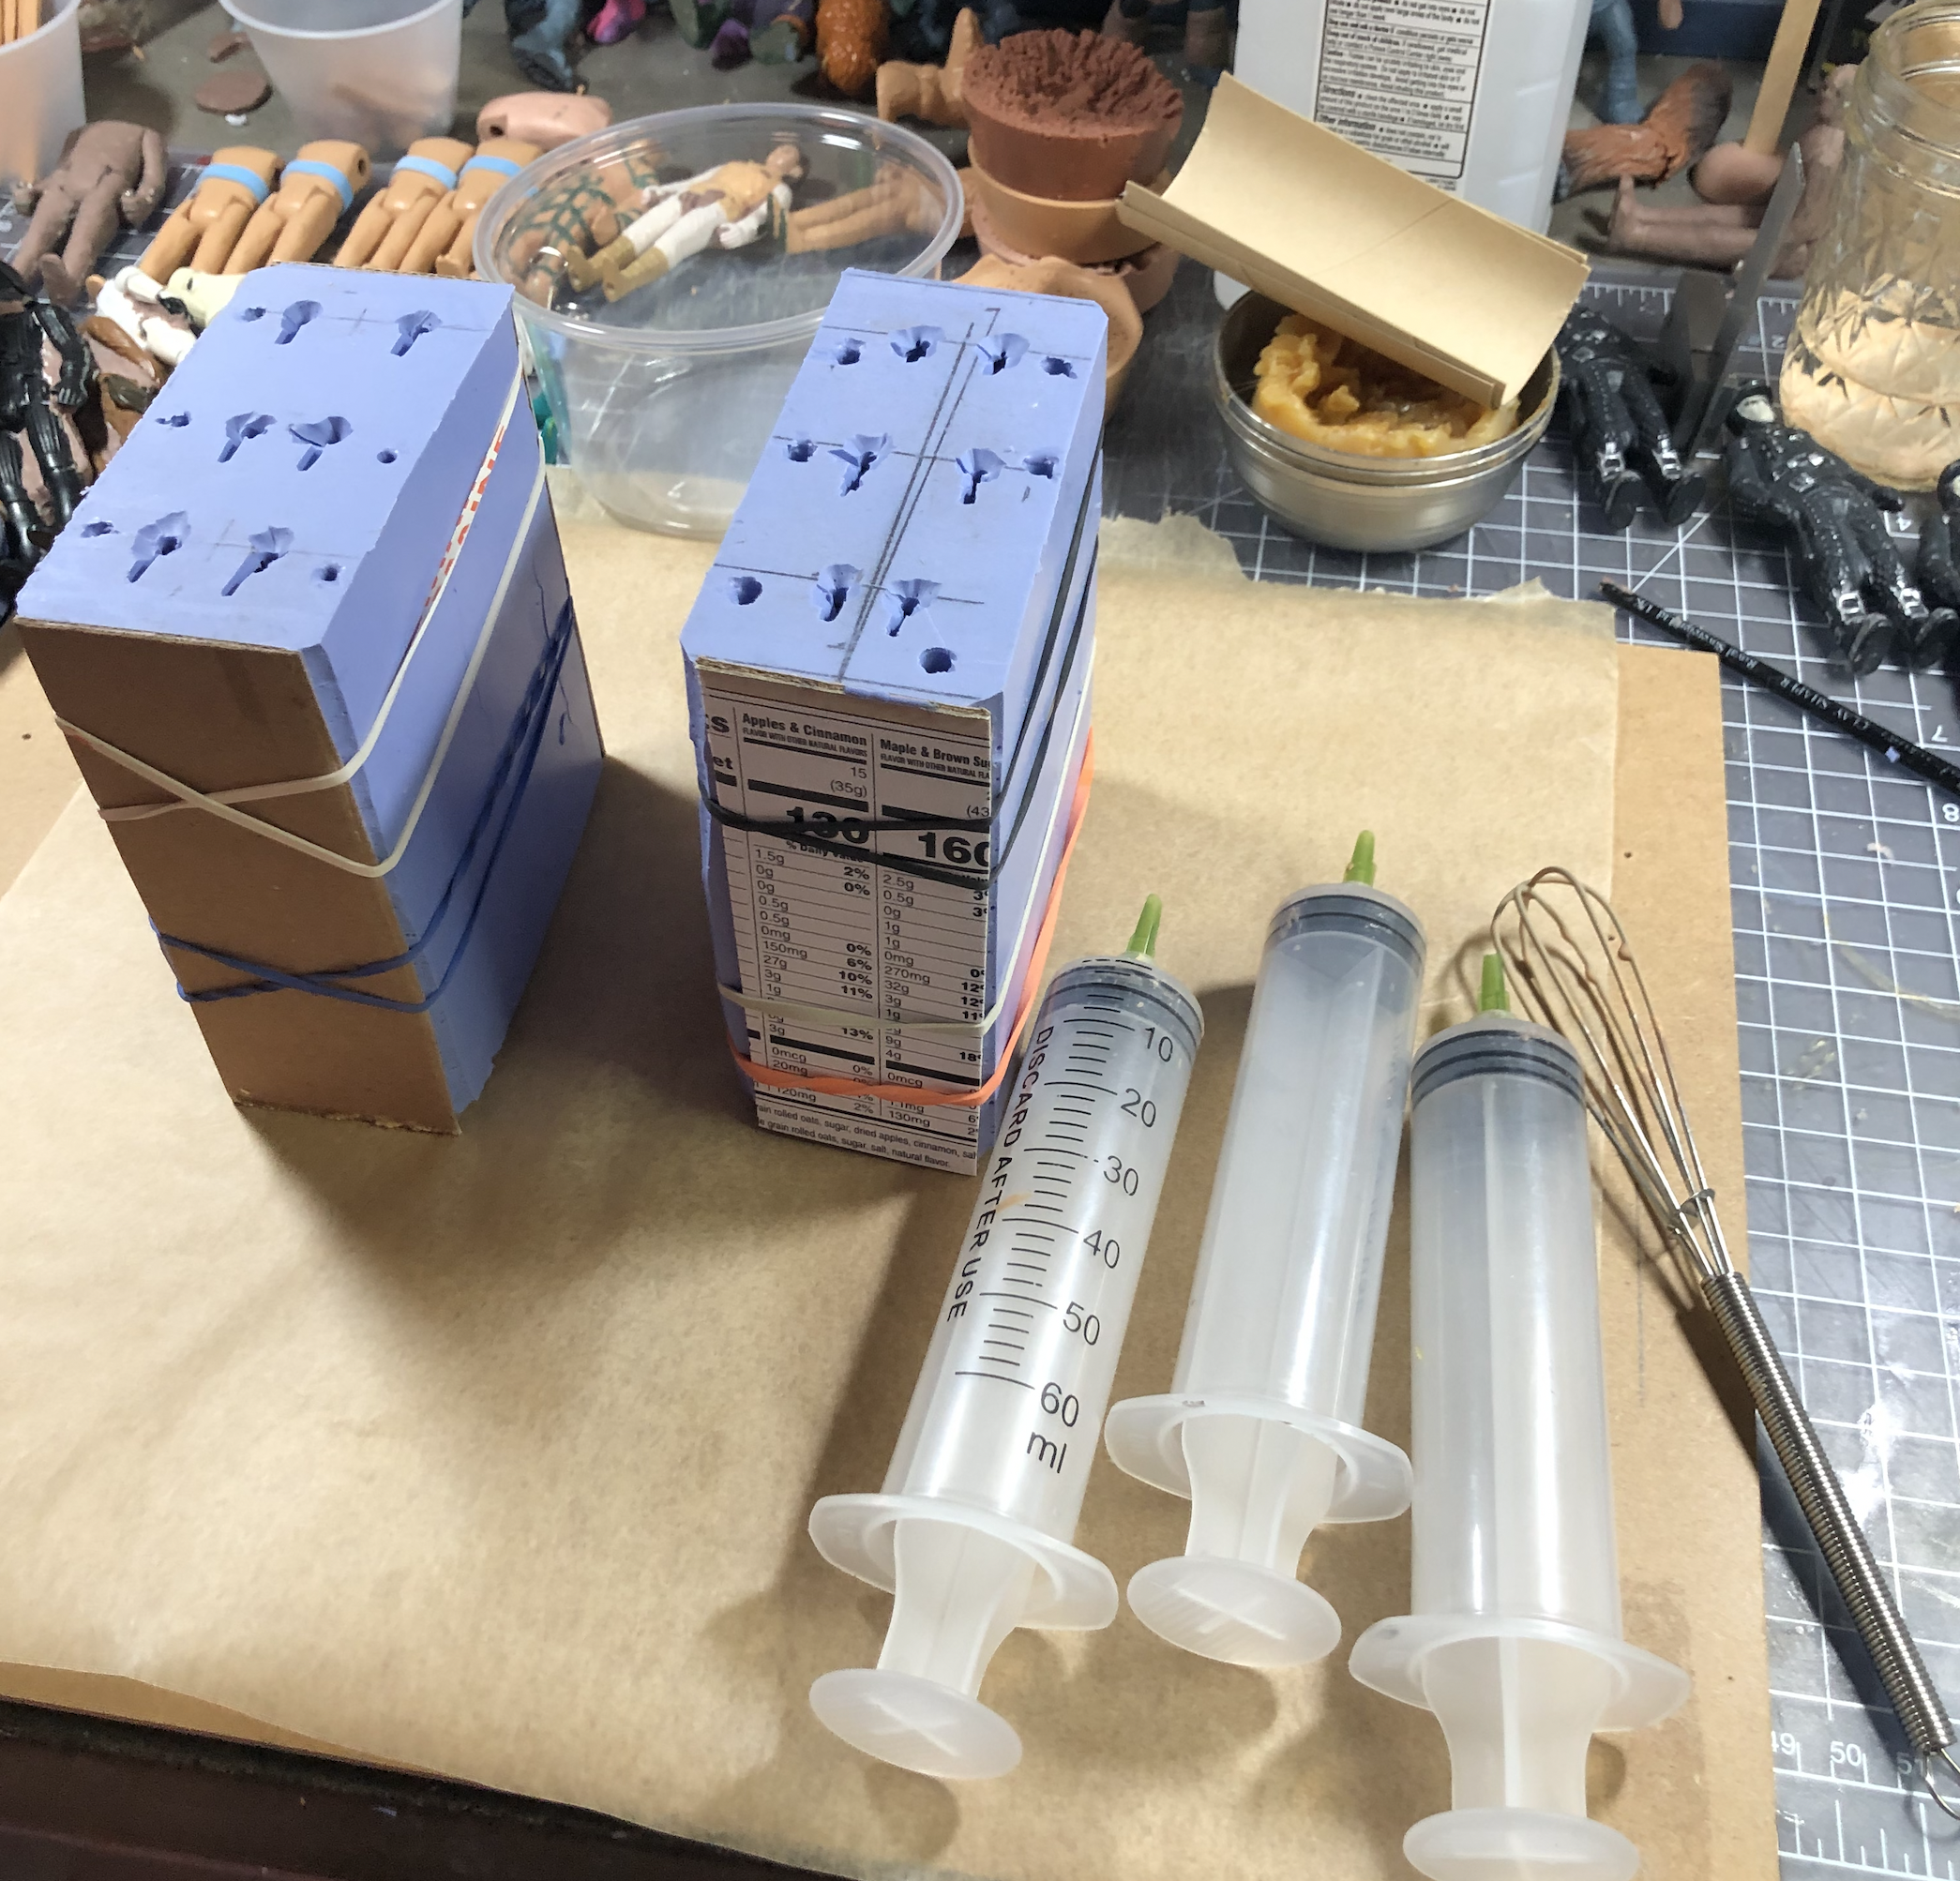
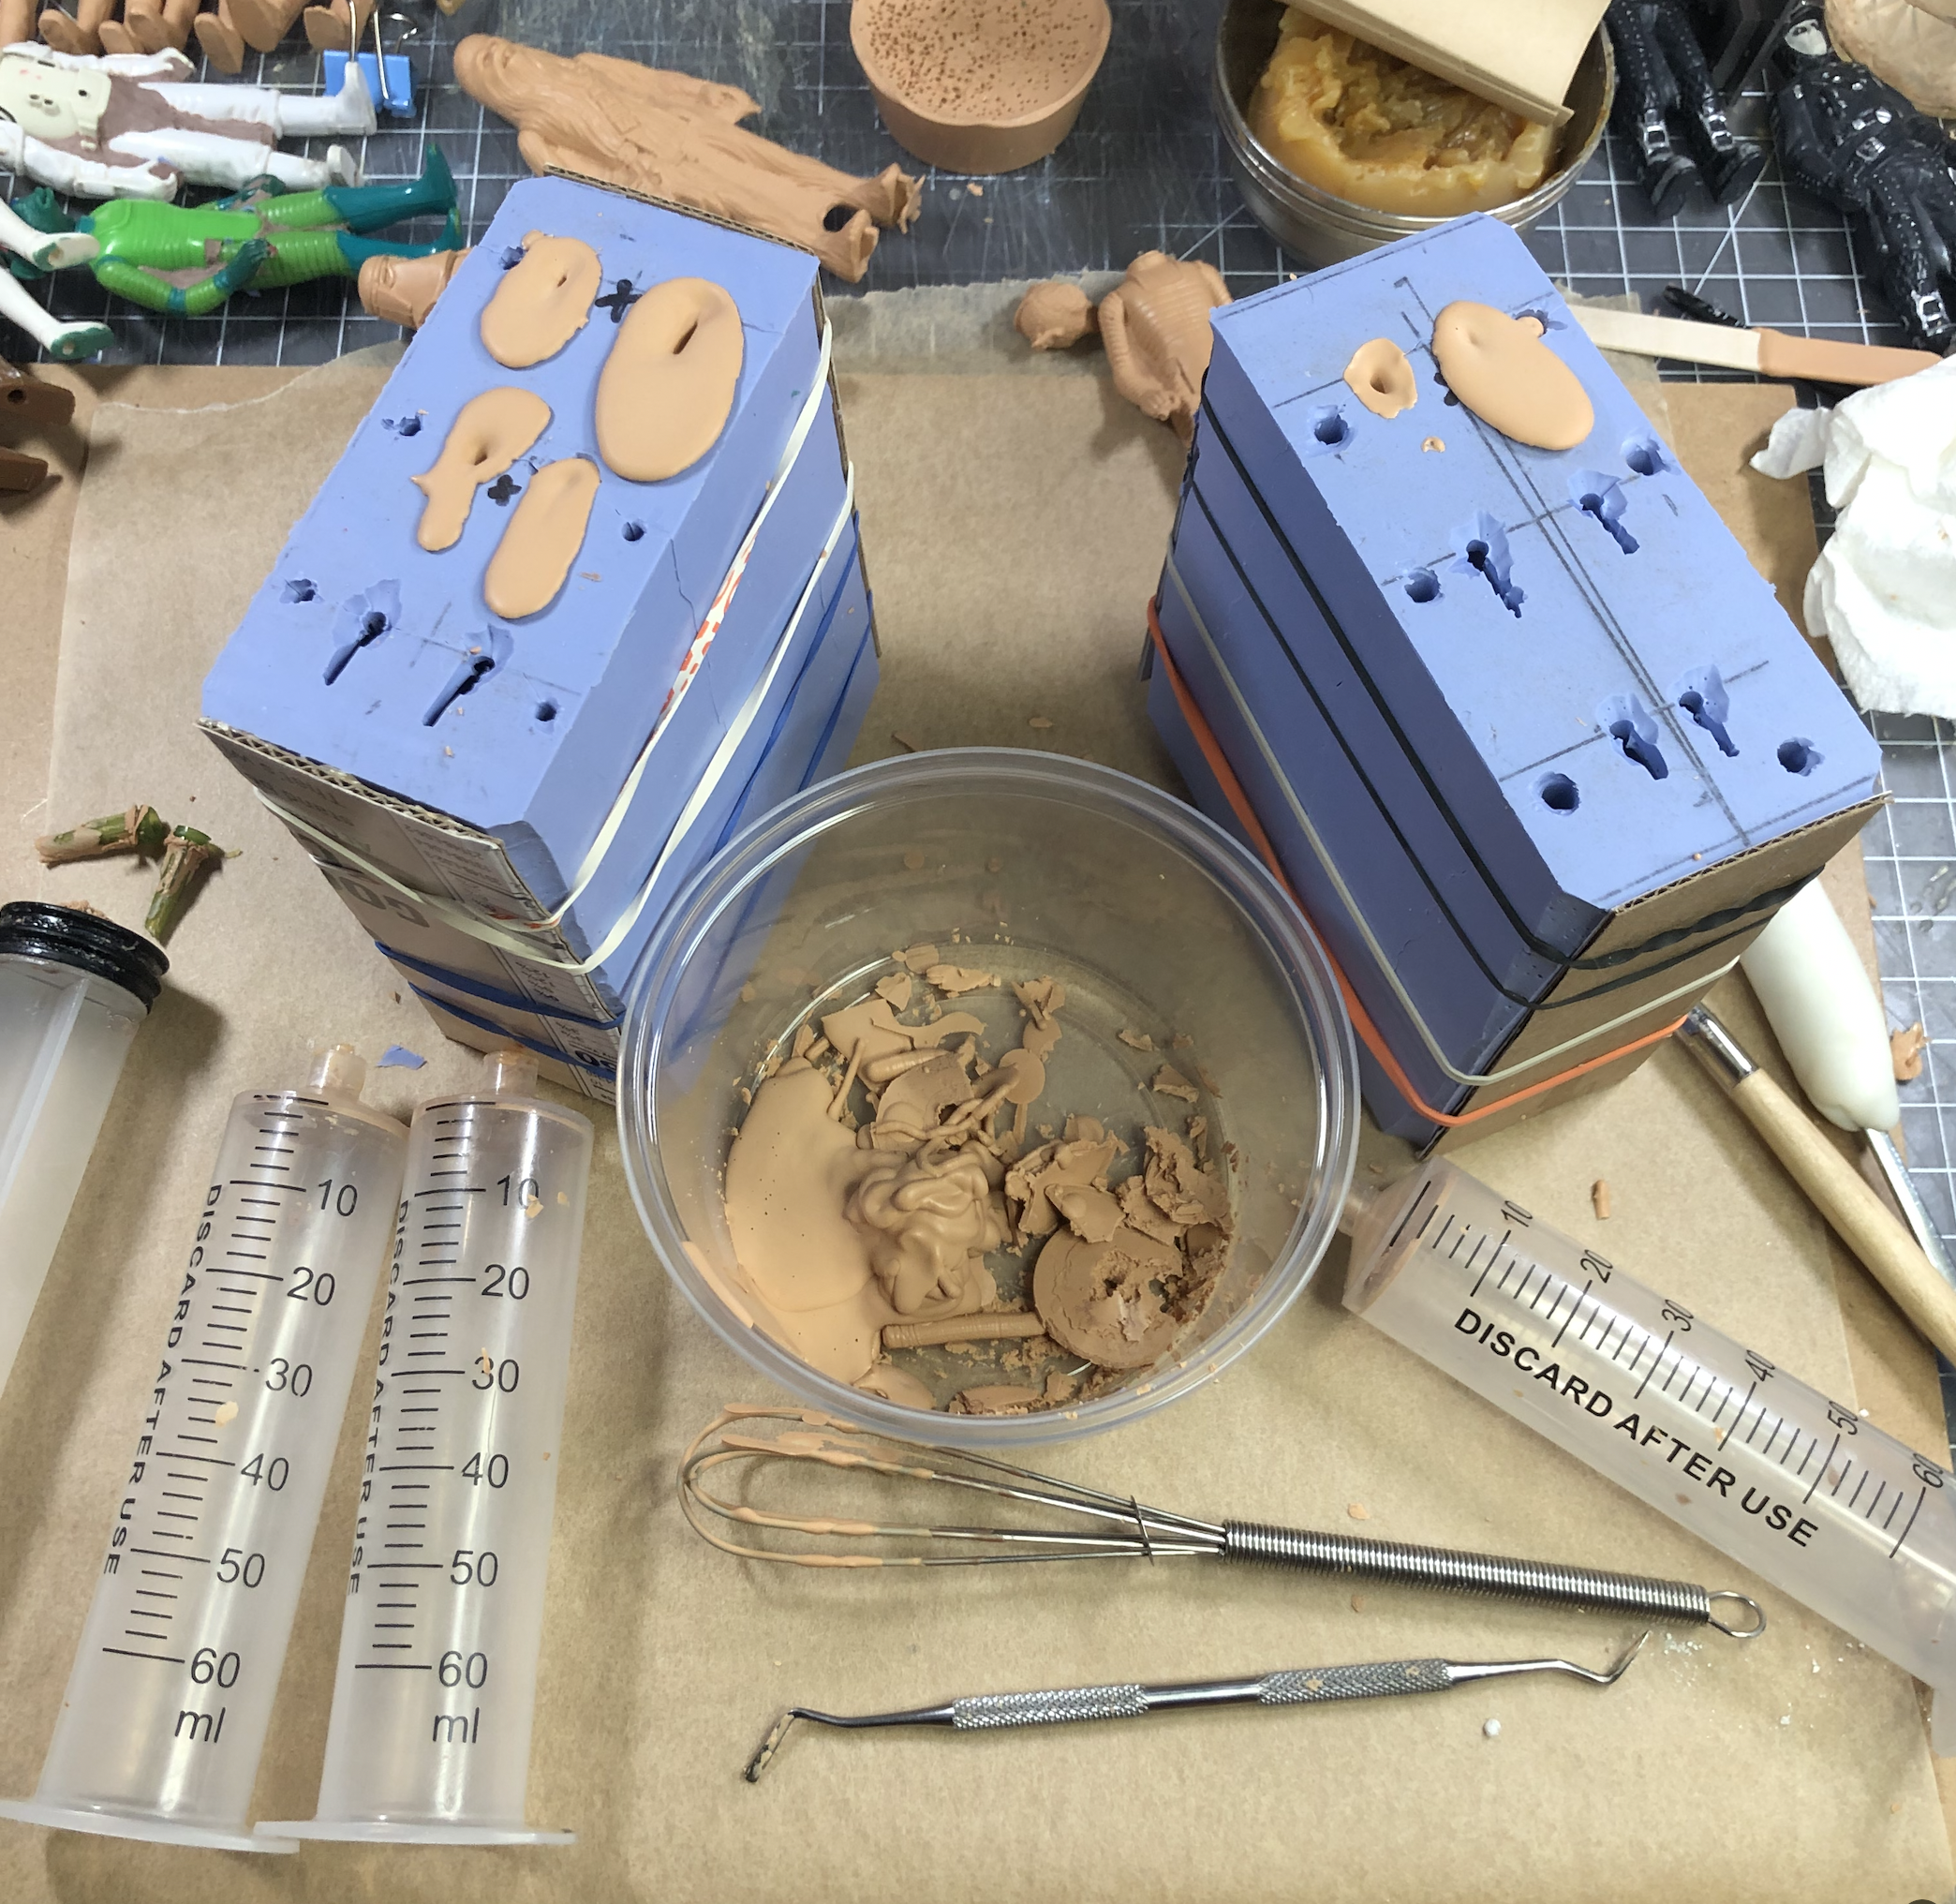
The images below highlight a wax casting set up in which multiple molds need to be filled.
In the first image, multiple syringes are prepared. In our experience, you only get one push from a syringe before the wax cools, so if your mold requires more than one shot of wax, be prepared with clean syringes ready to draw up the next shot.
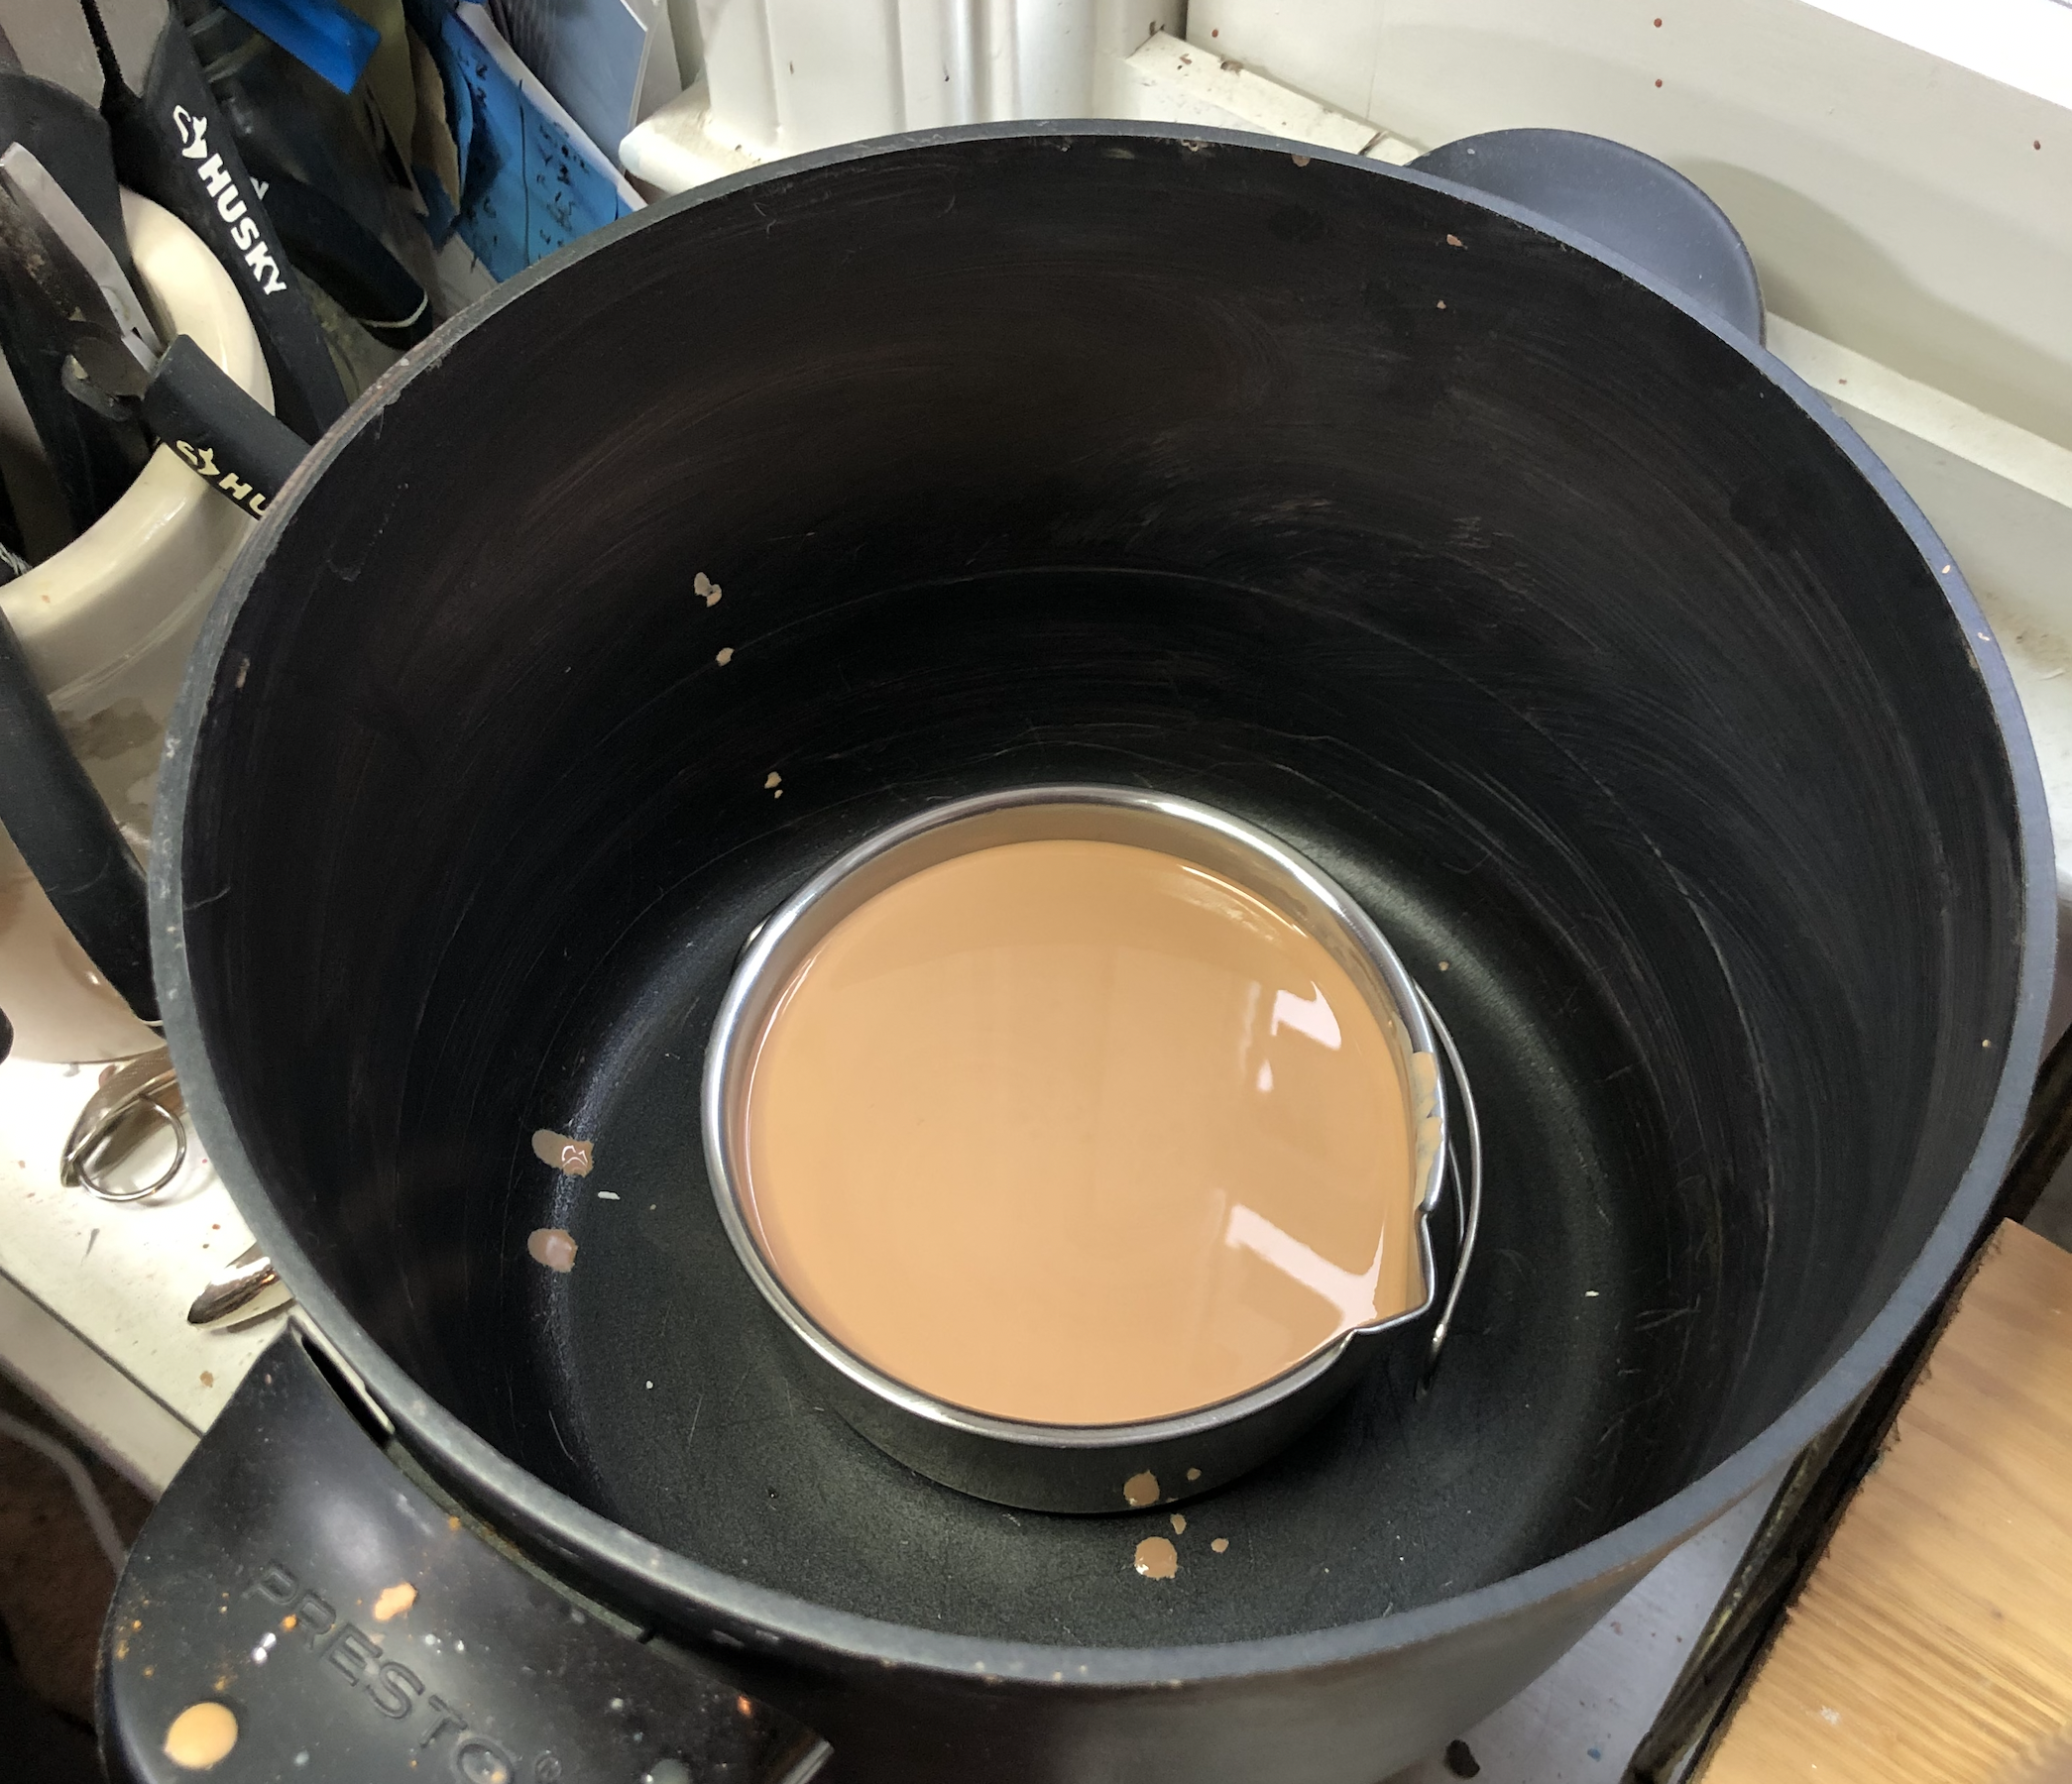
In the second image you’ll see a small, deep dish used to melt the wax. This reduces the chances that drawing the wax into the syringe will result in sucking air. Otherwise the wax would have been too shallow in the base of the black kettle.
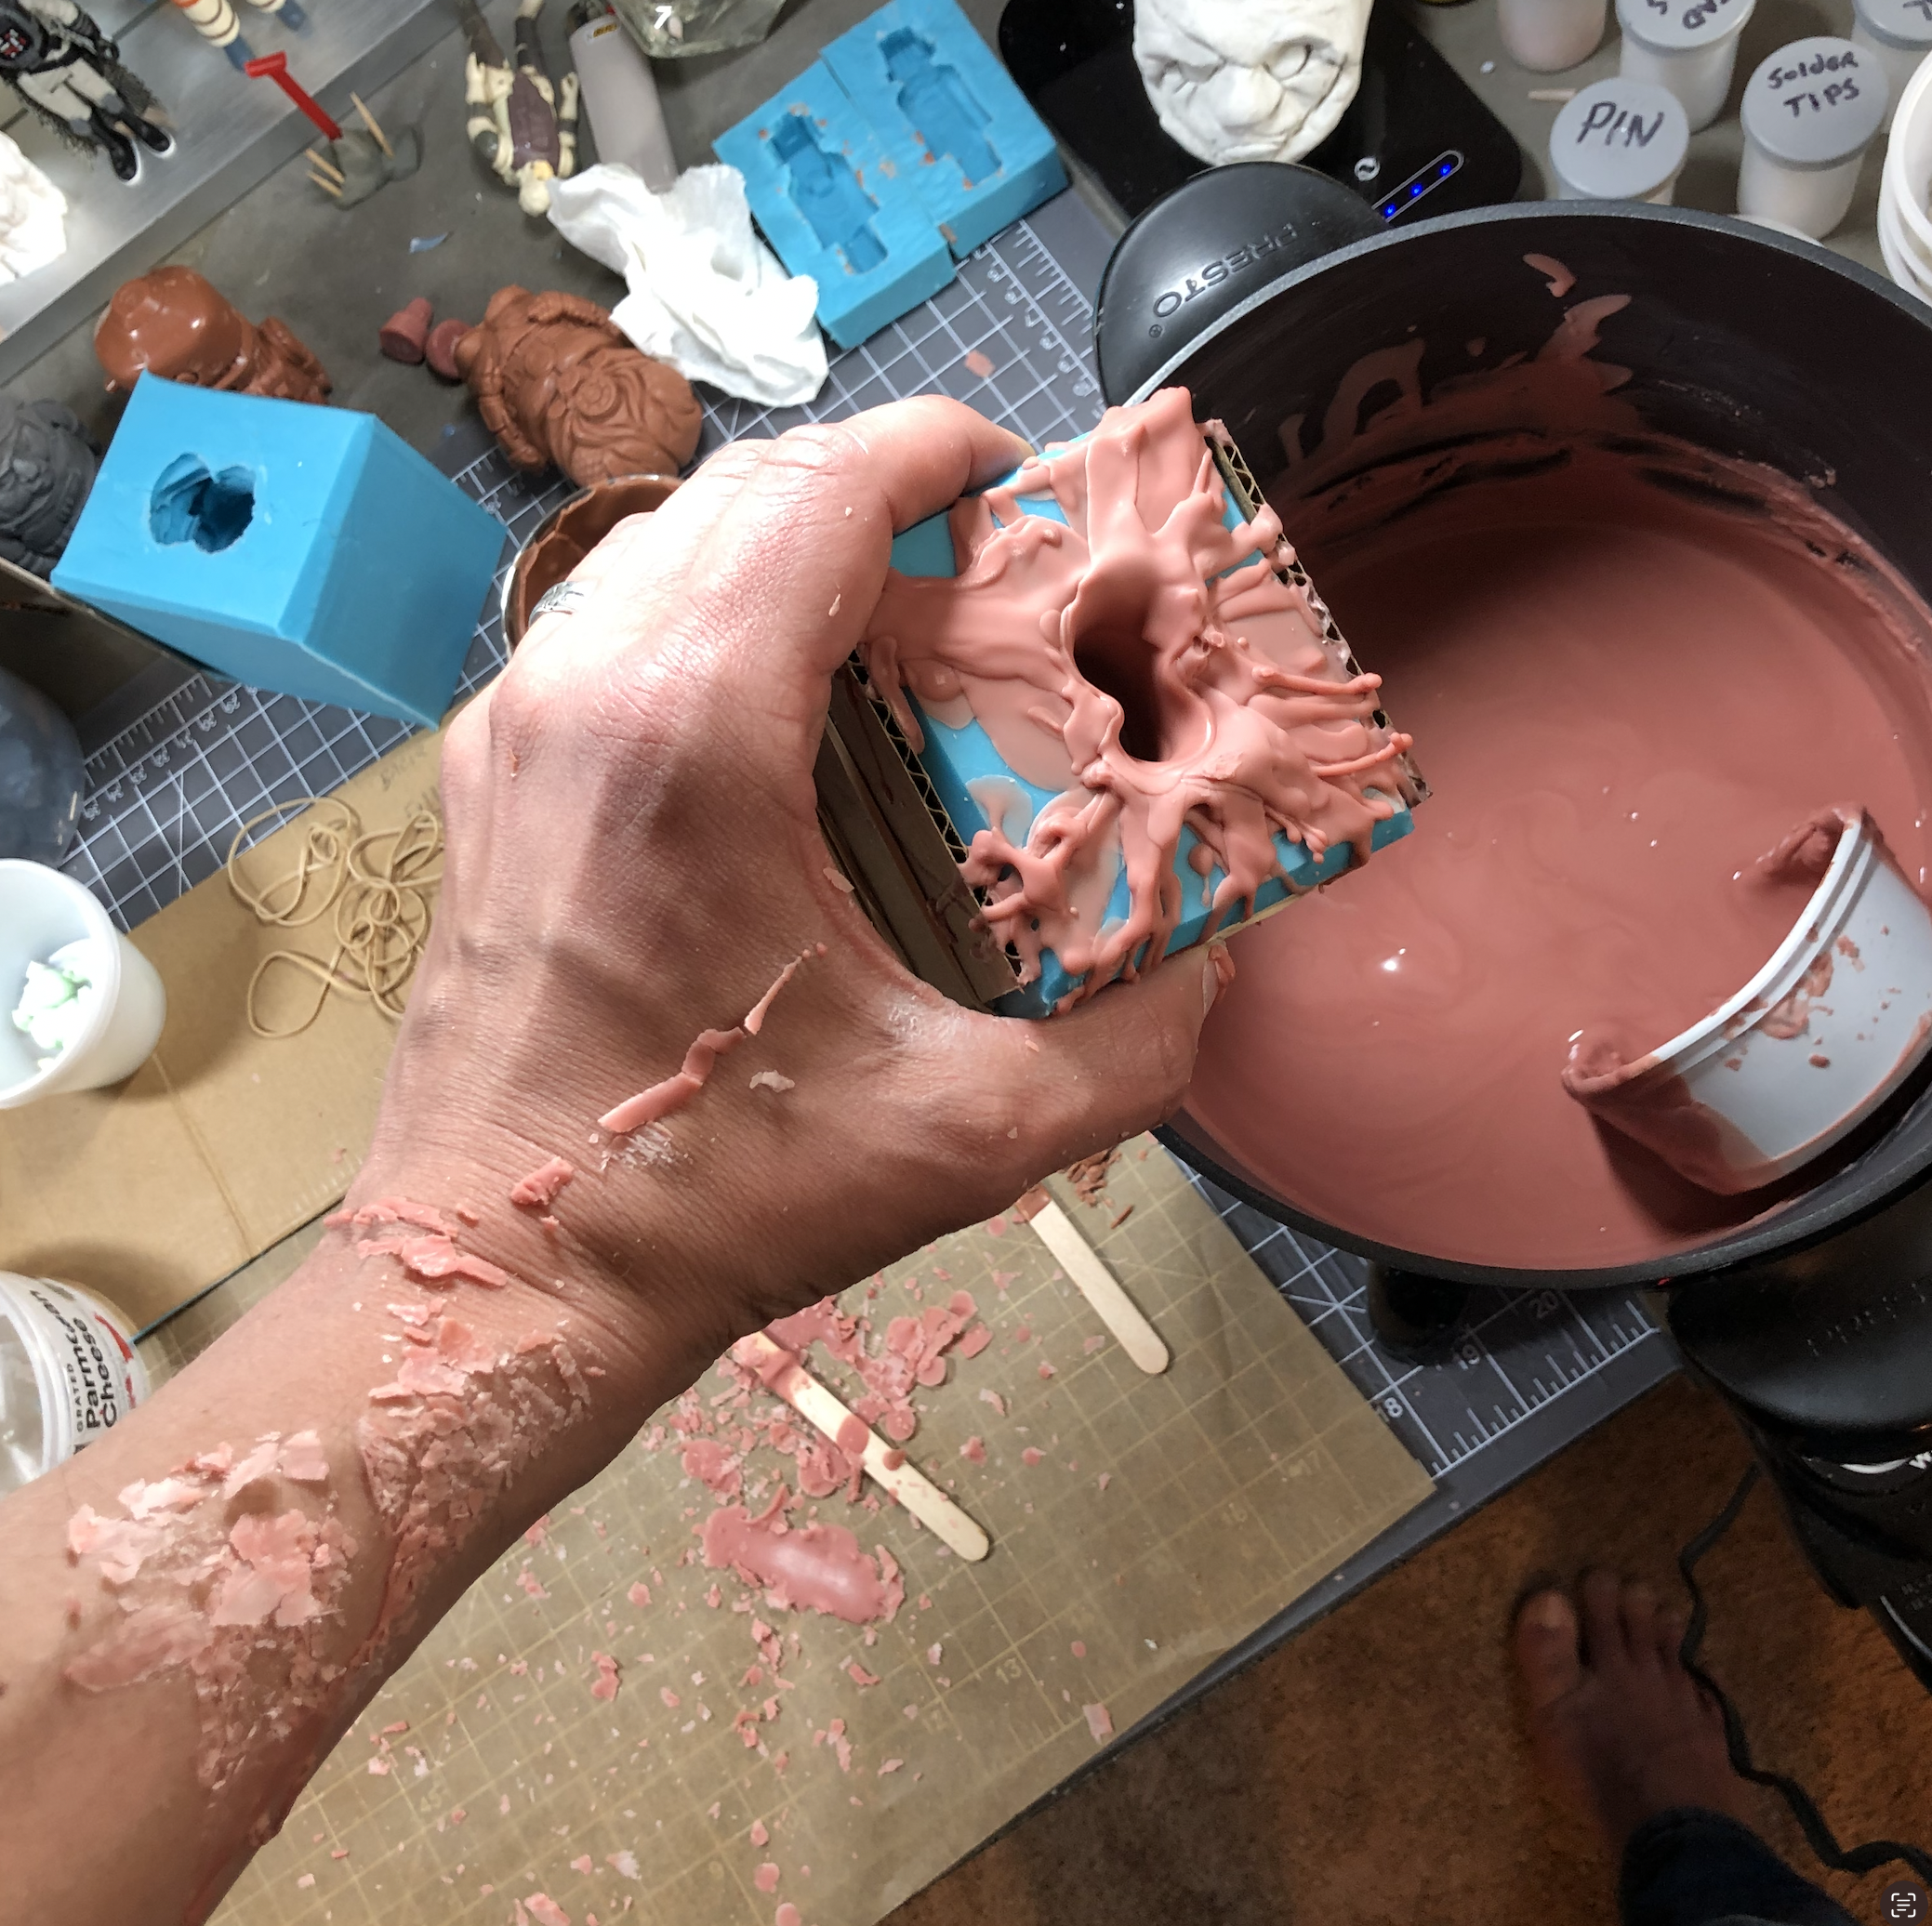
In the third image you’ll see a waste container. Cleaning wax from a syringe is tedious so it’s best to not let your leftovers cool inside the tube. Instead, push the remaining wax into clean container and immediately remove the plunger. This will prevent the plunger from getting stuck due to blockage at the tip.If you’re using a lure lock syringe, you’ll likely have to toss it after each use so make sure you have plenty on hand.
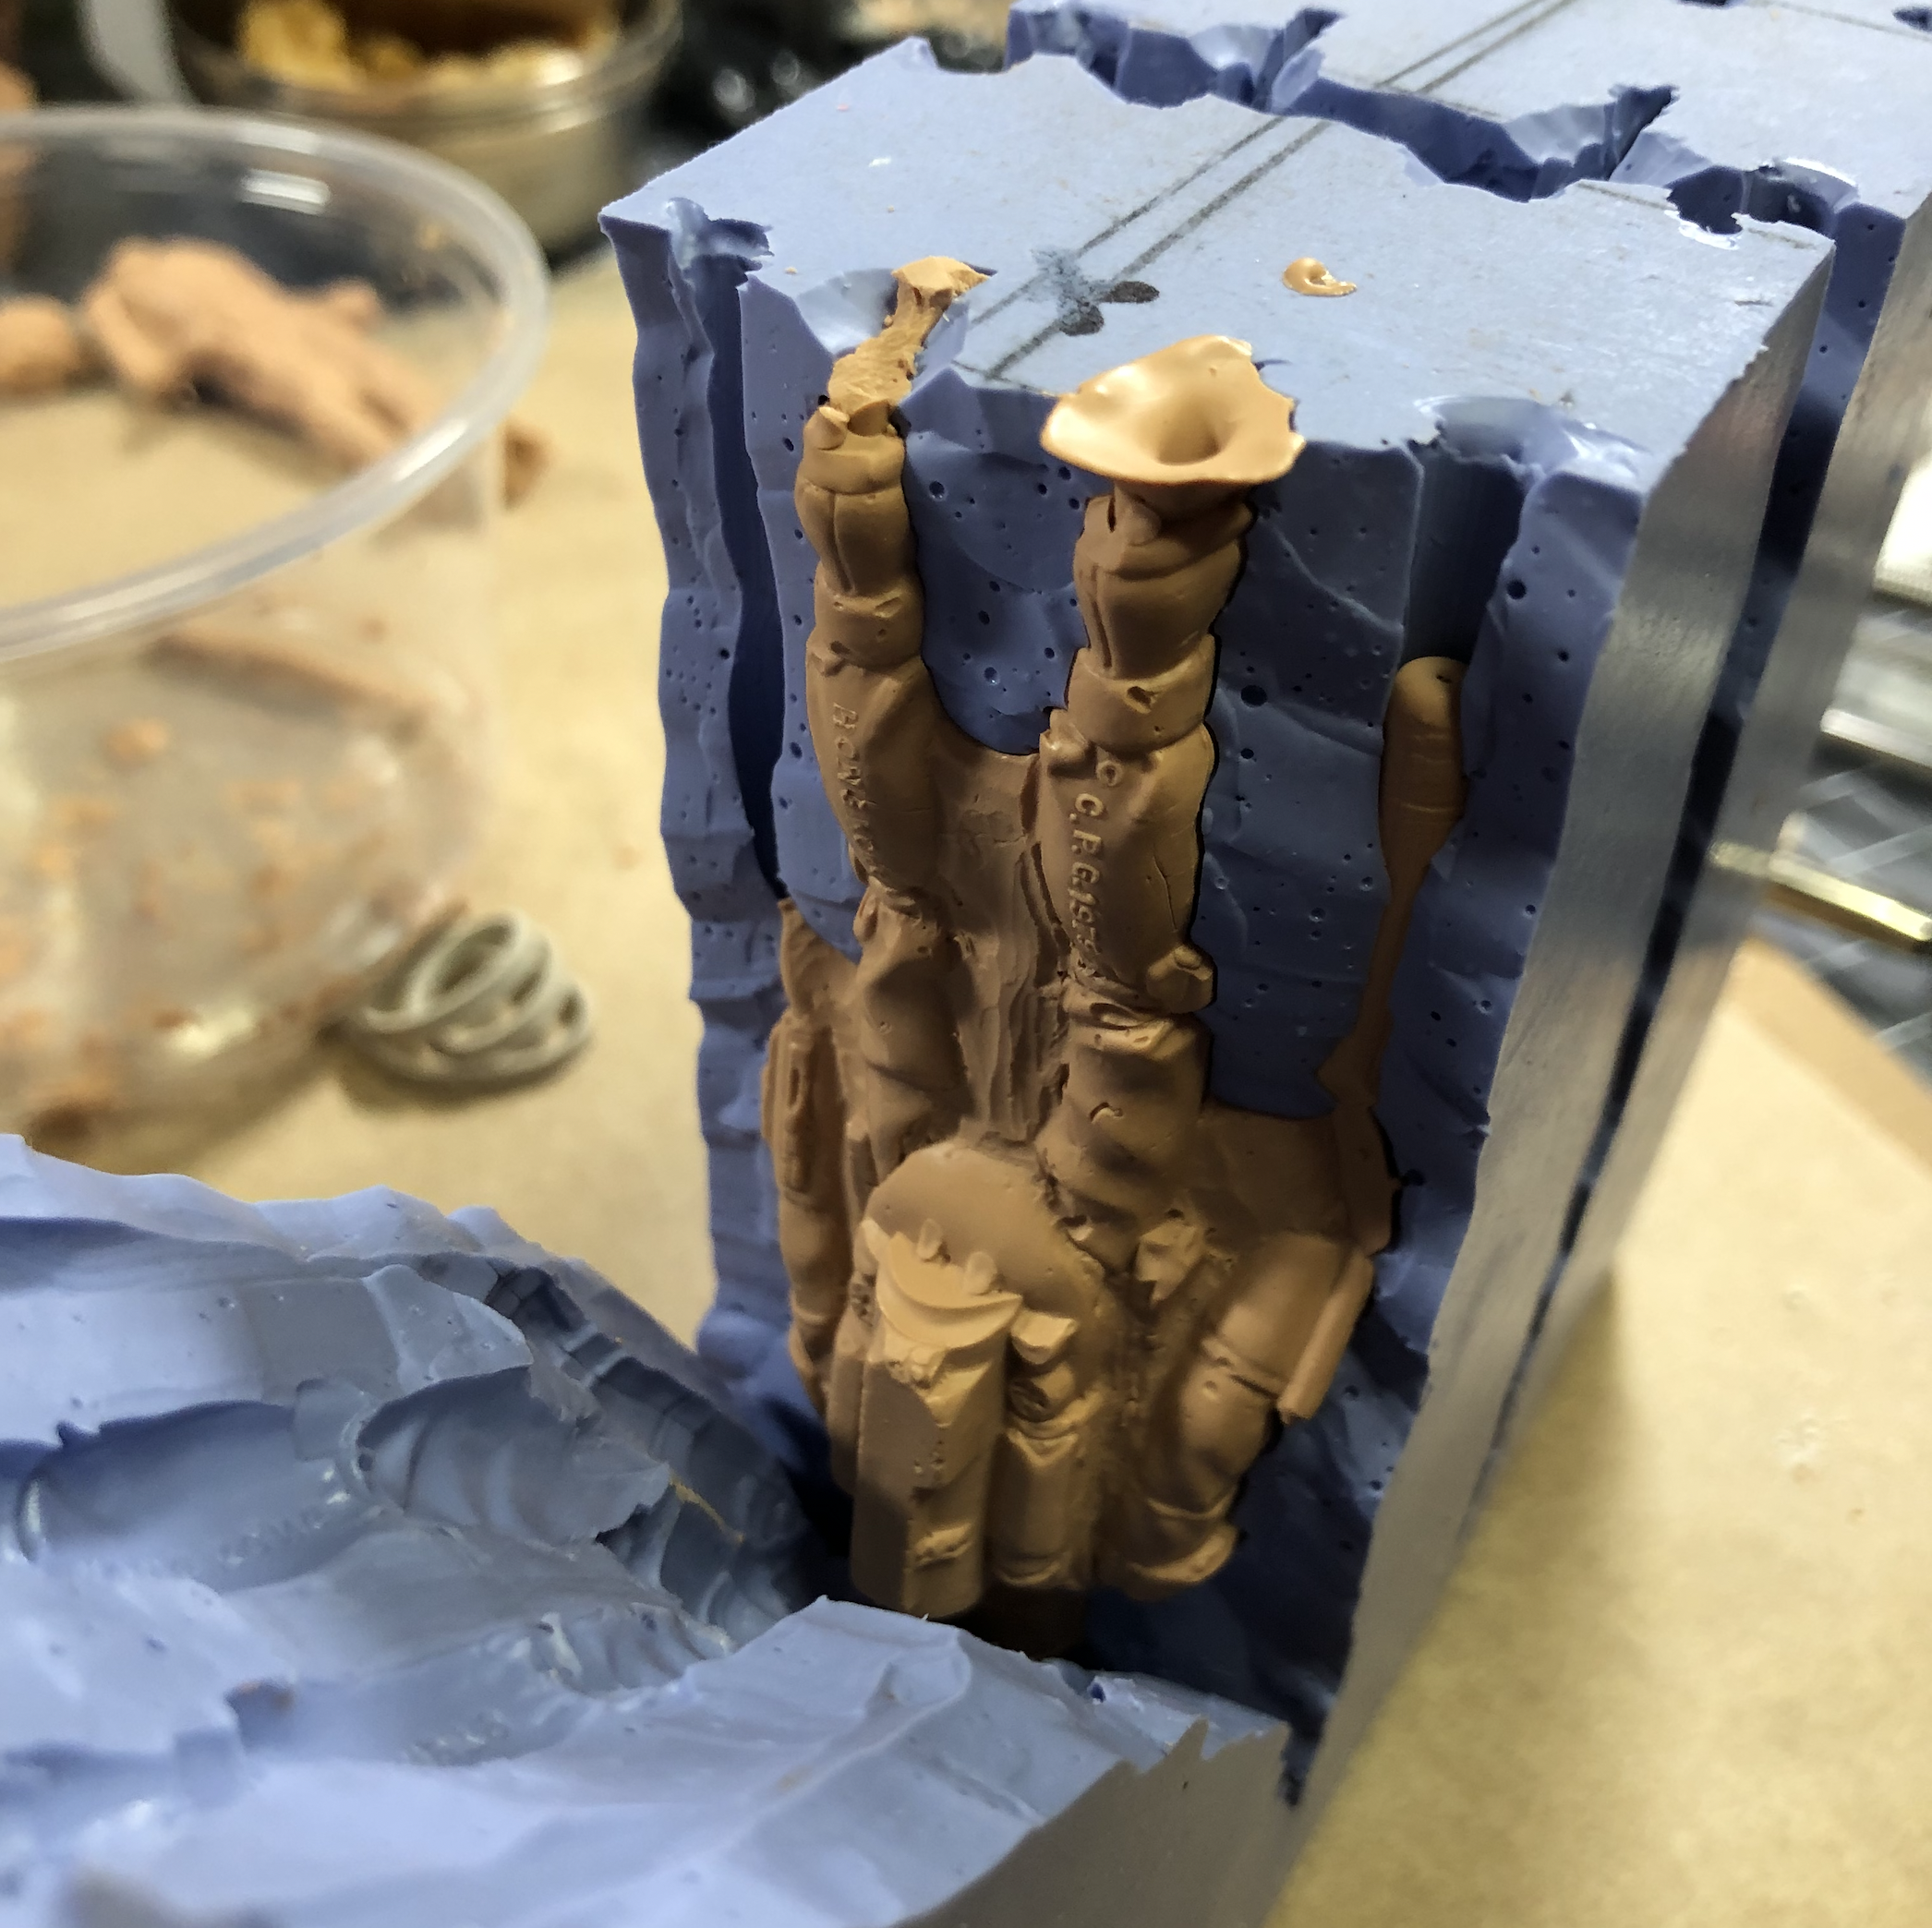
There are professional wax injectors that pushing wax up into a mold. The image below shows how you can turn a syringe upside. An advantage to injecting upside down is that the flow of air out of the mold doesn’t have to go past the injection point. Warning - in can get pretty messy this way.

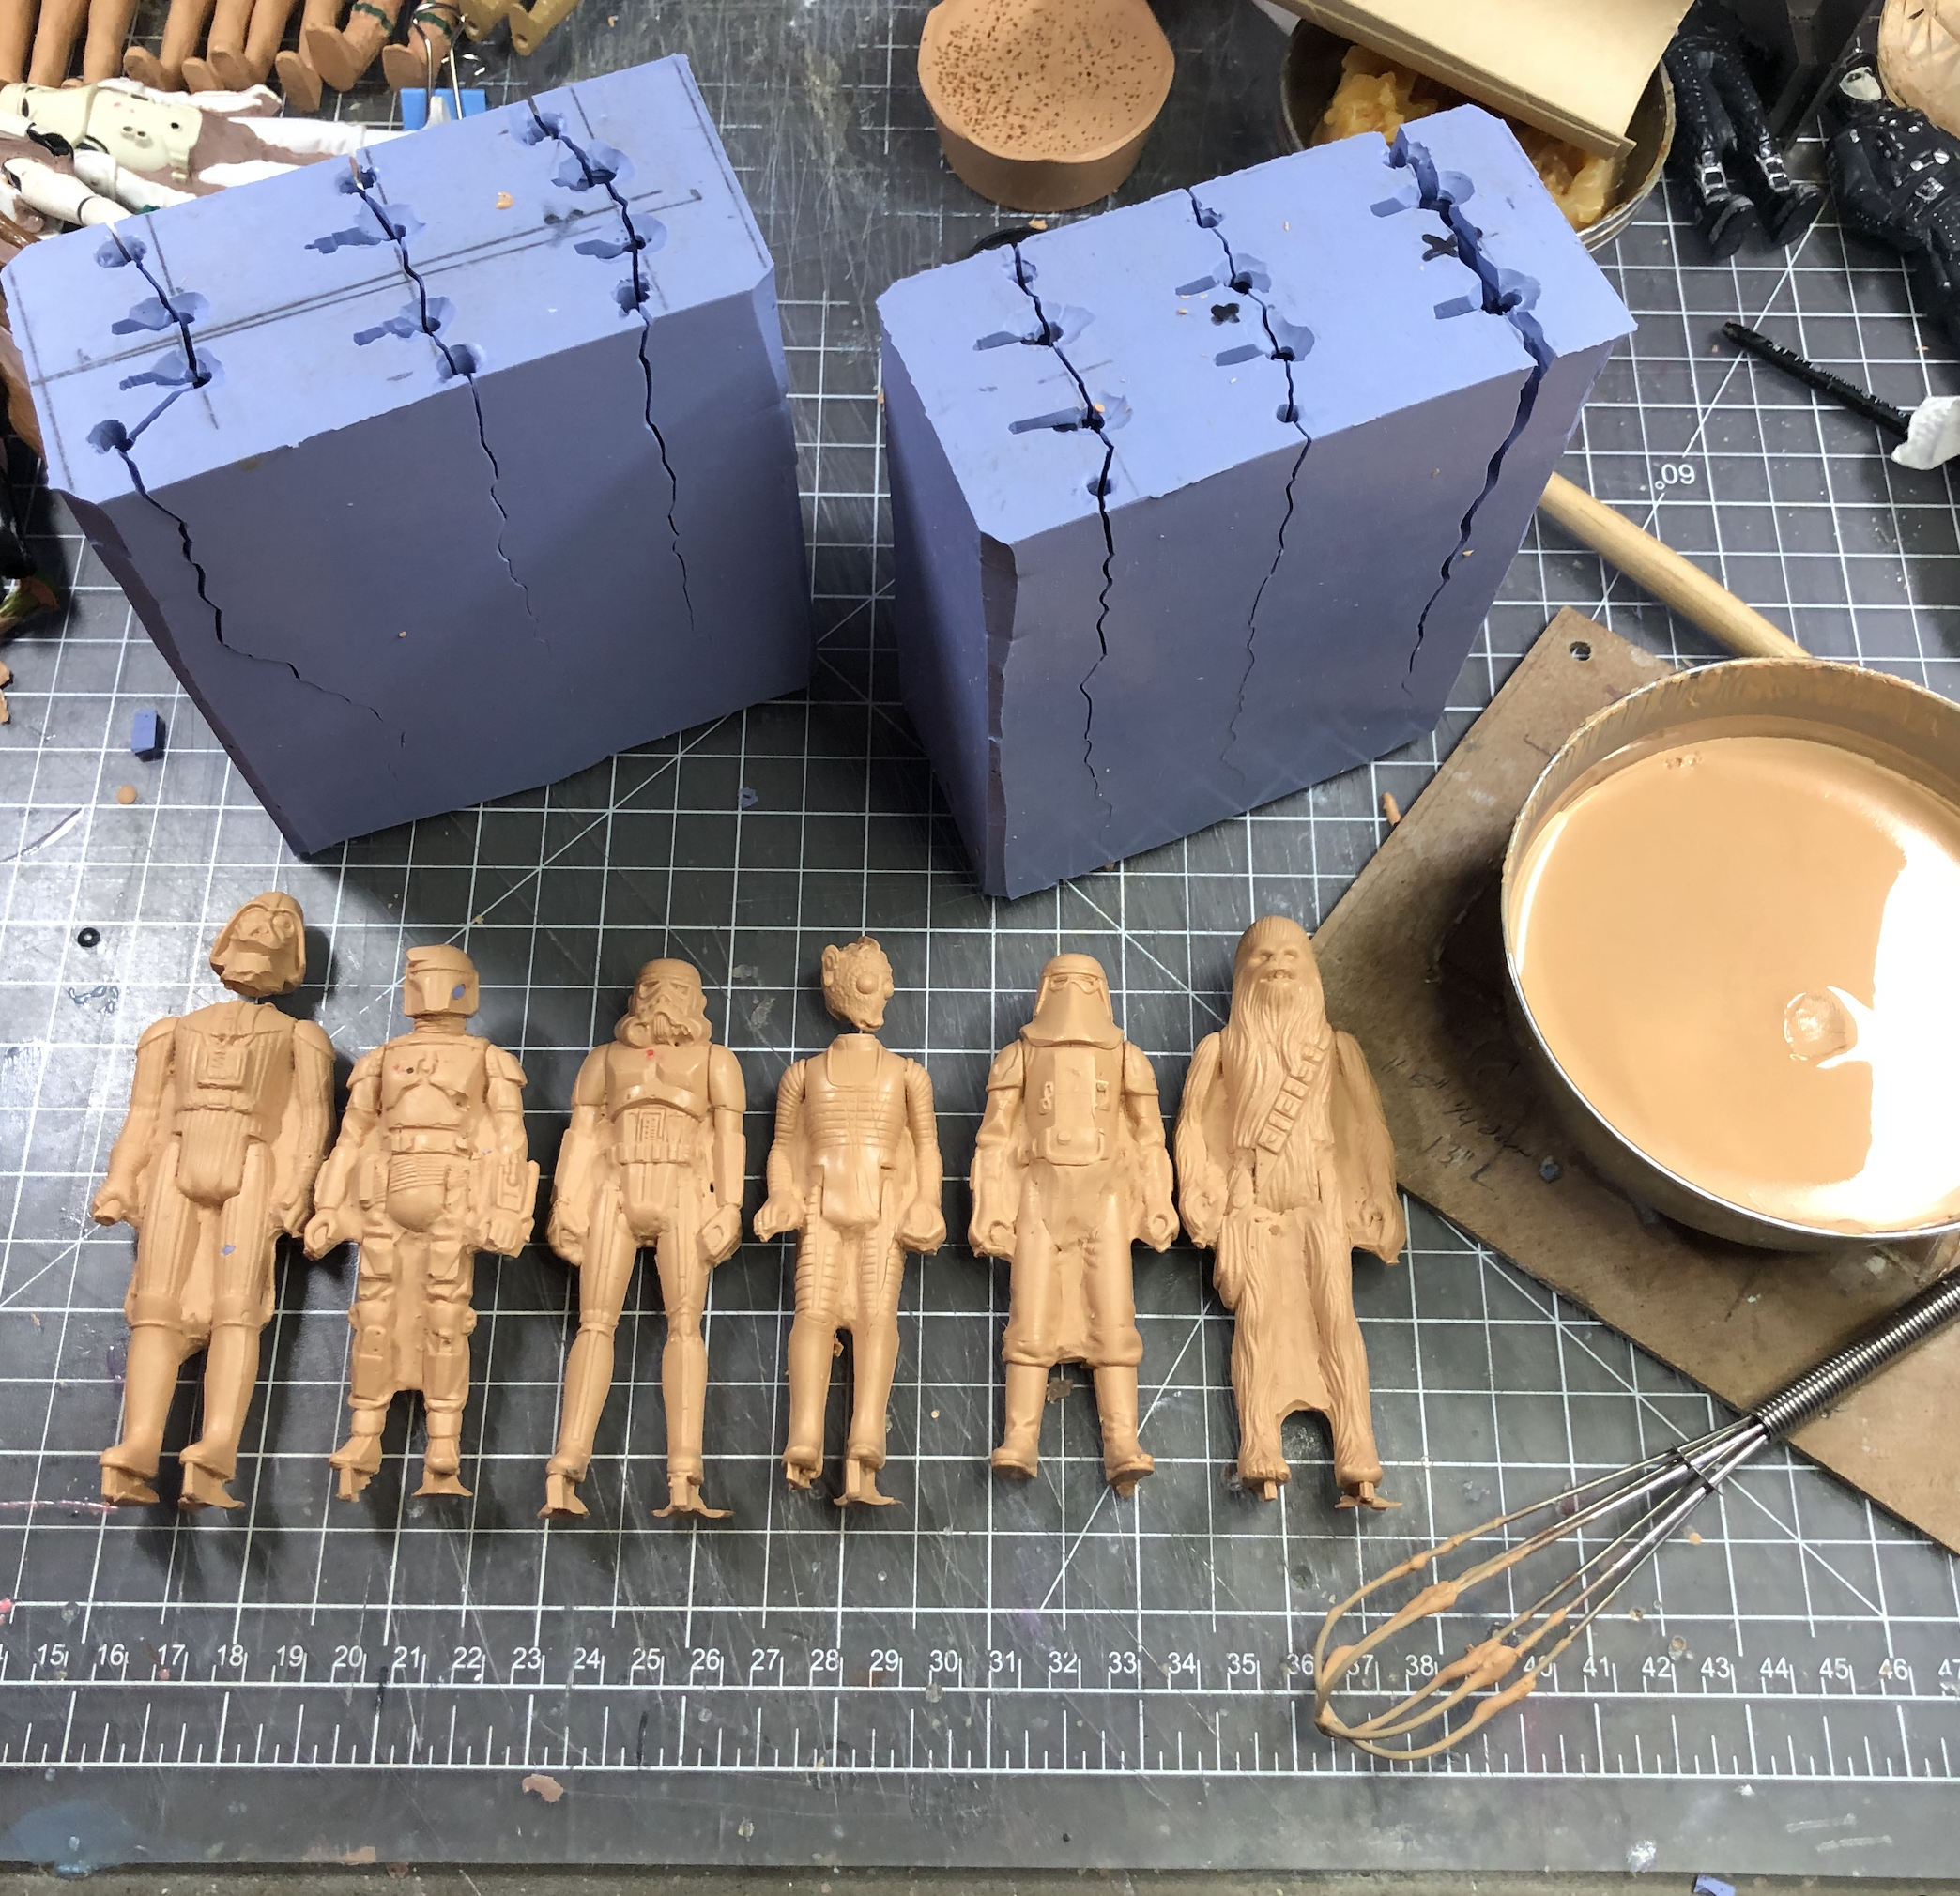
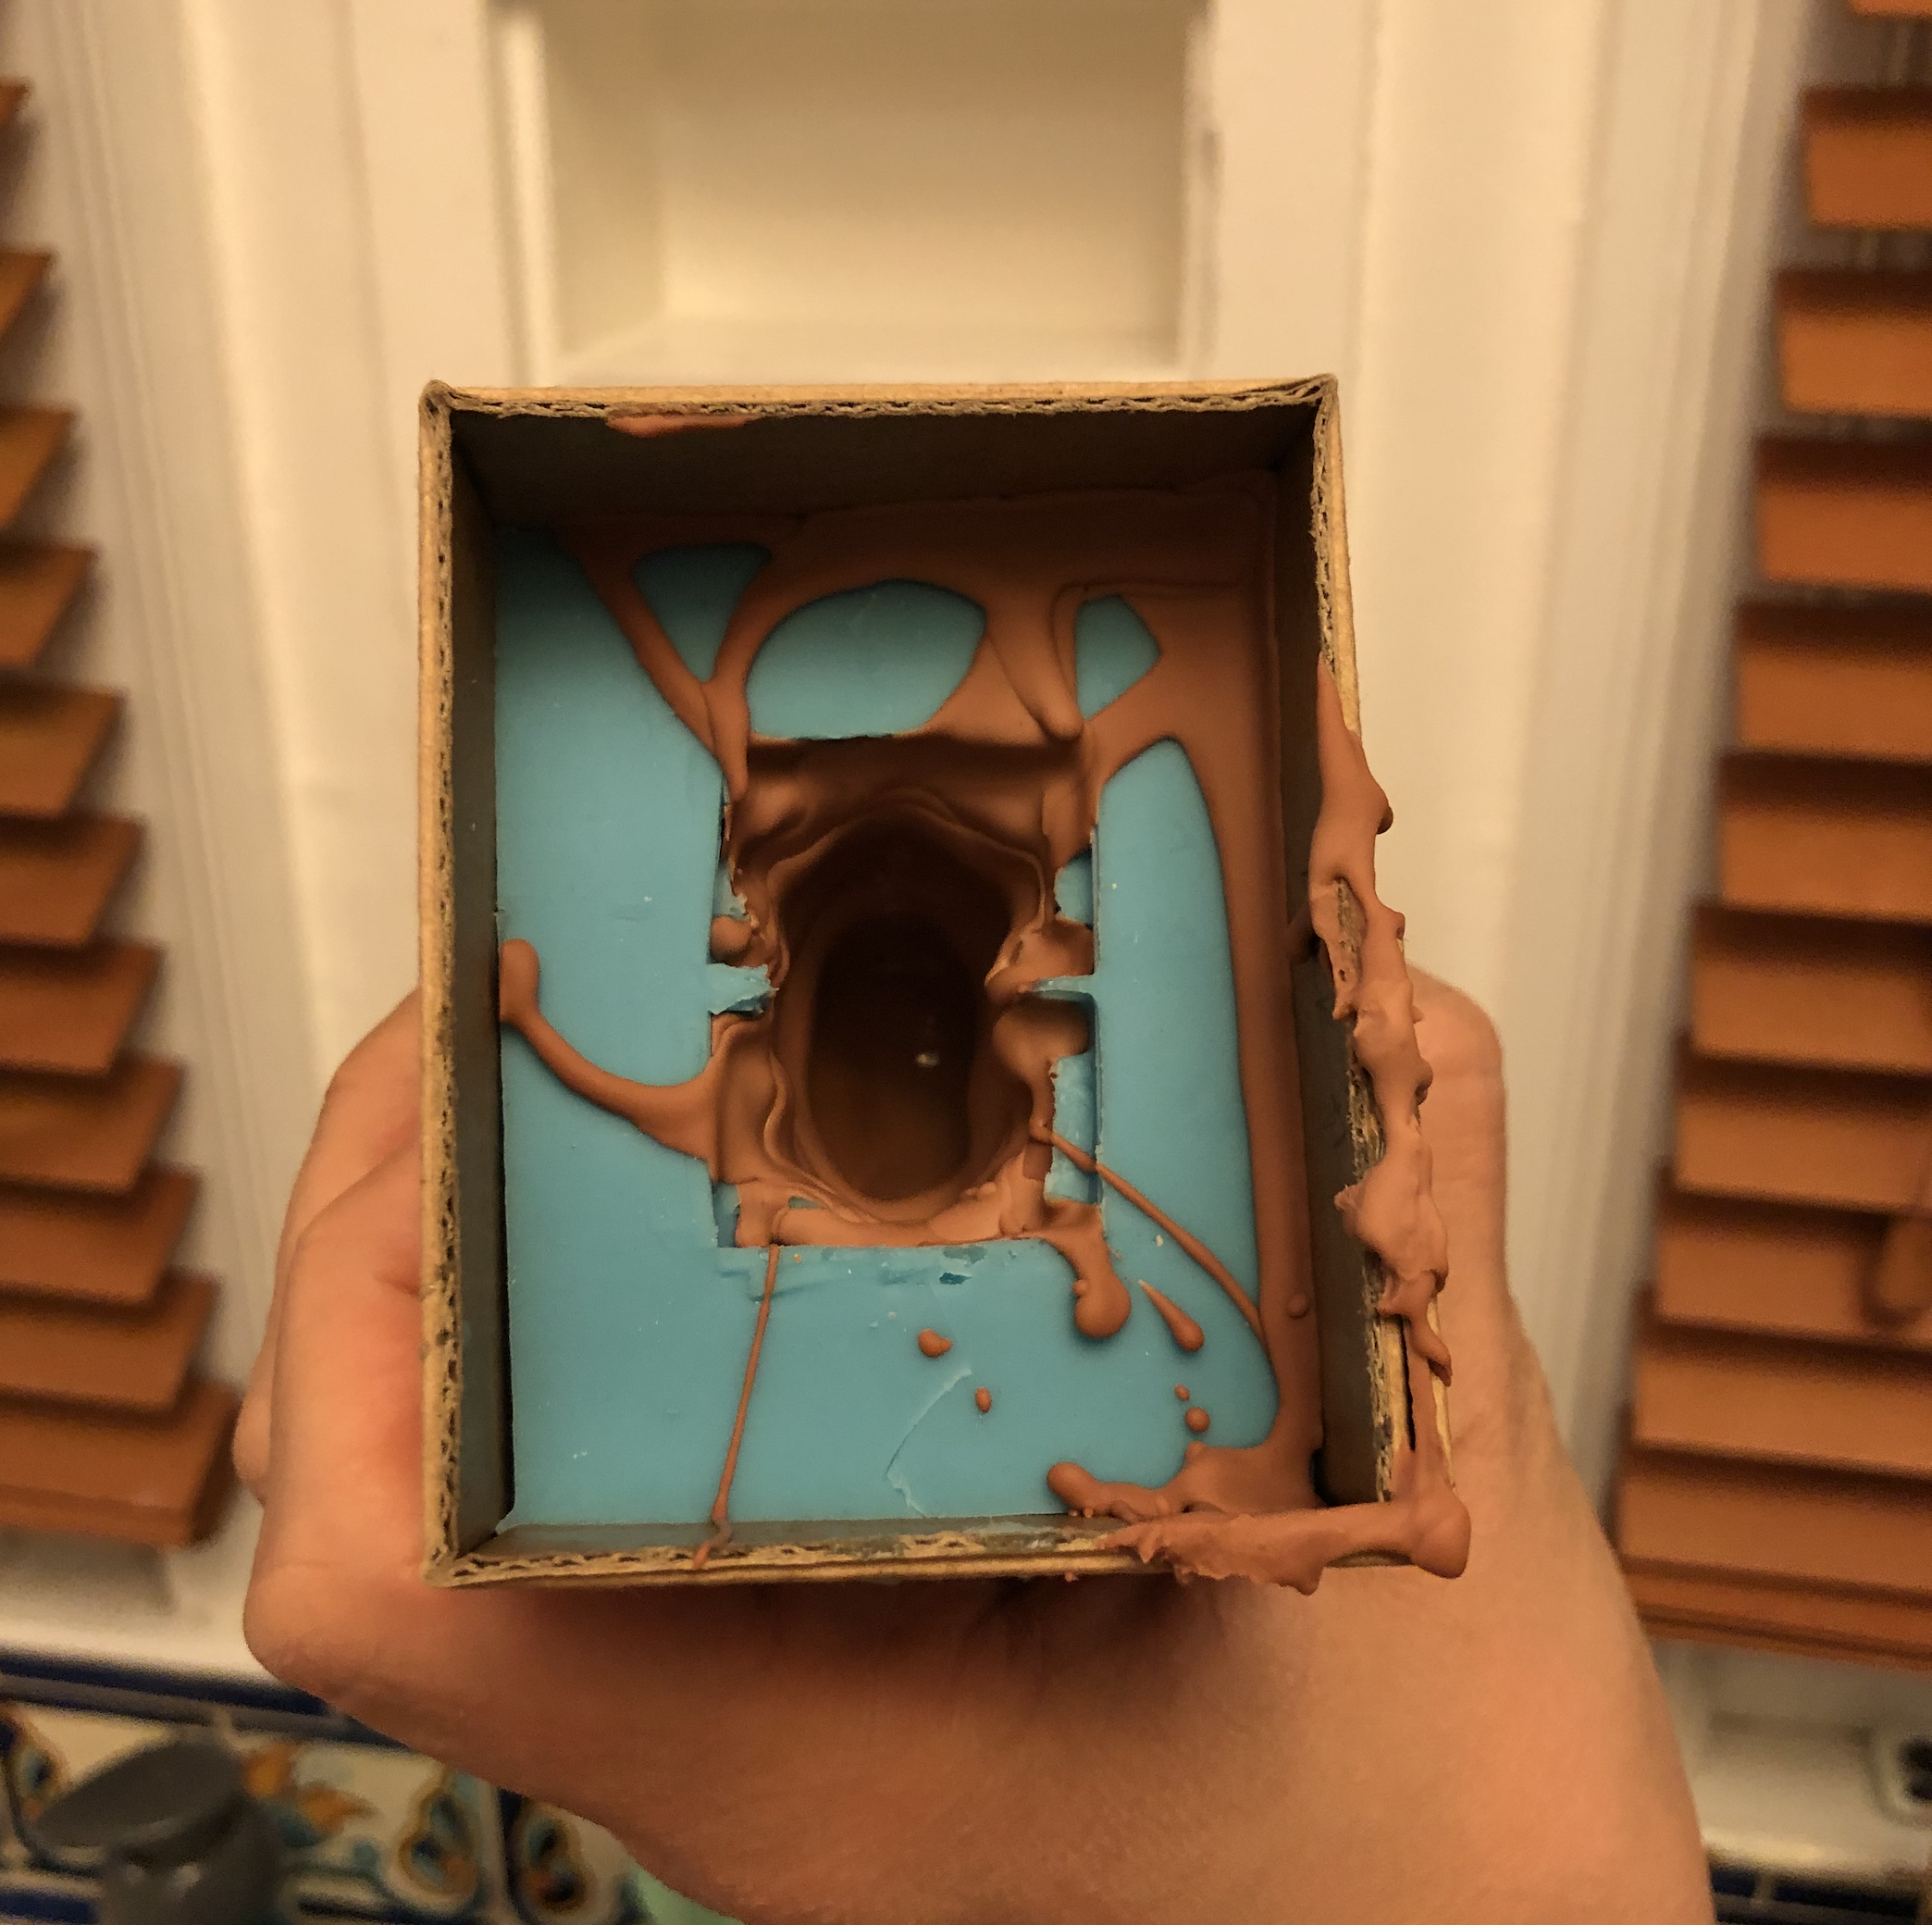
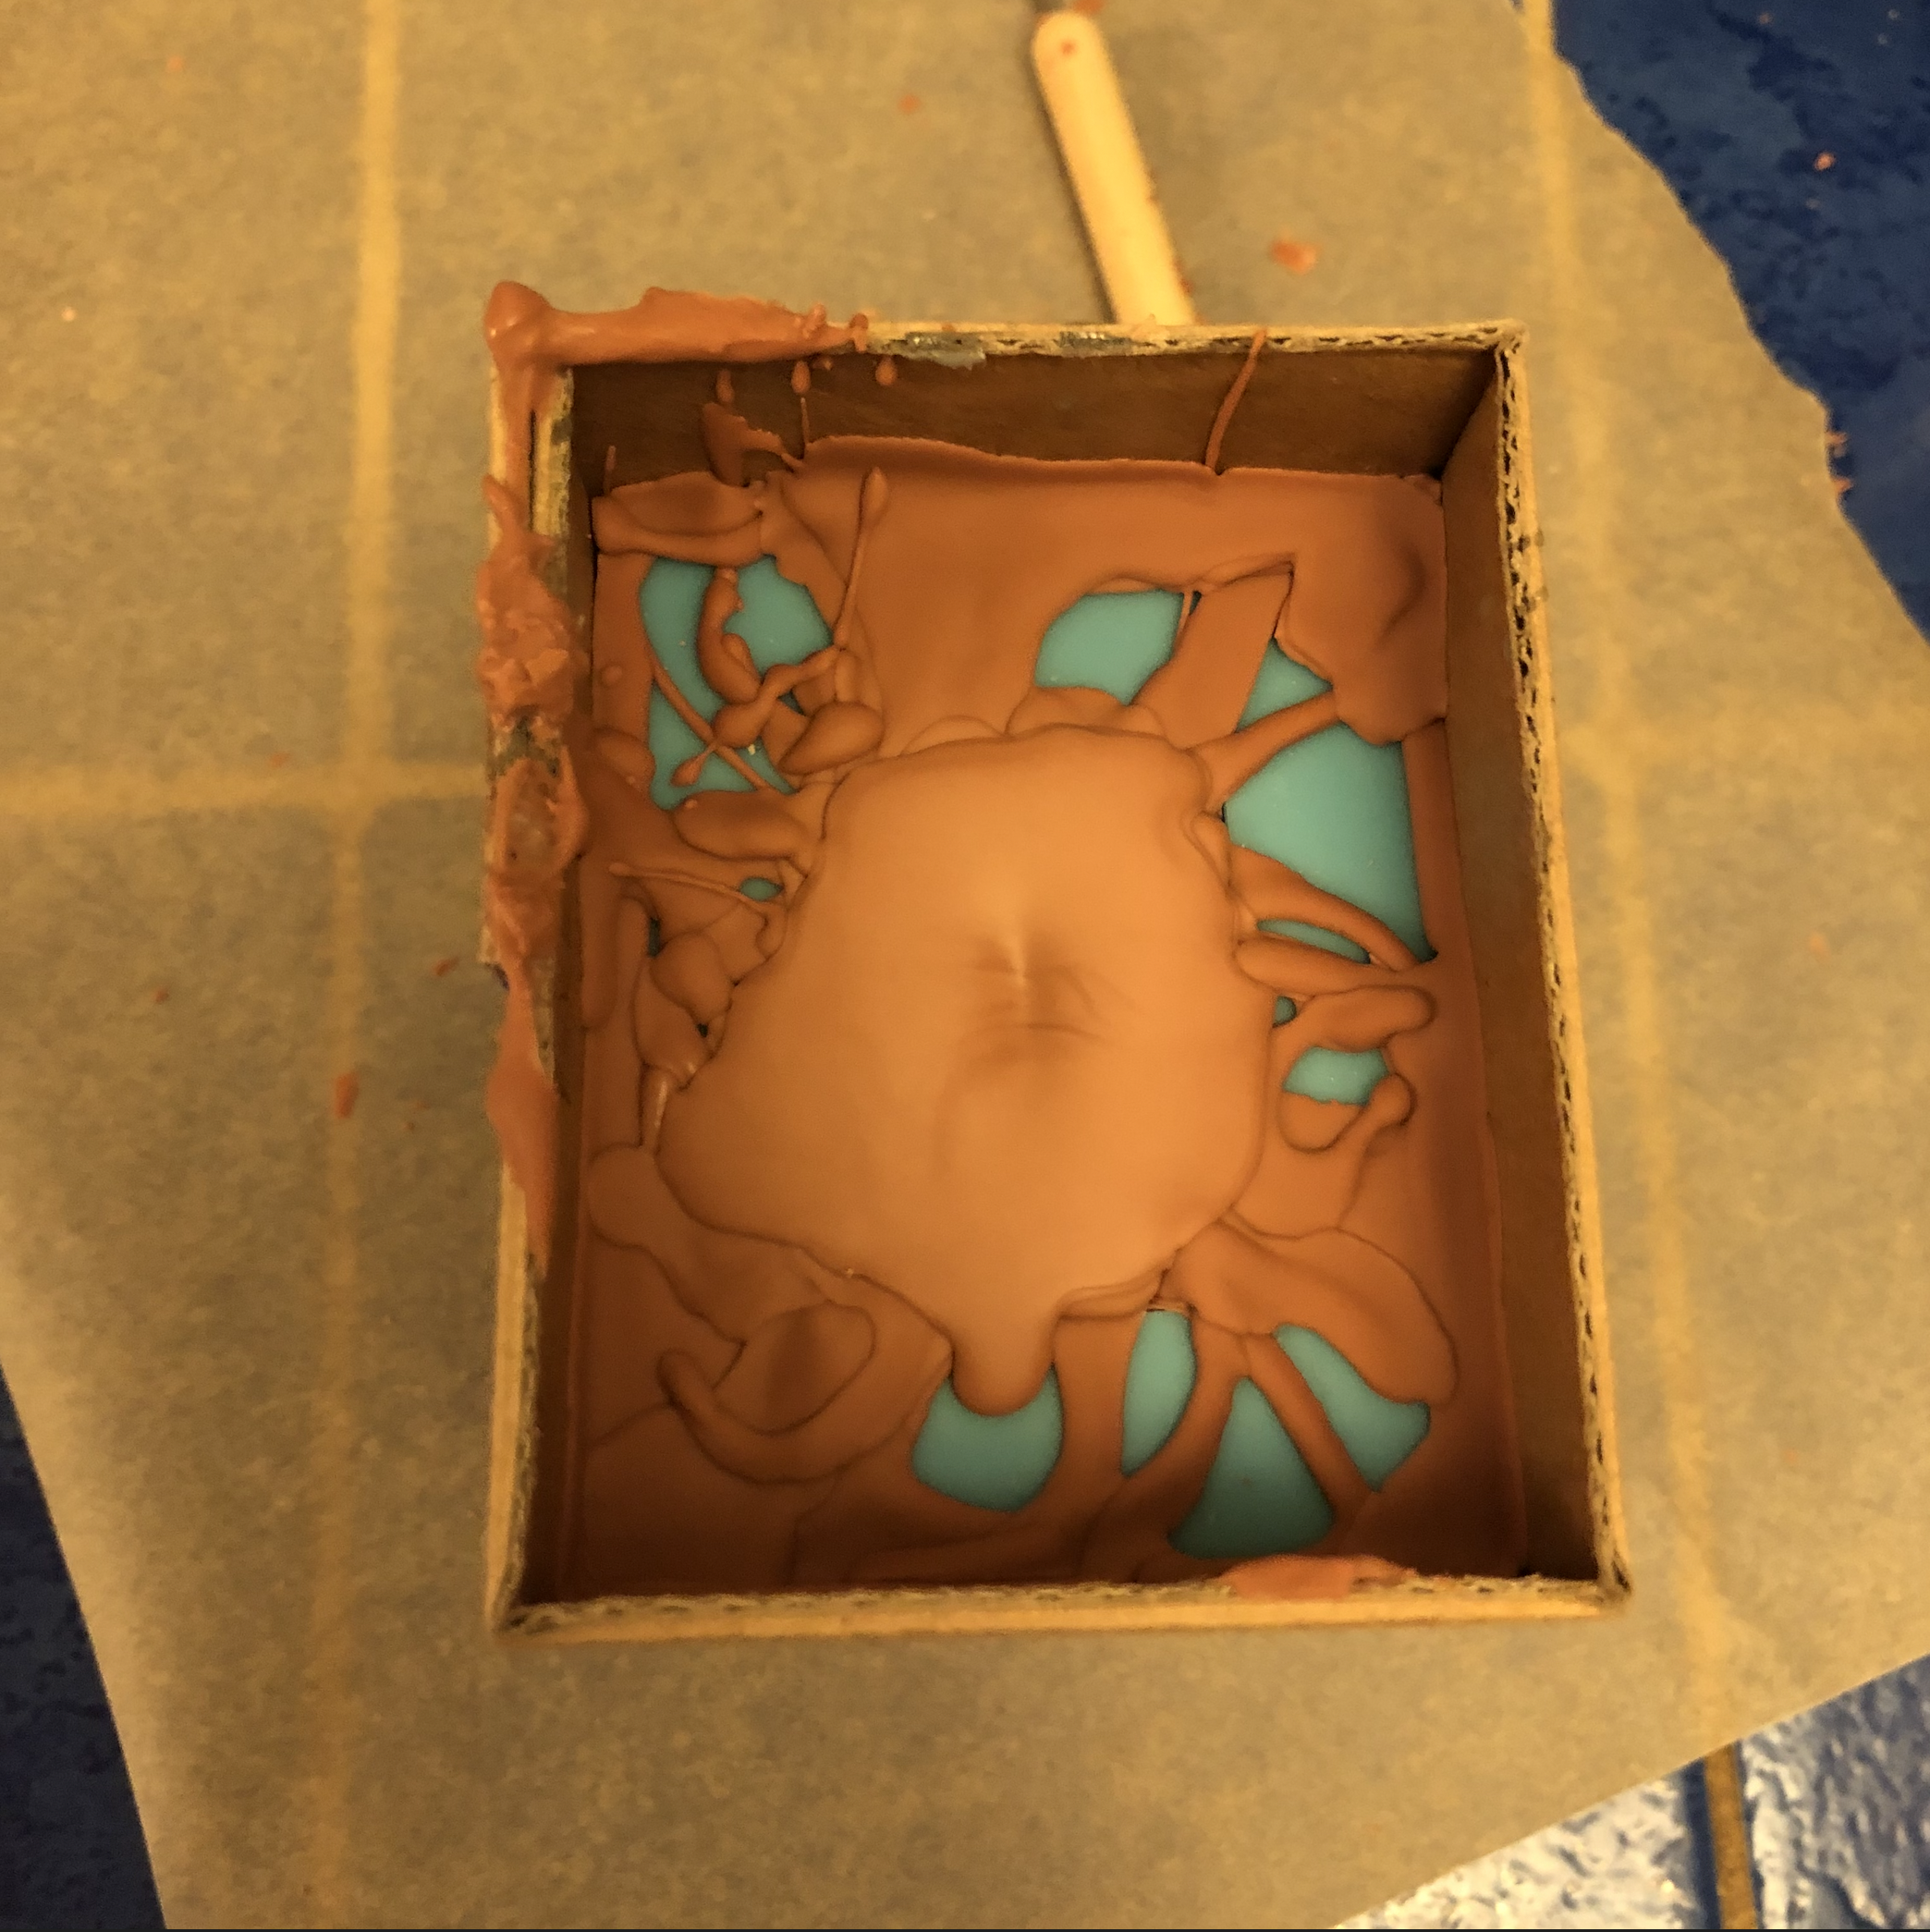
Casting large parts with pour and dump method
Wax can shrink considerably as it cools, especially in molds with large cavities. This is because wax cools toward the center of the mass, and the larger the mass the more it’s drawn inward.
CAUTION – Melted wax can burn your skin. Wear protective clothing.
To minimize the amount of shrink in large castings, you can use the pour-and-dump method to slowly build up wax along the inside of the mold. By building up thin layers the wax isn’t drawn in toward the center of the cavity.
Warning - it can get messy.
Troubleshooting your wax castings
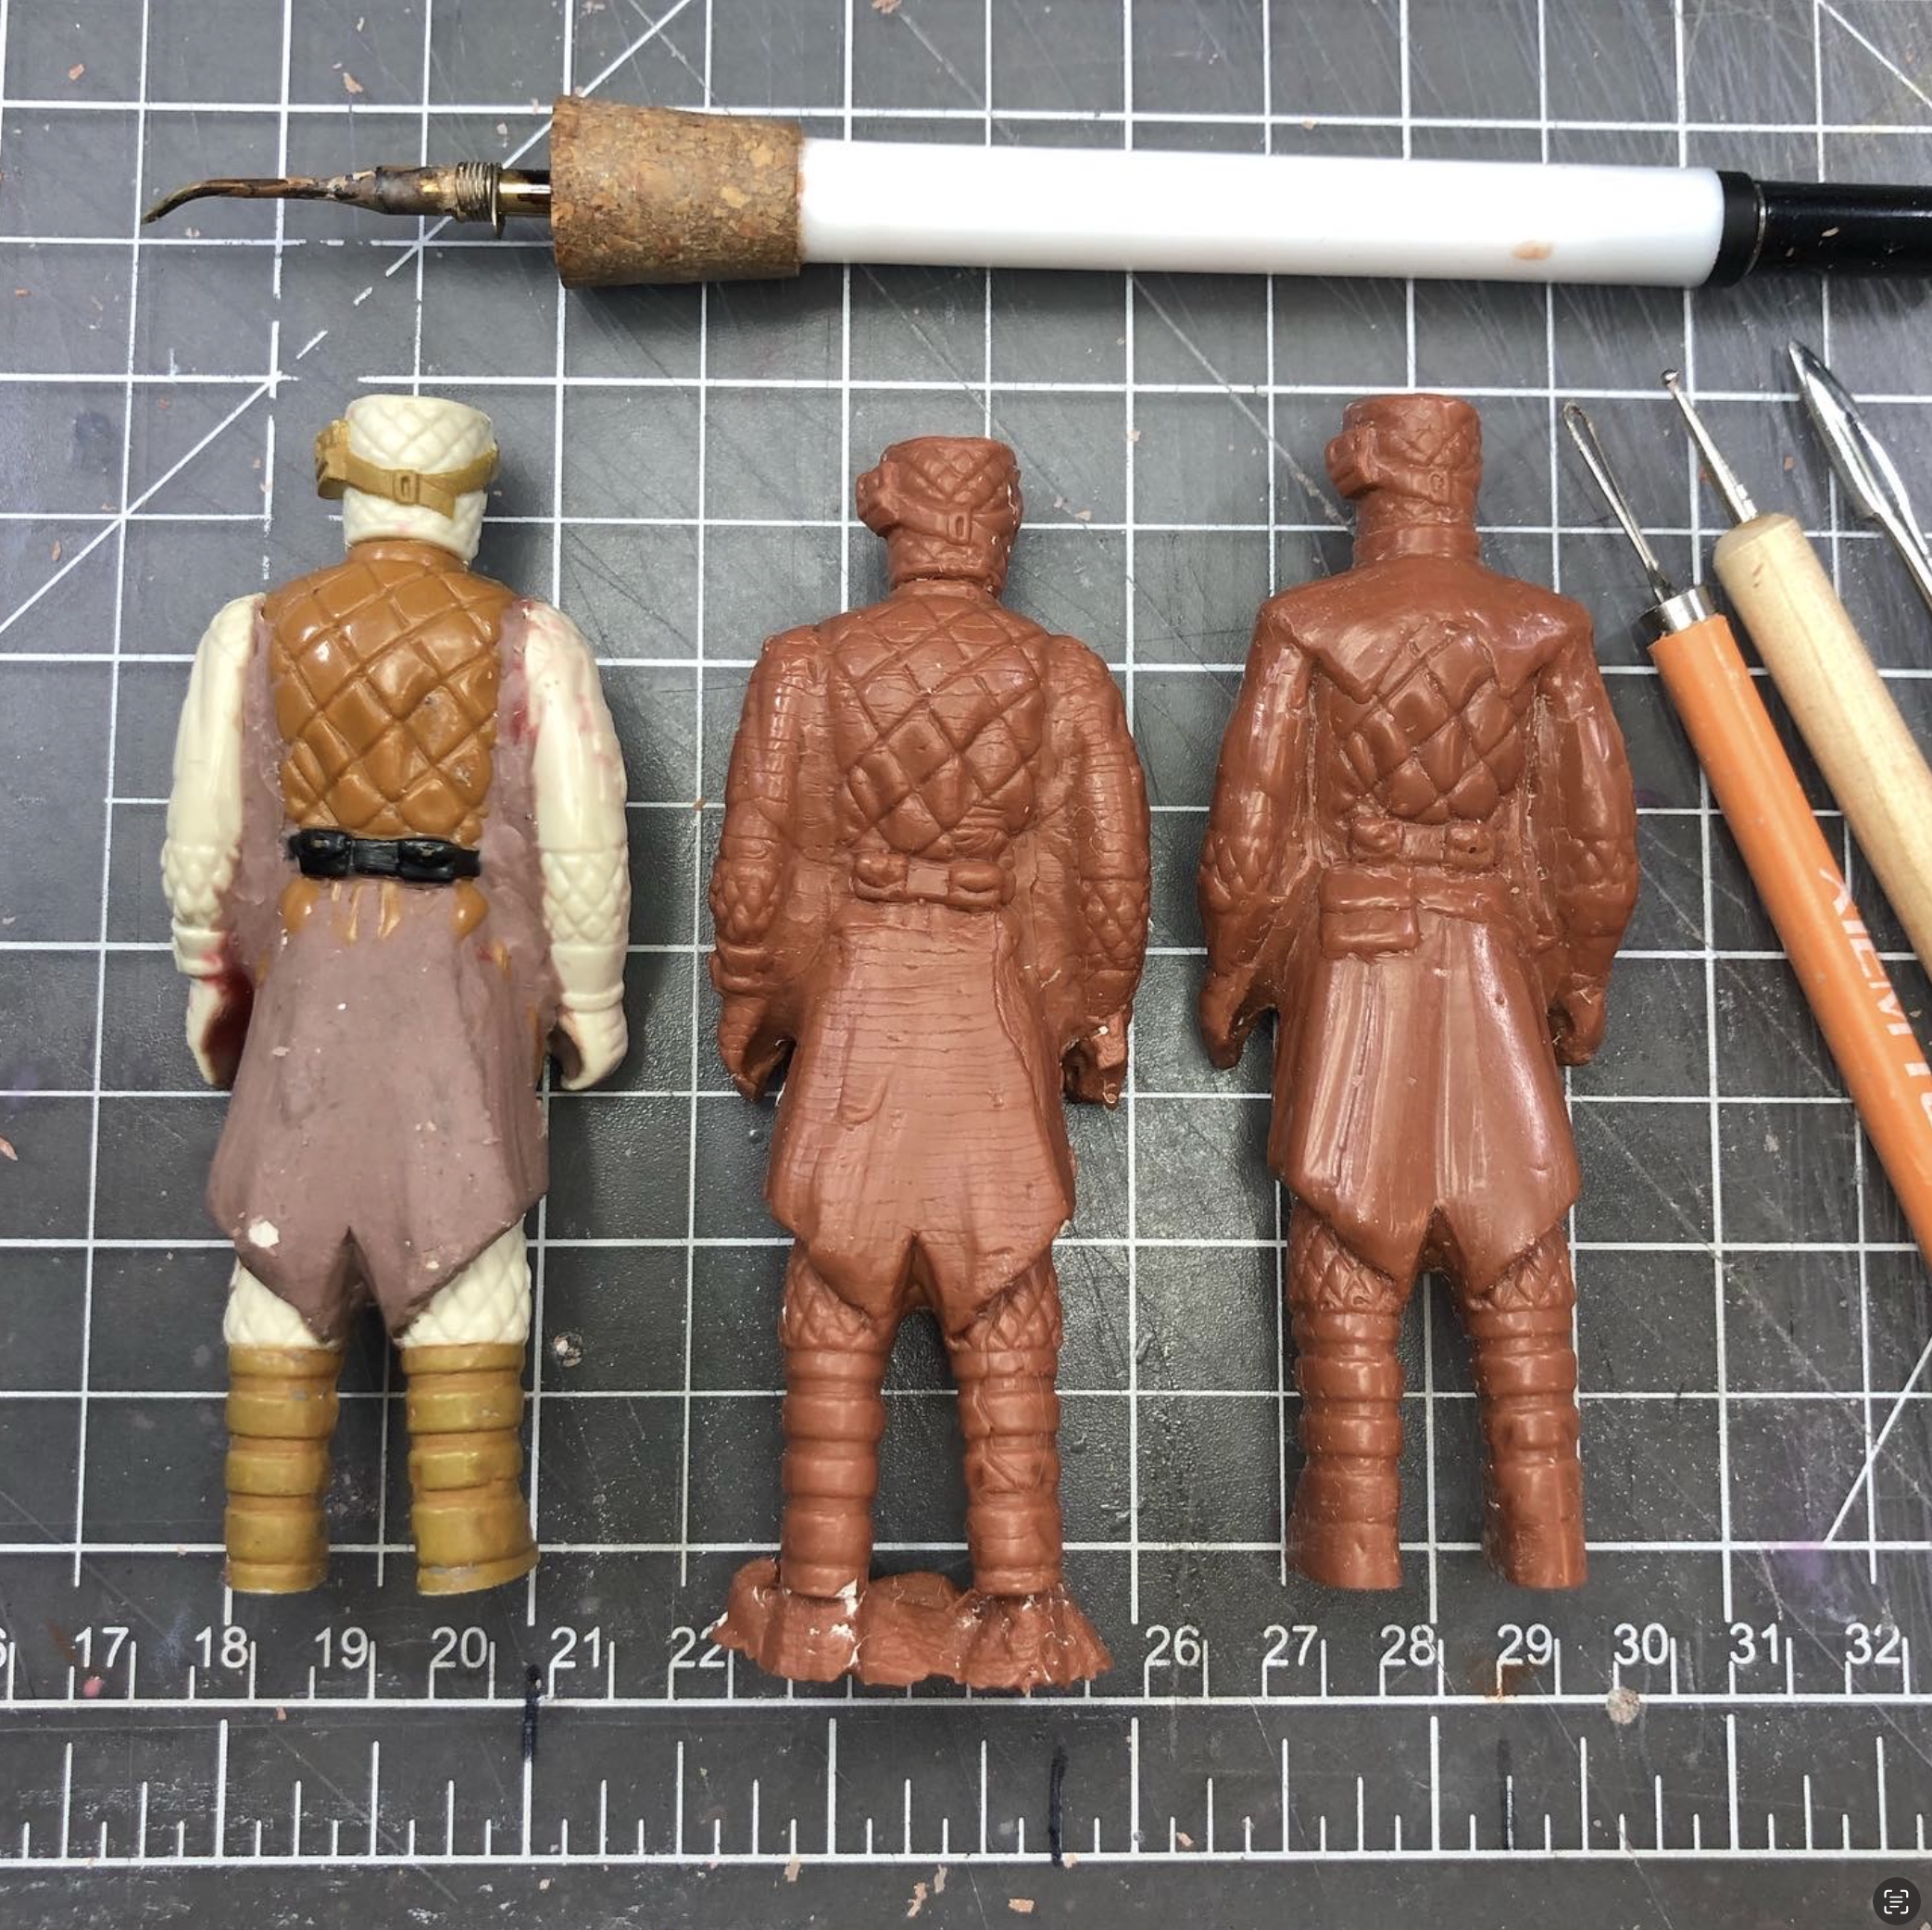
Broken Parts
Be careful when extracting your castings from the mold, especially silicone molds. Unlike rigid plaster molds, silicone molds can flex considerably while opening and extracting the castings which can transfer pressure through out the mold and result in breaks at the weakest points in your figure.
But don’t worry! You can fix an break in no time using the welding technique: Welding Wax Parts Together
Chill Lines
Chill lines are the result of wax that’s too cool as it fills the mold. A couple of ways to address this are to heat up your mold or try increasing the temperature of your wax and/or pouring/injecting it faster. We’ve also observed that the rate of flow can have an impact on the smoothness of the casting.
Regardless, the more you can avoid chill lines, the less clean up you’ll have to do.

Air Pockets
Air pockets can form if there’s inadequate venting or the venting gets clogged by cooling wax. Depending on how tight the entry point is, you may feel back pressure if you’re injecting and the vents get clogged. Chances are you’ve created an air pocket.

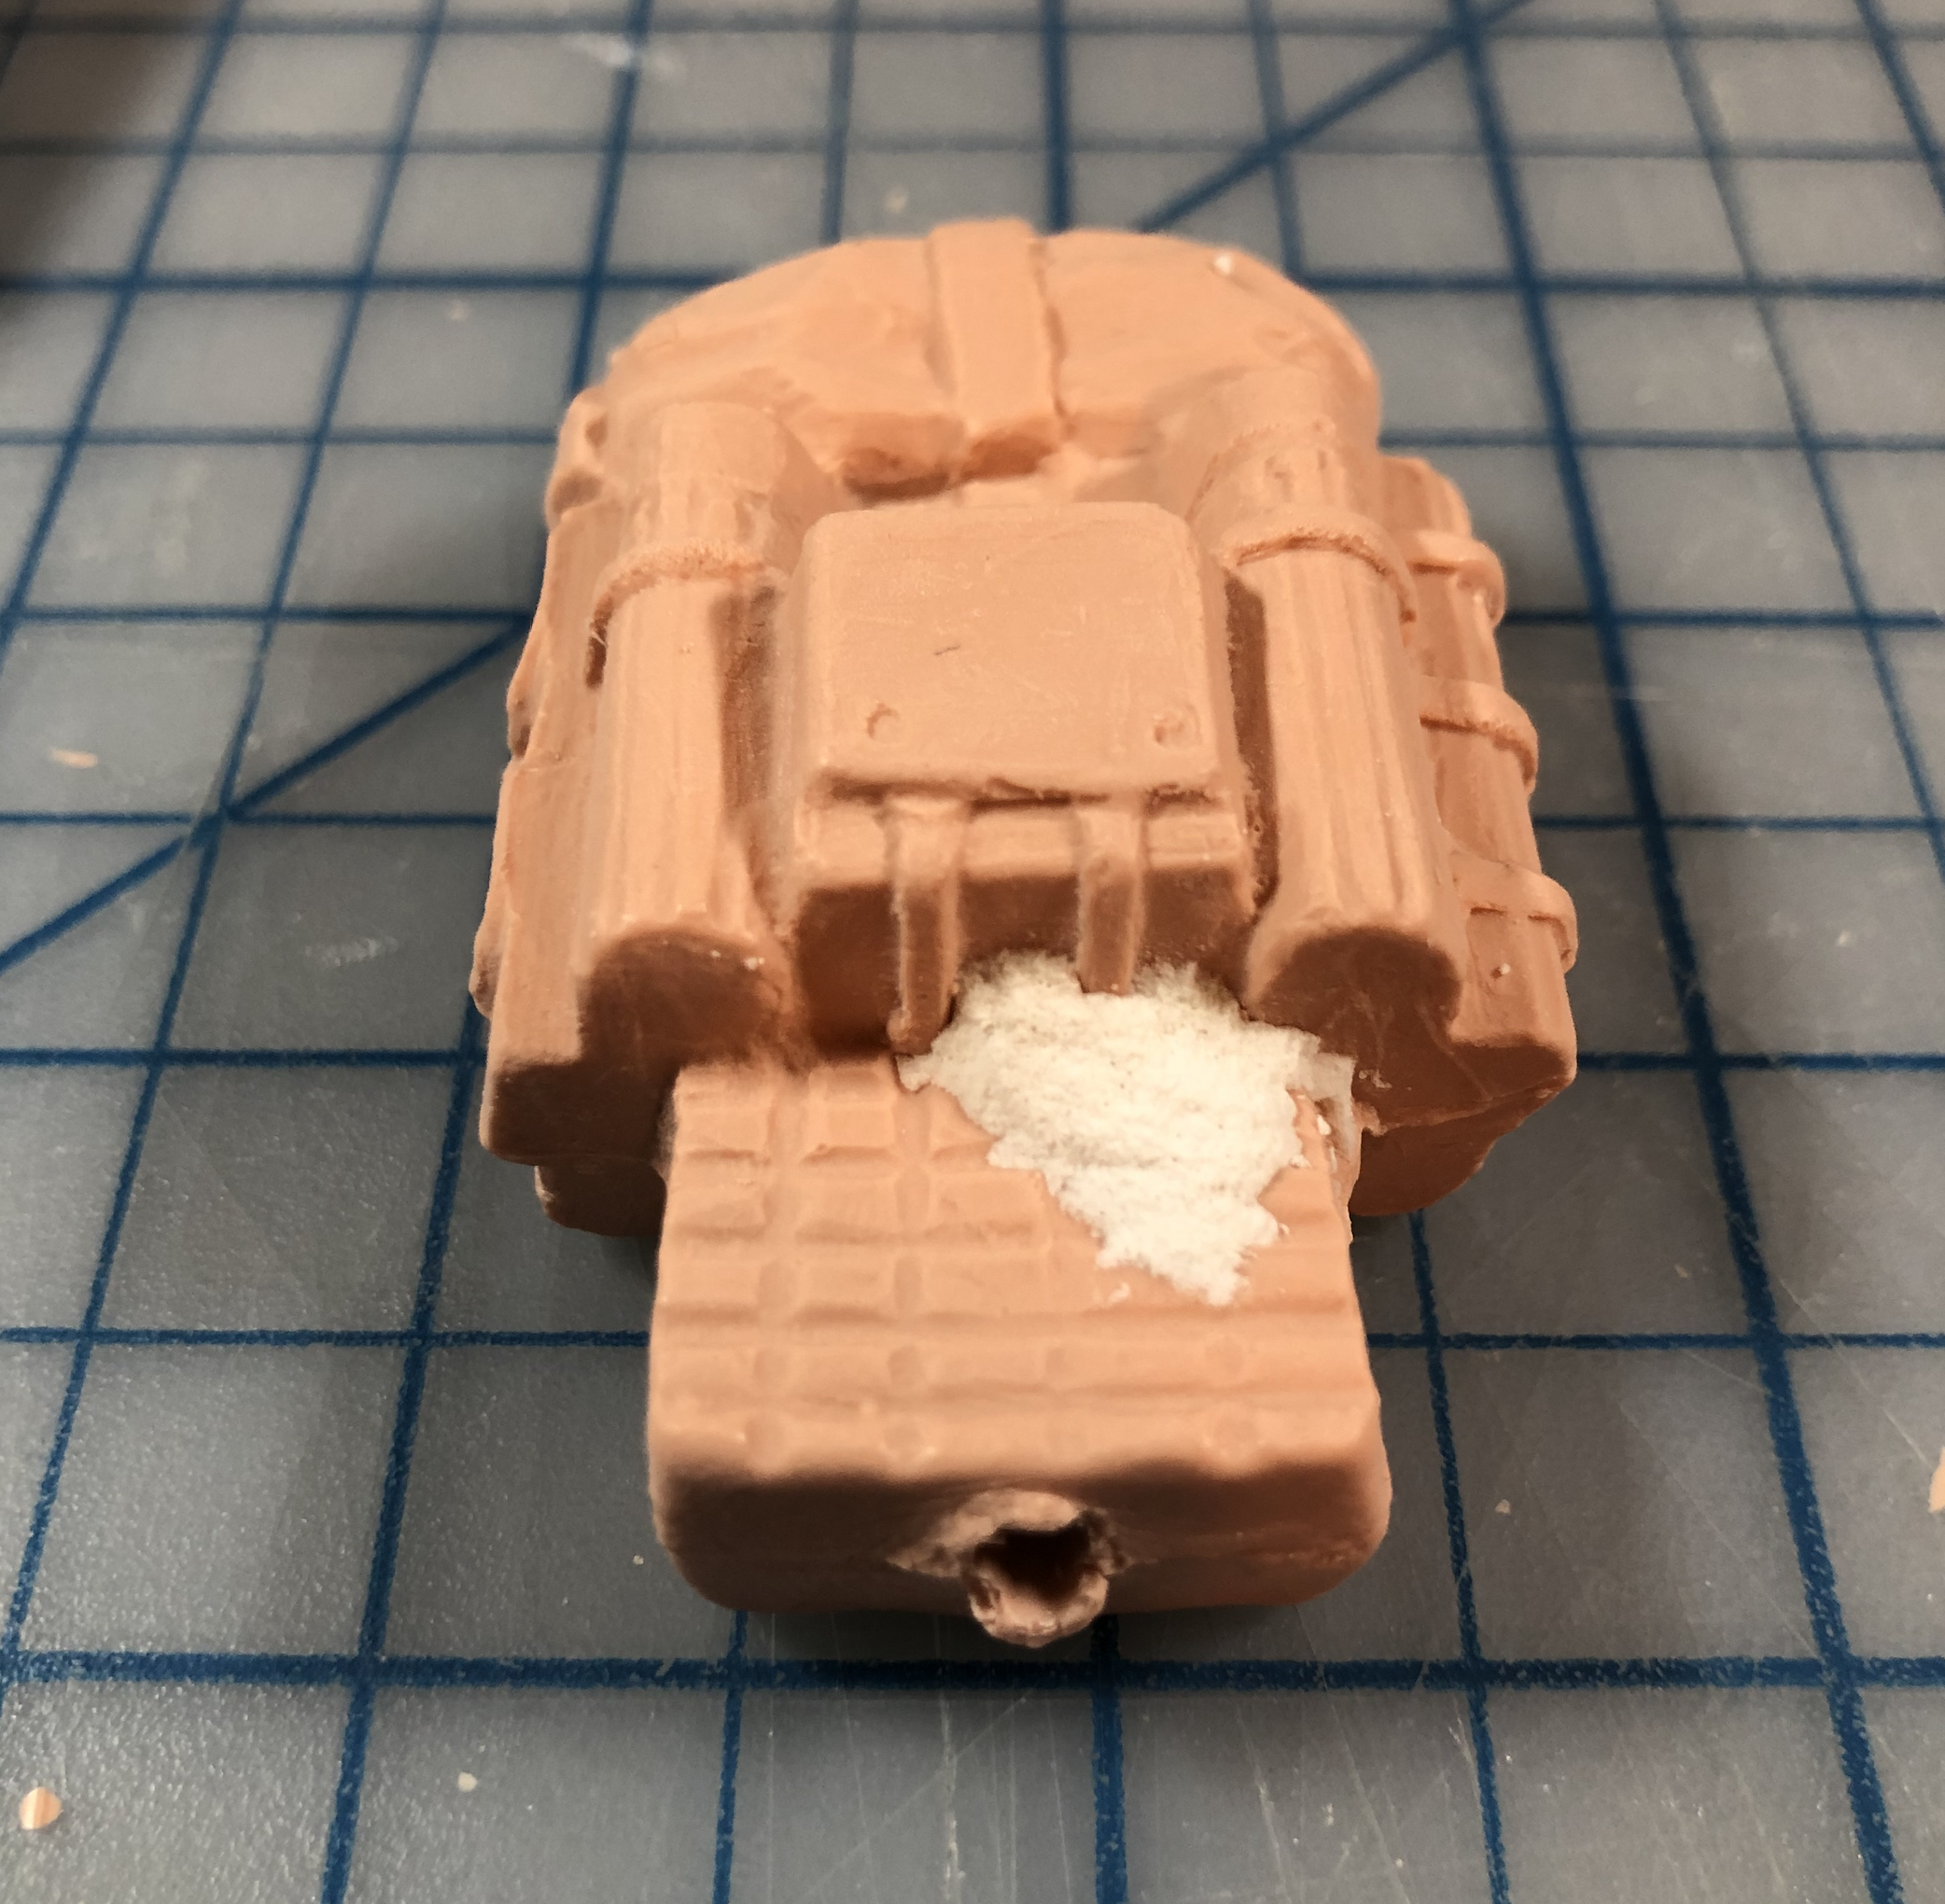
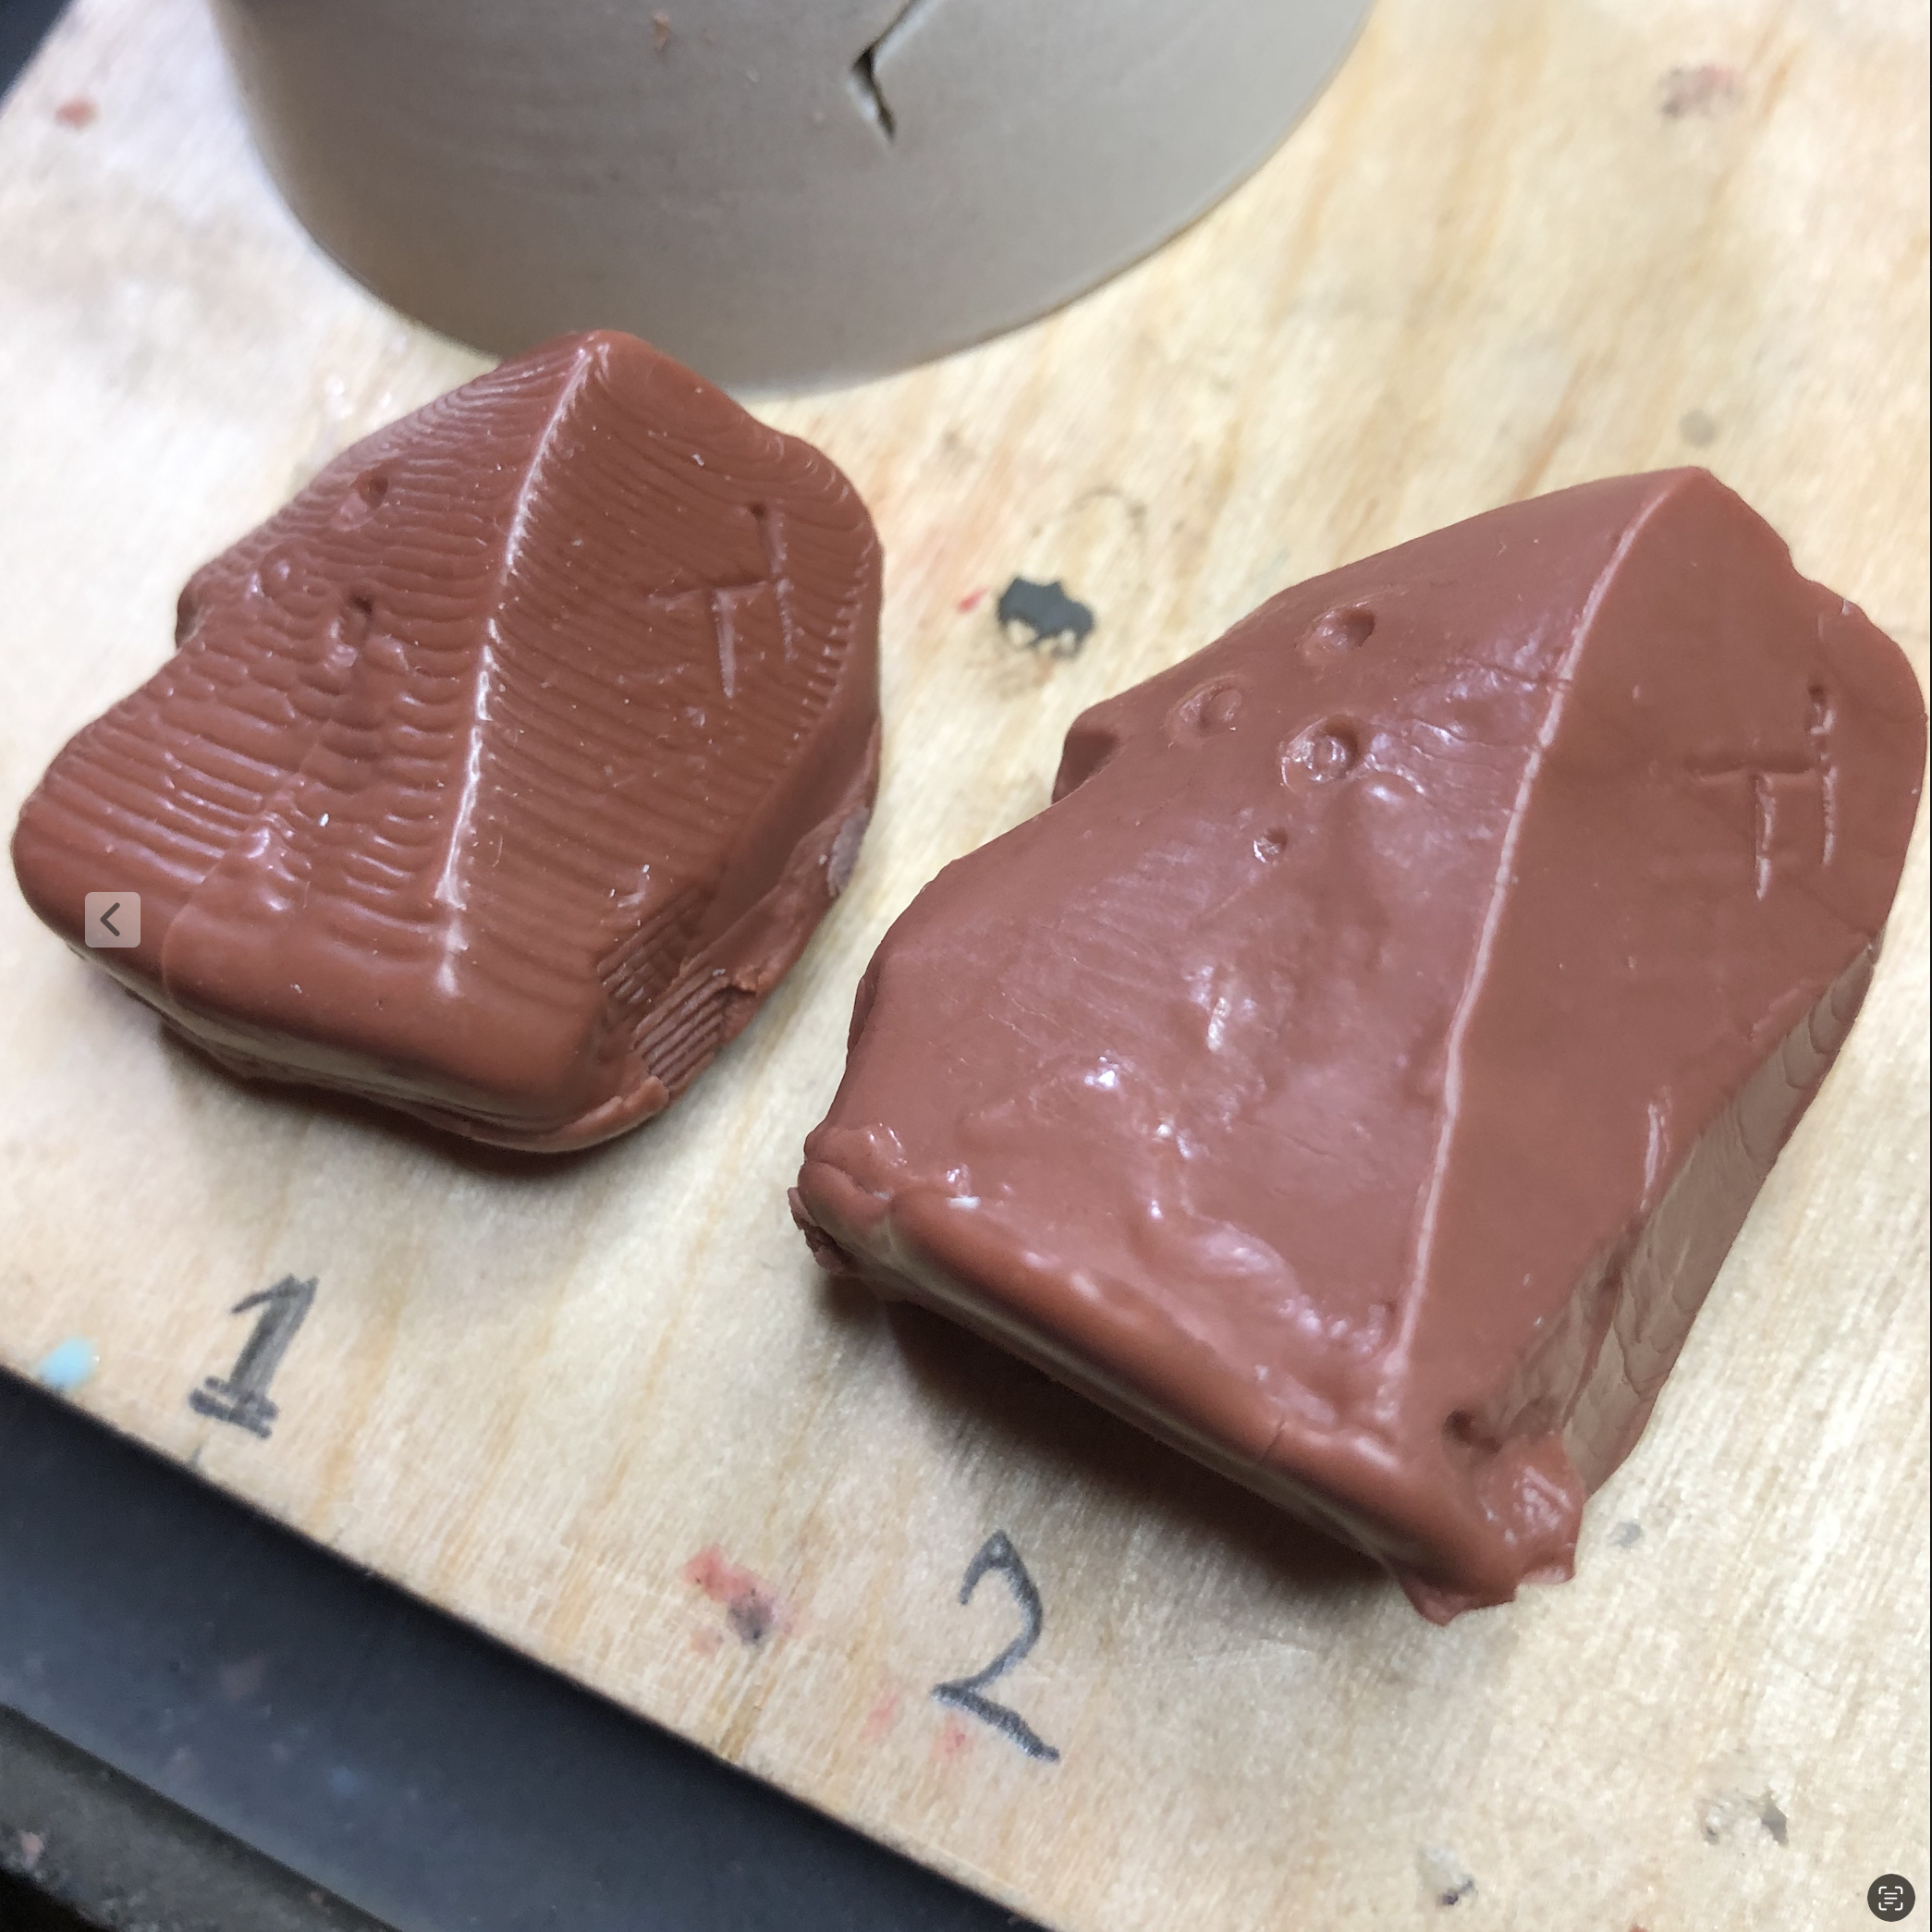
Mold Fragments
In the example on the left you can see a piece of the plaster mold chipped off when extracting the casting. This was the result of inadequate moisture in the plaster. We’ve observed that wax can bond with plaster, however an easier remedy is to soak your plaster molds in cold water and blot dry.
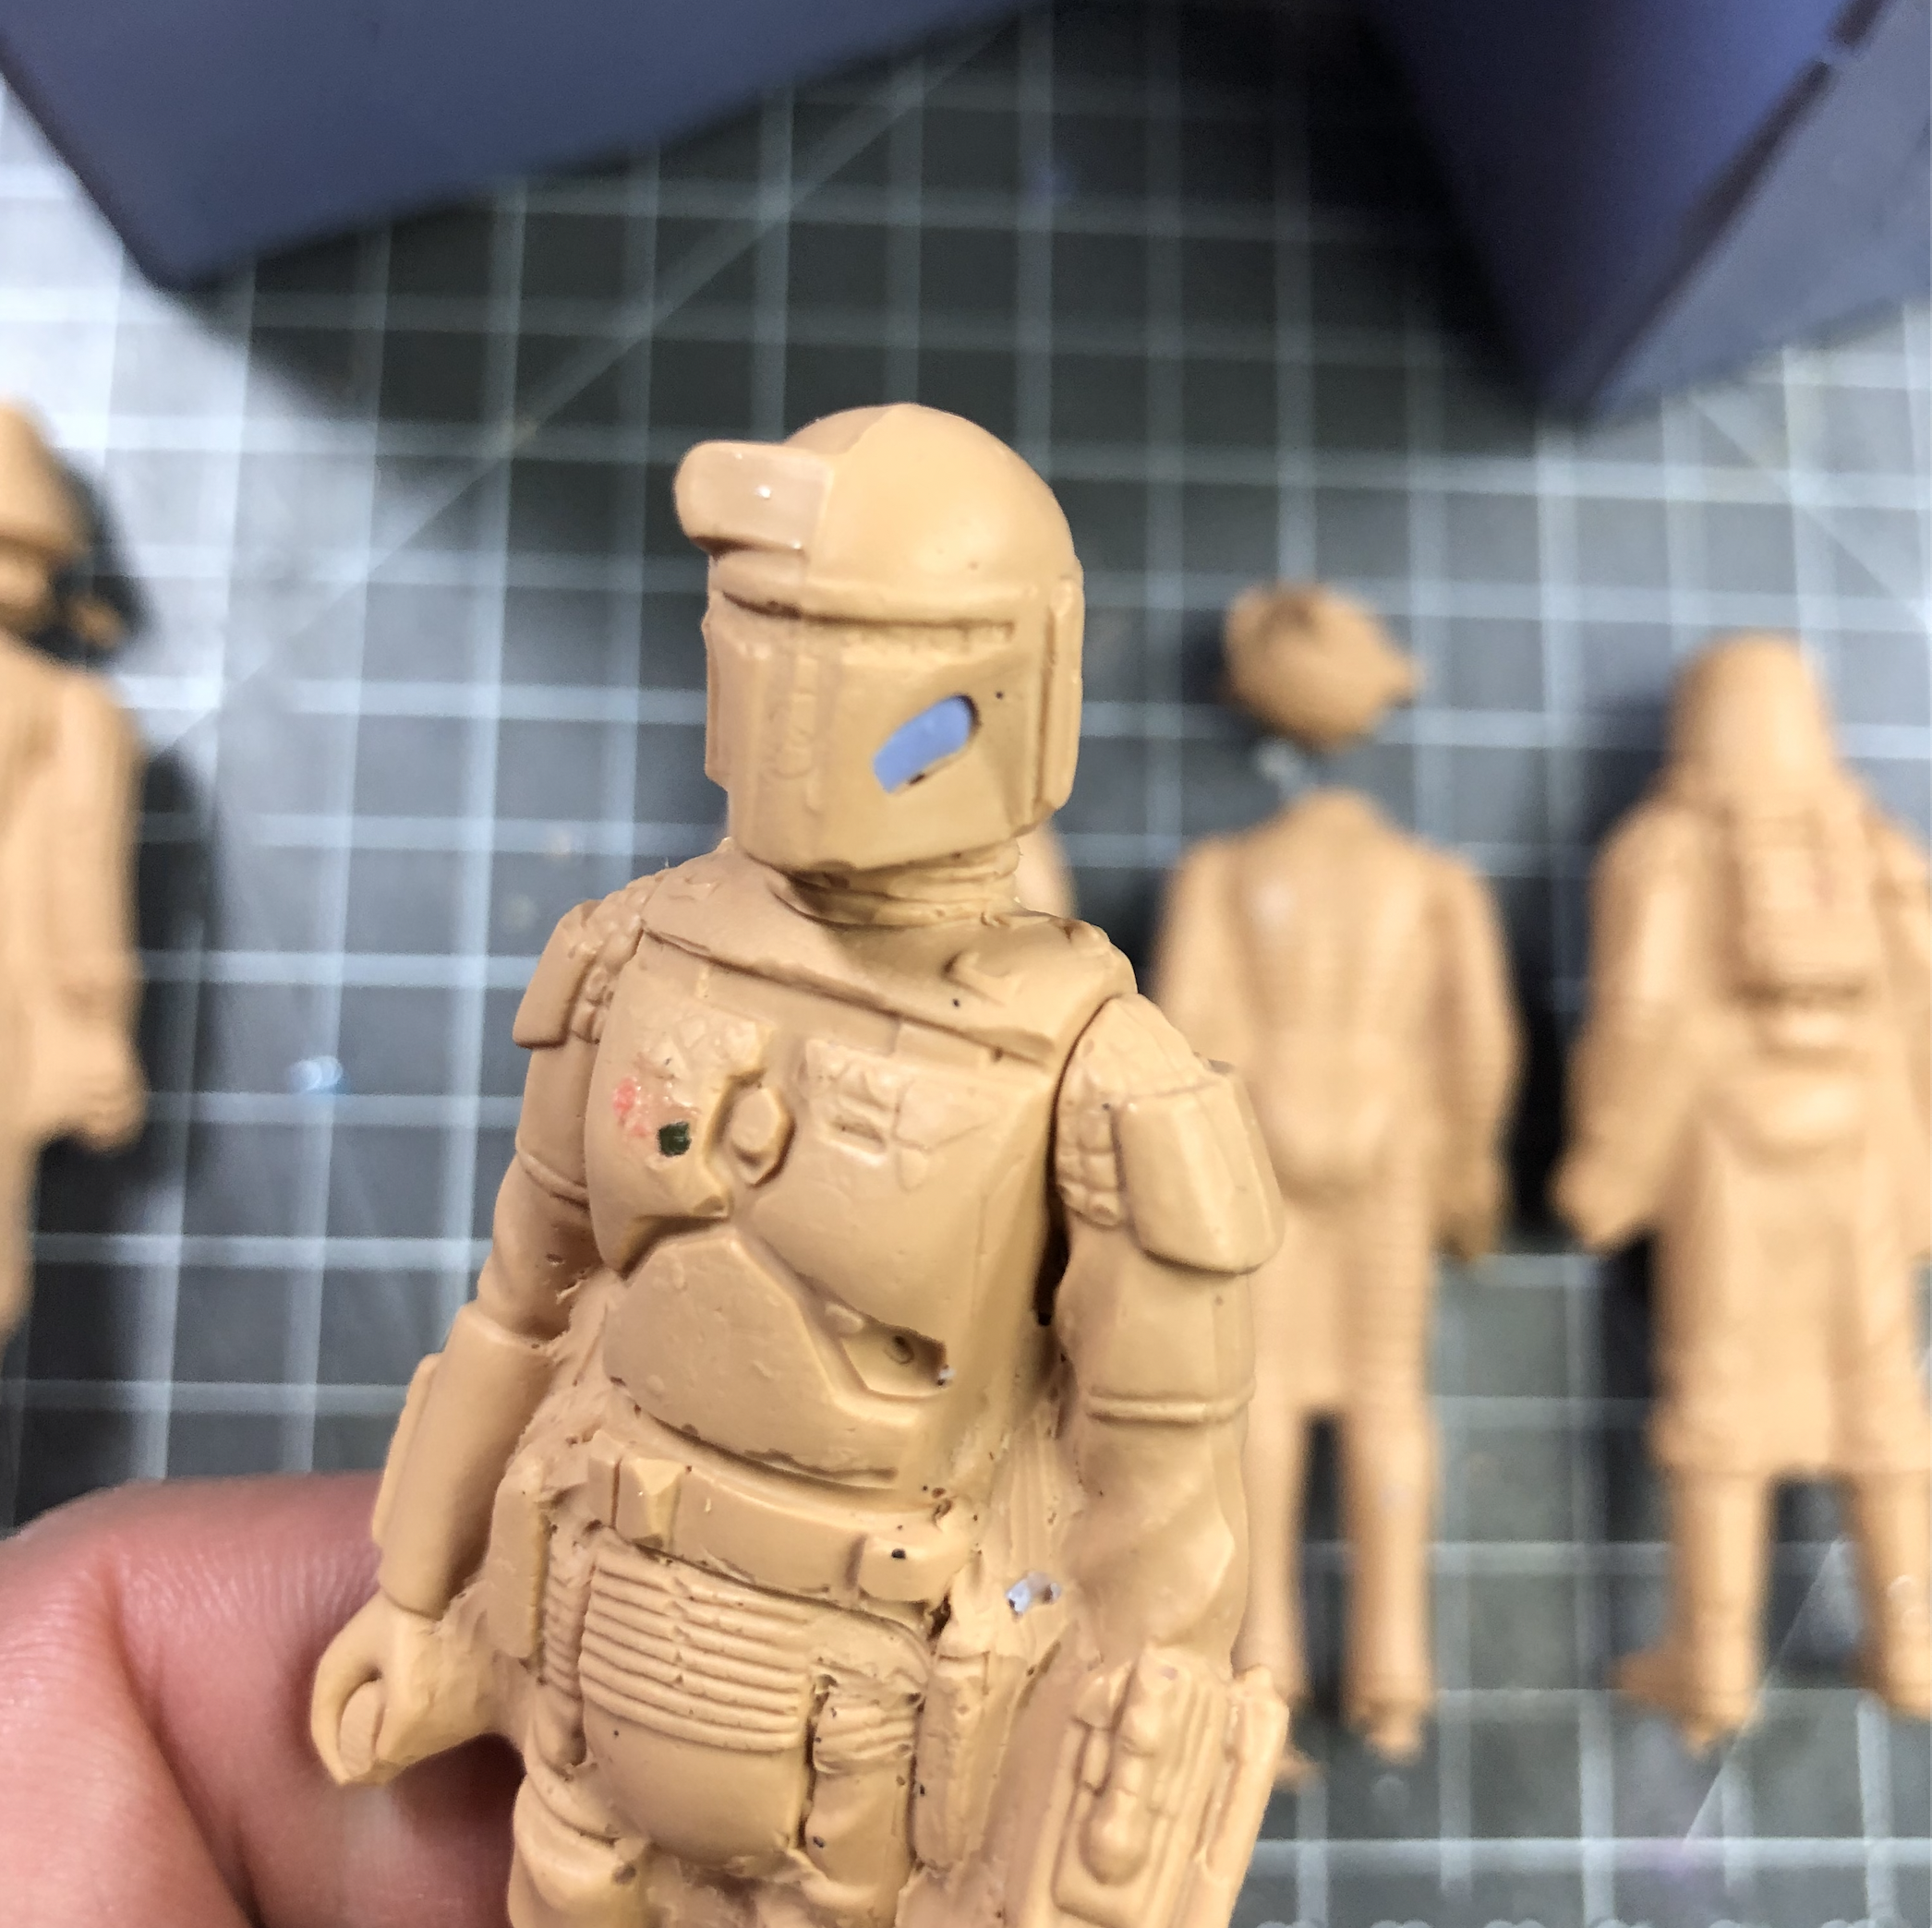
In the example on the right, a chunk of silicone is seen lodged in the casting. This was likely the result of a piece of silicone being torn from the mold during extraction of a previous piece and the remanent remaining in the mold undetected.
In either case, when your mold begins to fail, it’ll be obvious in your castings.