Techniques & Exercises
Here is a selection of exercises to try out different techniques.
Using hot tools to add wax to wax
In order to add wax to wax, you have to heat your metal tools to collect wax and apply it to your model. Aside from building up wax, you can also scribe it on to your model by loading the wax up on a hot blade and drawing out your details.

Blocking Armor
The goal is to rough out the shapes of the armor that will be refined later

Adding Pouches
The goal is to build up enough wax that we can carve it back to the desired shape.
Using wax sticks to quickly build up wax
Wax sticks are great for building up a lot of wax in a short period of time. This is especially useful if you’re starting your sculpt in wax instead of from a wax casting.
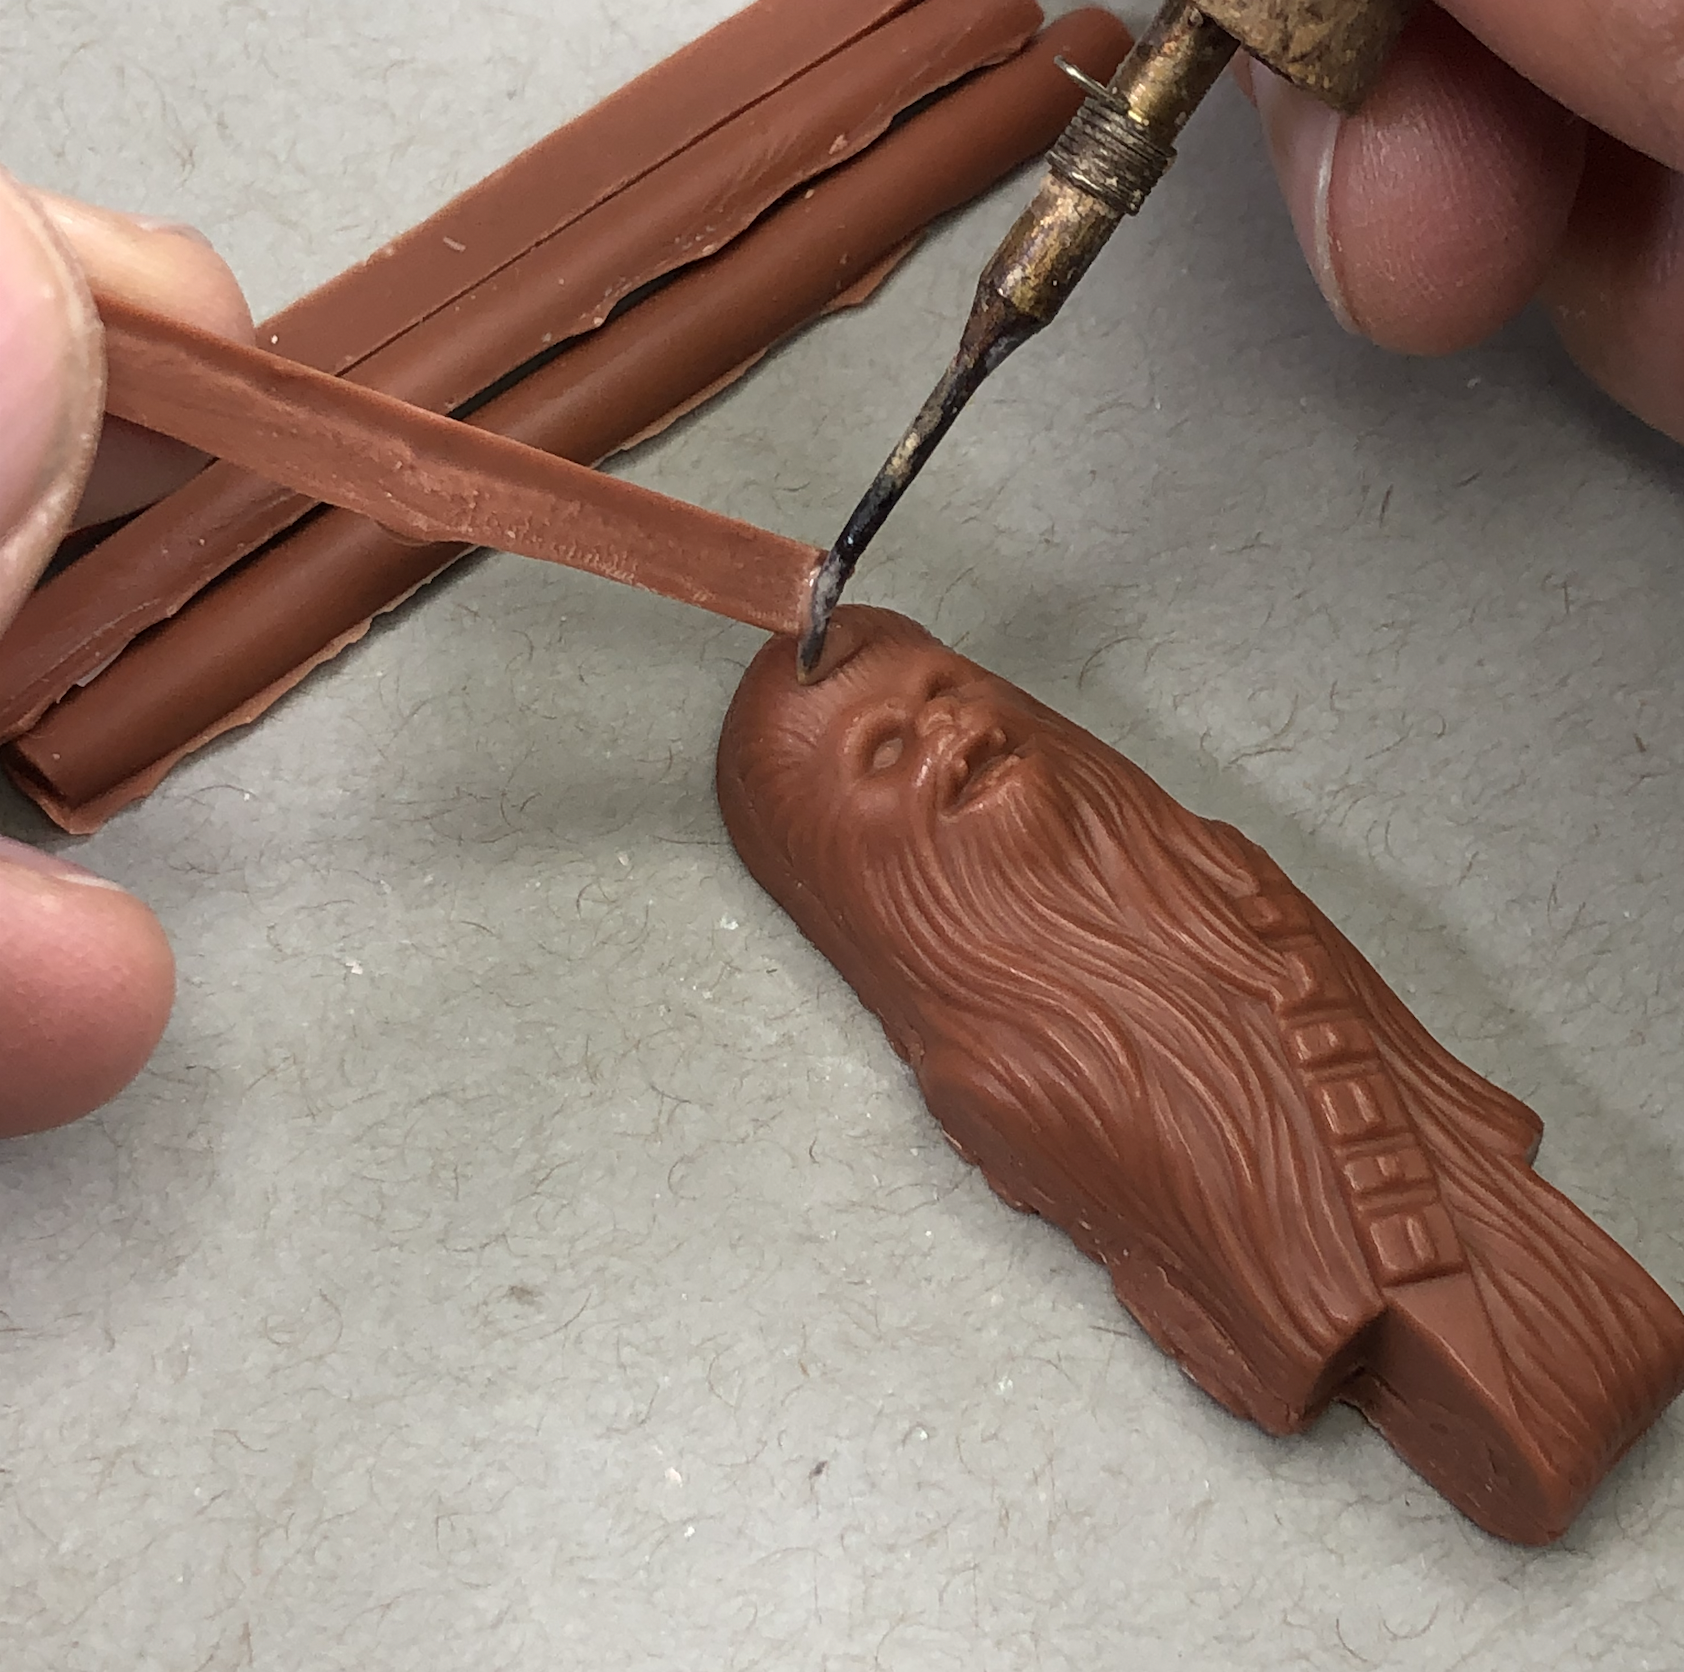
Adding a hat
The goal is to use wax sticks to quickly add flowing clothing.
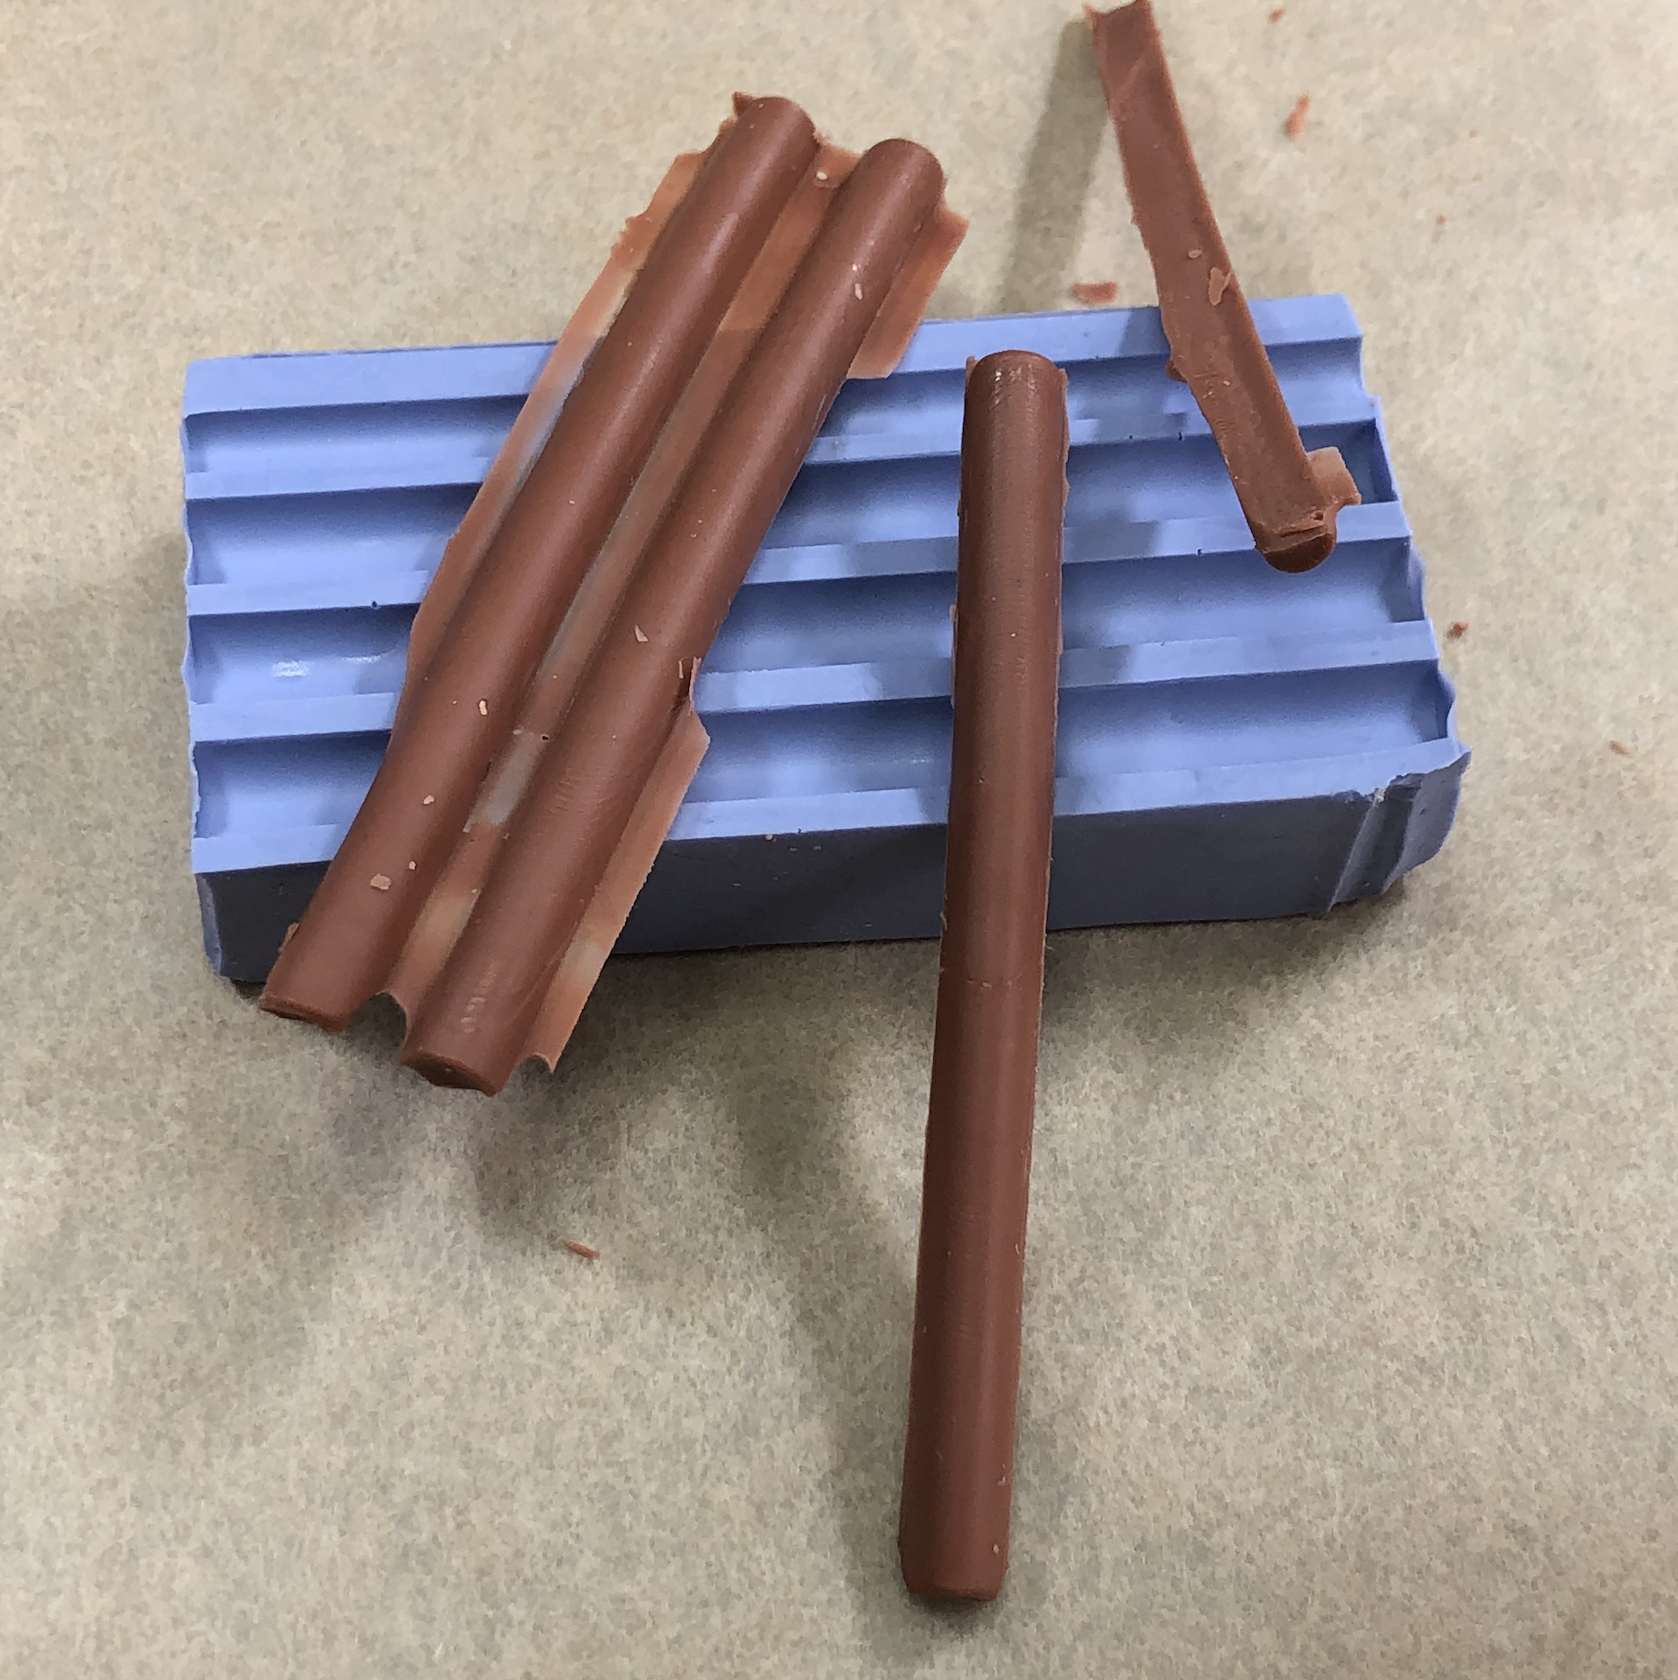
Making a wax stick mold
The goal is to make a reusable mold you can pour wax into.
Cutting wax parts
Cutting parts off of a wax model can be done in lots of different ways. You can use a saw, a rotary tool, a hobby blade or a hot tool. The different techniques will each yield a different result - some with more kerf (the amount removed by the tool) than others.
Hot tools may also cause drips, which can be undesirable. whichever method you choose, just know that you'll be able to fix any damage incurred during the removal process. It just takes a little more wax, a little more time, and a little more patience!

Removing a part of the sculpt
The goal is to remove the bottom of the torso, leaving a flat bottom and clean edge.
Welding wax parts together

Repairing a broken sculpt
The goal is to bond the broken surfaces between two parts by inserting a hot tool between them.
Smoothing out rough textures
You can use a number of items to achieve this goal. Firstly, you’ll want to make sure you smooth out rough bumps, textures and shill lines with a few cold tools. I like to start with a very light scrape with a dull hobby blade or other flat bladed tool, then move to a spoon type tool, careful not to let any edges catch on the model- smoothing it out further.
You may also want to use the alcohol torch to slightly heat the wax at this stage (you can squeeze a plastic bottle to make a flamethrower).
Sculpting wax can also be sanded and buffed, so an alternative method is using sandpaper (wax will clog the paper, so be aware) in successive grits until you get it smooth enough for your liking.
Polishing wax
The final step is a good buffing with a fine cloth to get it to shine. I use a lens cloth I got at the dollar store.
Former toy designer and YouTuber Robert Tolone suggests lemon oil (furniture polish) and fine steel wool. Others have used Goo Gone (citrus oil) and a white Scotchbrite pad to the same effect.
The makers of Azbro Wax recommend that you use water as your last polish to get the haze off from other solvents.
A tooth sculptor who goes by “The Tooth Doctor” recommends applying soap to a wet nylon cloth or even wet cotton balls to achieve a high polish.
Free Sculpt!
Now’s your chance to put them all together.

Custom helmet design
The goal is to use different techniques to customize the helmet.
Creating wax parts from scratch

Custom Figure Stand
The goal is to design, form, cast, and sculpt a custom stand for your figures.